Where Good Intentions Go to Die
Every woodworker remembers their first finishing disaster. You spent hours sanding, staining, brushing — maybe even whispering a prayer over the grain. And then, when the finish dried, your “future heirloom” looked like it belonged in a garage sale marked FREE.
Wood finishing is an art, but it’s also science — part chemistry, part patience, part knowing when to leave the brush alone. Bob Flexner has spent decades breaking down finishing myths, and his troubleshooting advice reads like a survival manual for frustrated woodworkers.
Here are the 10 most common finishing mistakes — and how to fix them before your project becomes firewood.
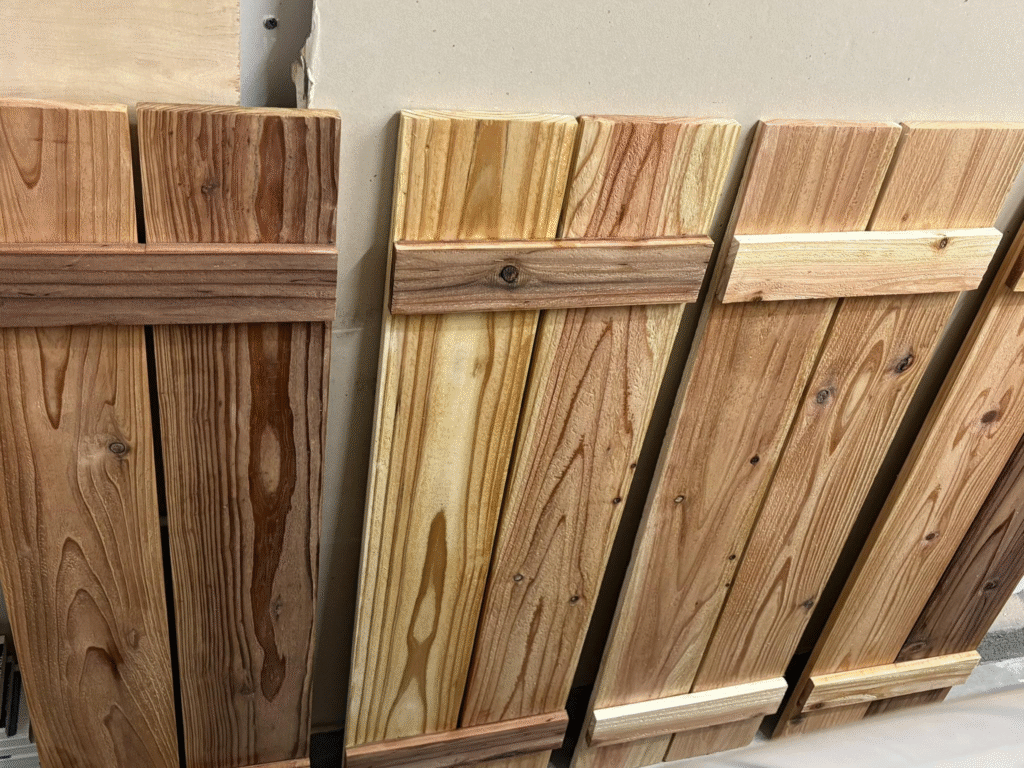
1. Blotching After Staining
You applied a stain expecting a smooth, even tone… and instead, the wood looks like a leopard. Welcome to blotching, especially on tricky woods like maple, cherry, and birch.
Why It Happens:
Blotching occurs when stain soaks unevenly into areas of varying density. Softer patches absorb more pigment, leaving dark, splotchy spots.
Flexner’s Fix:
- Pre-Stain Conditioner: Seal the surface with a washcoat of dewaxed shellac or a pre-stain conditioner before staining.
- Gel Stains: Use thicker gel stains that sit on top rather than soaking unevenly.
- Dye Instead of Pigment: Dyes penetrate more uniformly and can reduce blotching entirely.
2. Streaky or Uneven Color
You expected rich, consistent tones but ended up with visible brush marks and lap lines.
Why It Happens:
Uneven application — especially with fast-drying water-based stains and finishes — causes overlapping marks where edges start drying before you blend them.
Flexner’s Fix:
- Work Fast, Work Wet: Always maintain a “wet edge” by working in manageable sections.
- Pre-Tint Your Finish: Mixing a little dye directly into the finish evens out the overall tone.
- Wipe Excess Promptly: If using oil or gel stains, wipe thoroughly before the solvents flash off.
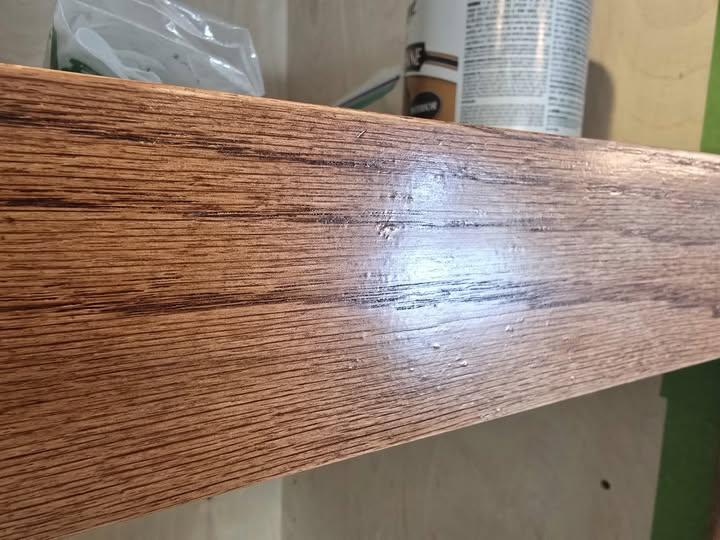
3. Raised Grain After Applying Water-Based Finishes
You sanded beautifully, applied your first coat of water-based finish… and suddenly, the surface feels like 80-grit sandpaper.
Why It Happens:
Water in the finish swells tiny wood fibers, making them stand up and roughen the surface.
Flexner’s Fix:
- Pre-Raise the Grain: Wipe the bare wood with a damp cloth before finishing, let it dry, then sand lightly with fine grit.
- Sand Between Coats: Knock down raised fibers with 320–400 grit sandpaper after the first coat.
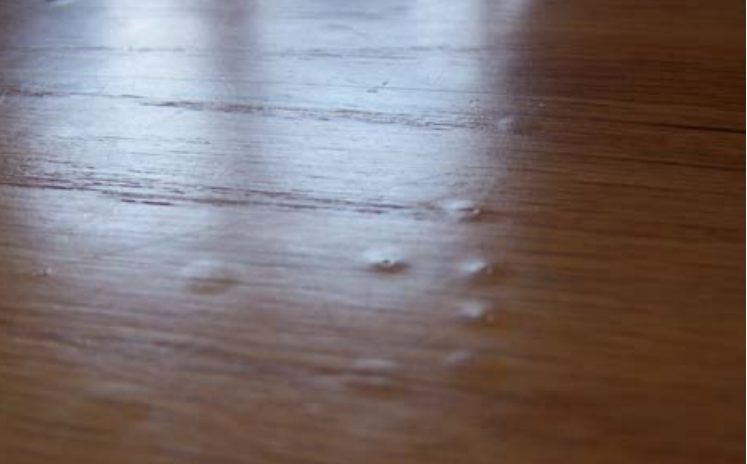
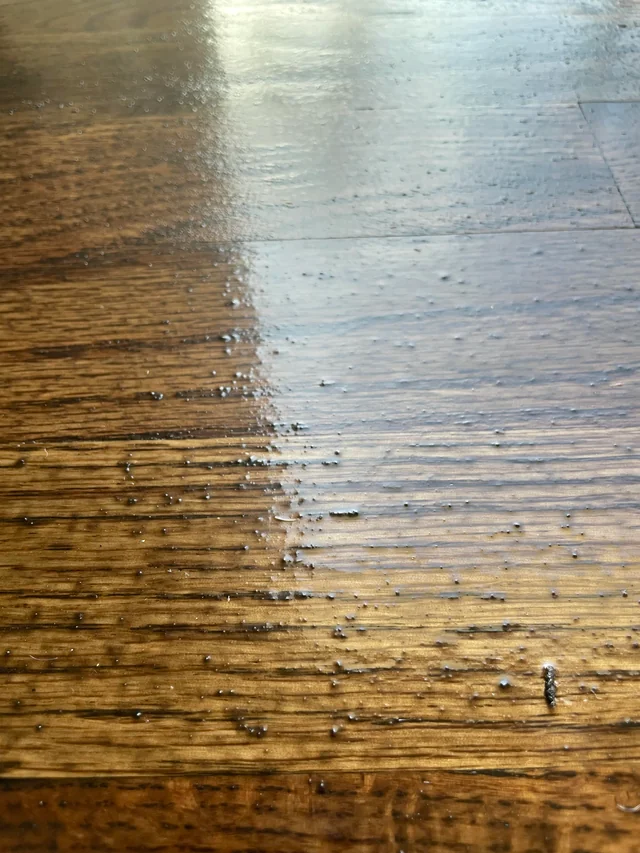
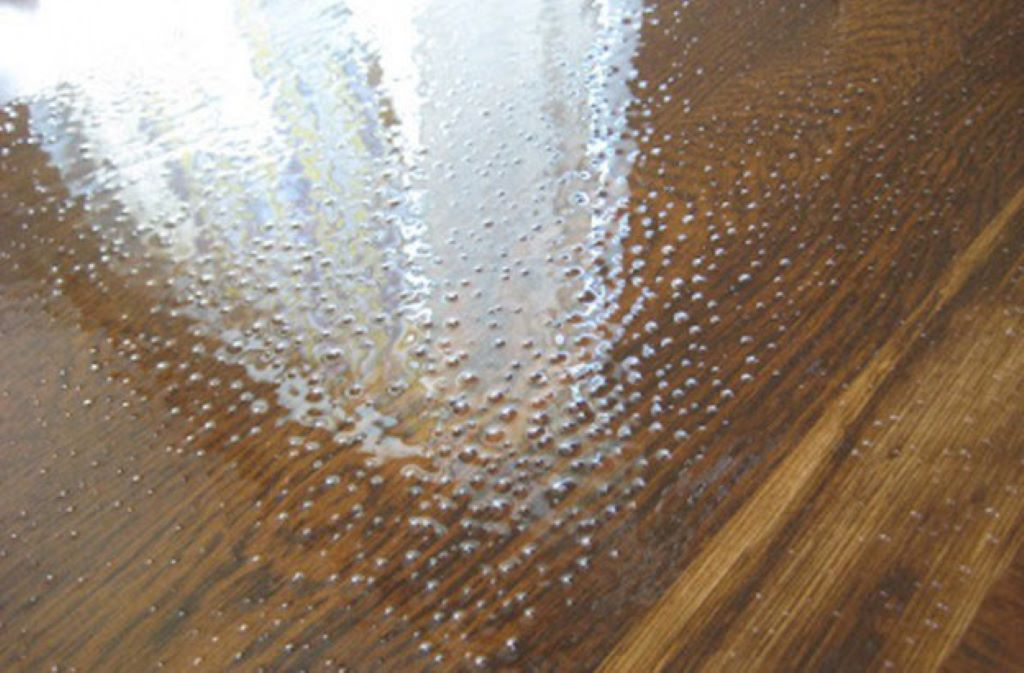
4. Bubbles in the Finish
Tiny, infuriating bubbles litter the surface, drying into permanent dimples.
Why It Happens:
- Shaking the can like a cocktail shaker.
- Using foam brushes that trap air.
- Applying coats too aggressively or too thick.
Flexner’s Fix:
- Stir, Don’t Shake: Gently stir your finish; never whip air into it.
- Ditch Foam Brushes: Use high-quality synthetic bristle brushes for water-based finishes.
- Thin Slightly: Adding up to 10% water gives the finish more time to level before drying.
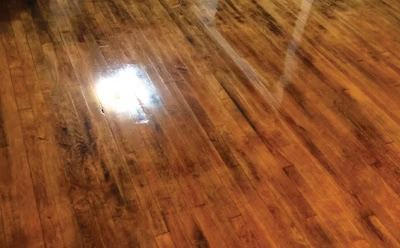
5. White Rings and Blushing
Your gorgeous tabletop now has ghostly white rings where sweaty glasses once sat, or the entire surface has a milky haze.
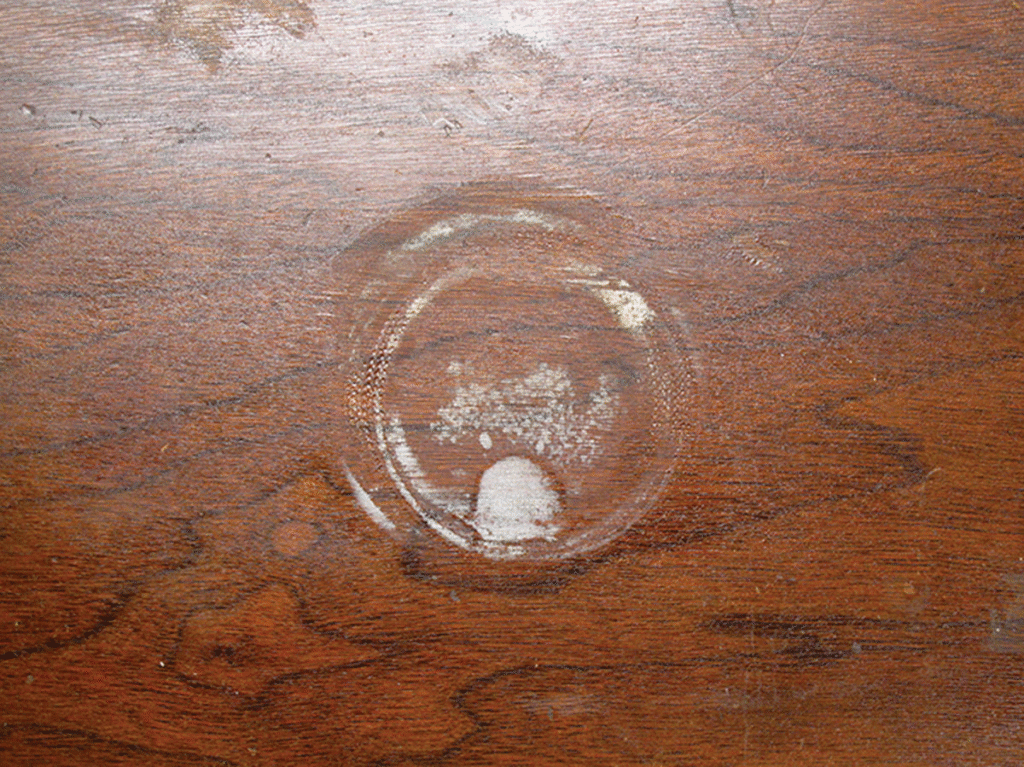
Why It Happens:
Moisture gets trapped inside finishes like shellac or lacquer.
Flexner’s Fix:
- Gentle Heat: Use a low-temperature iron over a cotton cloth to release moisture.
- Recoat with Solvent: For lacquer, mist a light coat of solvent or retarder to reflow the surface.
- Preventive Coats: For humid environments, choose finishes less prone to blushing, like polyurethane.
6. Dust Nibs Everywhere
You applied the final coat, stepped back, and… it feels like sandpaper. Welcome to dust nibs, the tiny particles from your shop floating directly into your masterpiece.
Why It Happens:
Finishing in a dusty environment without controlling airflow or cleaning between coats.
Flexner’s Fix:
- Clean Between Coats: Use a vacuum, tack cloth, and compressed air.
- Wet the Floor: Lightly mist the floor with water before finishing to keep dust settled.
- Polish Them Out: Once cured, rub the finish with synthetic pads or polishing compounds to smooth imperfections.
7. Wrinkling and Alligatoring
The finish cures unevenly, pulling into ripples and cracks that resemble reptile skin.
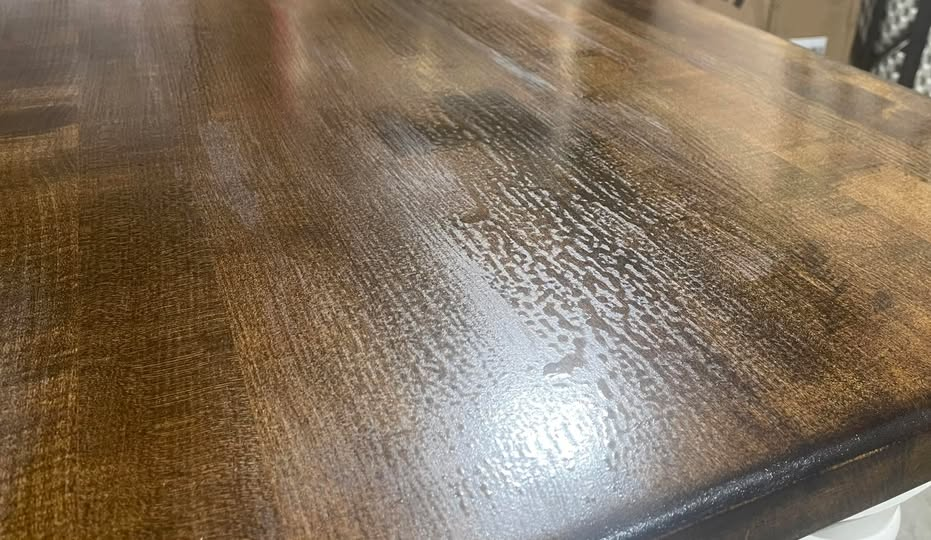
Why It Happens:
- Applying coats too thick.
- Coating before the previous layer has cured.
- Using incompatible finishes without proper prep.
Flexner’s Fix:
- Thin and Light: Apply multiple thin coats rather than one heavy layer.
- Wait It Out: Follow manufacturer curing times religiously.
- Strip if Necessary: Severe wrinkling often requires sanding back to bare wood and restarting.
8. Soft, Sticky Surfaces
Days — even weeks — after finishing, the surface still feels tacky.
Why It Happens:
- Applying oil-based finishes in high humidity or cold temperatures.
- Using old or contaminated products.
- Trapped solvents from overly heavy coats.
Flexner’s Fix:
- Add Heat and Airflow: Speed up solvent evaporation by warming the room and improving ventilation.
- Test Product Freshness: Always check shelf life; some finishes degrade in storage.
- Switch to Water-Based: Faster curing, fewer solvent traps, less stickiness overall.
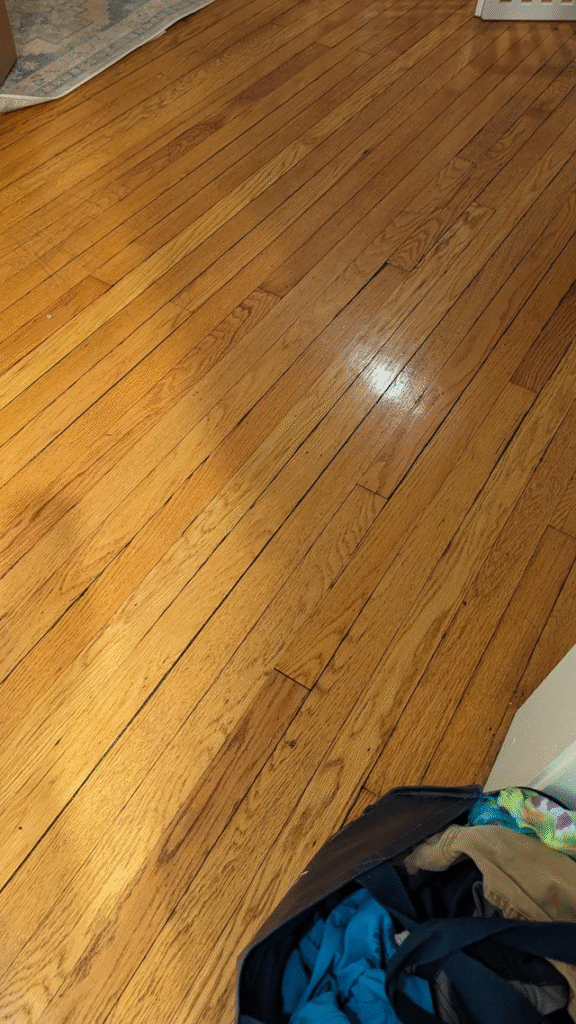
9. Uneven Sheen or Gloss Levels
Some areas are glossy mirrors; others are matte deserts.
Why It Happens:
- Inconsistent sanding between coats.
- Uneven application or poor mixing.
- Using incompatible products with different sheen levels.
Flexner’s Fix:
- Stir Thoroughly: Flattening agents settle at the bottom of cans; always mix well.
- Rub Out the Final Coat: Use abrasive pads, fine sandpaper, or compounds to unify sheen.
- Pick a Topcoat Sheen: Always apply the same sheen on the final layer to control consistency.
10. Finish Peeling or Flaking
Weeks later, your “bulletproof” finish starts peeling like bad sunburn.
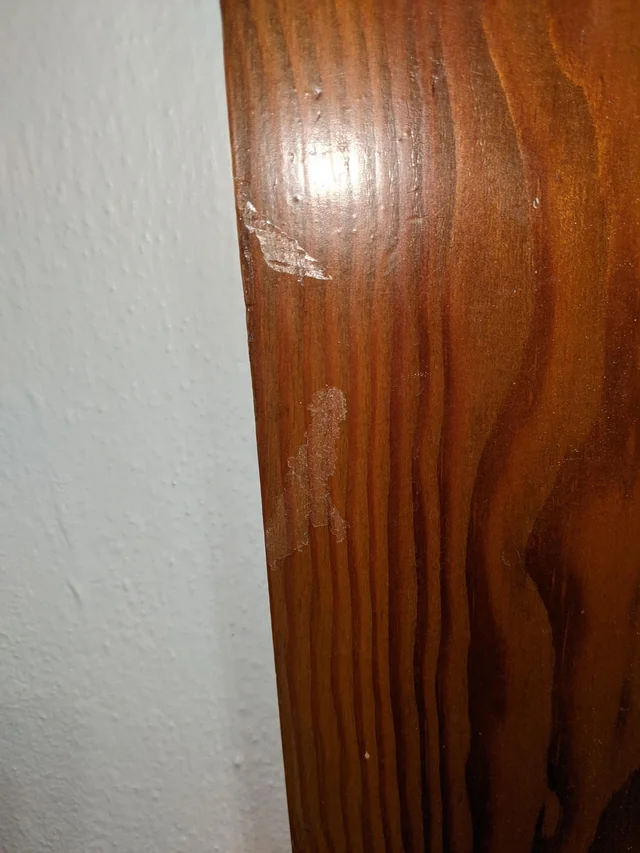
Why It Happens:
Poor adhesion — usually from finishing over contaminated surfaces, old wax, or incompatible sealers.
Flexner’s Fix:
- Surface Prep Is Everything: Clean bare wood with mineral spirits or alcohol before finishing.
- Stick to Compatible Systems: Water-based finishes over oil-based stains need an intermediate sealer (like dewaxed shellac).
- Test on Scraps: Always test the full finishing schedule on scrap wood first.
Next Read Recommendations
- Wood Finishing Basics for Beginners: A Step-by-Step Guide
Learn the fundamentals of sanding, sealing, and finishing wood properly so you can avoid common mistakes before they happen. - 15 Easy Ways to Soften Wood for Carving
Discover techniques to make wood more workable and prevent uneven finishes when carving or shaping. - Master the Art: 10 Easy Chip Carving Ideas for Beginners
Once you’ve mastered finishing techniques, try your hand at creative chip carving projects perfect for beginners.
Final Thoughts: Patience Is the Real Finish
Flexner says it best: “Finishing problems aren’t caused by products. They’re caused by impatience.”
Every blotch, bubble, and blush is a lesson in preparation, chemistry, and timing. Slow down. Sand better. Work cleaner. The difference between a garage-sale reject and an heirloom isn’t luck — it’s understanding how wood, finishes, and time conspire against you.
Mastering these fixes means fewer disasters, smoother coats, and furniture that tells a story without apologizing for its flaws.