If you have thick hair, you know the struggle all too well: volume that turns into puffiness, weight that flattens your roots, and styling sessions that feel like an arm workout. Enter the undercut pixie—a game-changing hybrid that combines the chic shortness of a pixie with the hidden relief of an undercut. By shaving or closely cropping the nape and/or sides, you remove excess bulk while keeping length on top for versatility. The result? A cooler, lighter, more textured style that stays sharp for weeks. Whether you want soft and romantic or fiercely geometric, these 10 undercut pixie ideas will help you embrace your density instead of fighting it.
Who Is the Undercut Pixie For? (And Who Should Skip It)
This style works beautifully for thick hair, but it’s not for everyone. Here’s a quick checklist.
You’ll love an undercut pixie if:
- You struggle with heavy, hot, or bulky hair, especially in summer
- You want a wash-and-go style that still looks intentional
- You’re open to regular trims (every 4–6 weeks) to maintain the undercut
- You like texture, volume on top, and a clean neckline
You may want to reconsider if:
- You prefer long hair you can pull back into a ponytail
- You have very fine hair (the undercut can make it look thinner)
- You’re not ready for the maintenance of shaved areas growing out
- Your workplace or culture has strict expectations around very short female hairstyles
Pro tip: If you’re unsure, try a nape-only undercut first. It’s hidden when hair is down and gives you a taste of the weight reduction.
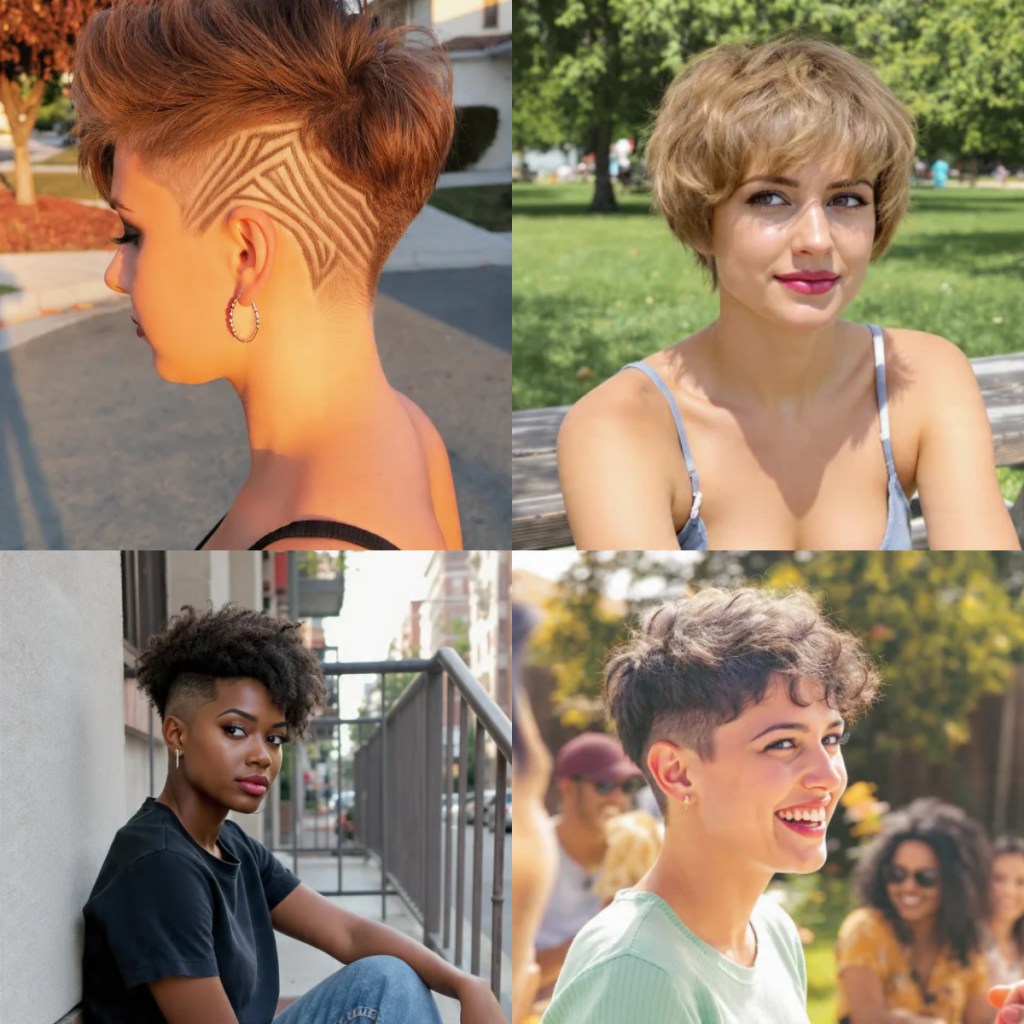
10 Undercut Pixie Ideas for Thick Hair:
1. The Classic Nape Undercut Pixie
- What it is: Hair is cut into a traditional pixie, but the nape area is buzzed (usually #2 or #3 blade).
- Why for thick hair: Removes the heaviest bulk where hair is densest.
- Styling tip: Keep top length at 2–3 inches; sweep forward with a light mousse.
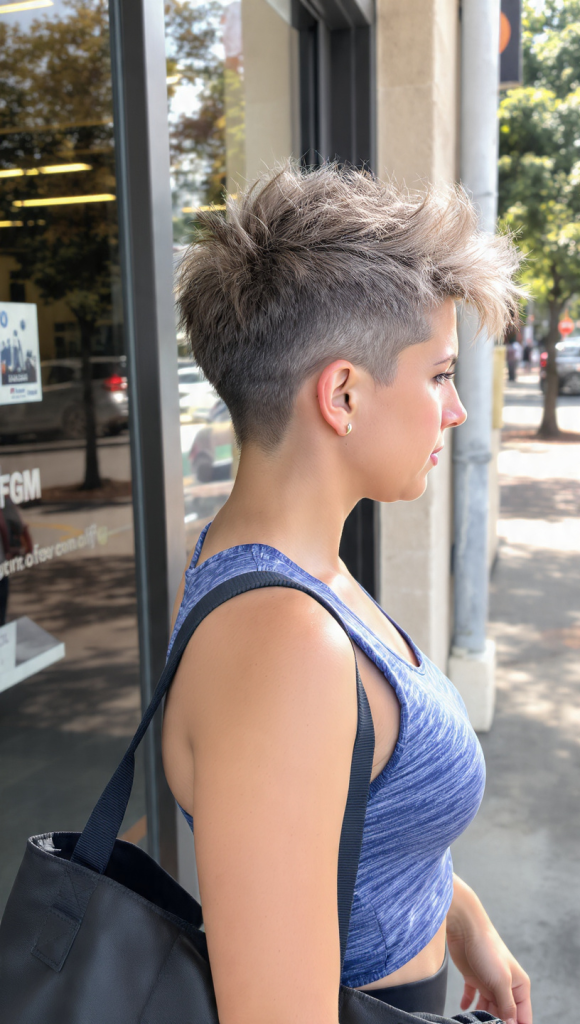
2. The Disconnected Undercut Pixie
- What it is: A sharp contrast—sides and back are buzzed very short (even skin fade), while top remains long and textured.
- Why for thick hair: Eliminates side bulk that causes “triangle head.”
- Styling tip: Use a matte paste to piece out the top for an edgy, modern look.
3. The Curly-Top Undercut Pixie

- What it is: Undercut on sides and nape; top kept longer to showcase natural curls or waves.
- Why for thick hair: Curls are prone to frizz and weight; undercut removes bulk so curls spring up without pulling flat.
- Styling tip: Apply curl cream to wet hair and diffuser-dry upside down.
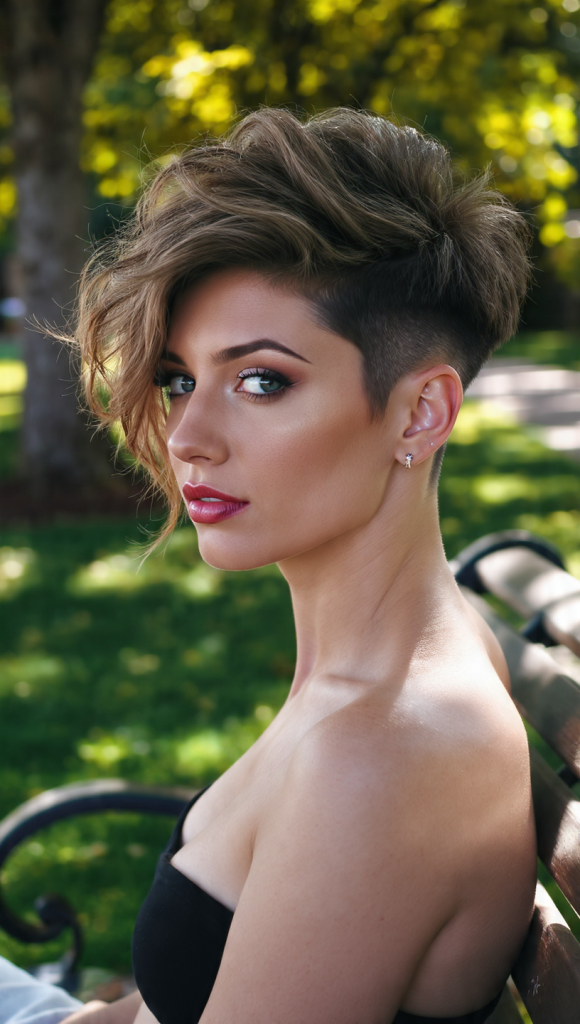
4. The Asymmetrical Undercut Pixie

- What it is: One side is deeply undercut (or shaved with a design); the other side has length that dips toward the eye.
- Why for thick hair: Asymmetry distorts the natural density, making thick hair appear deliberately dramatic.
- Styling tip: Flat-iron the longer side straight while keeping the undercut matte.
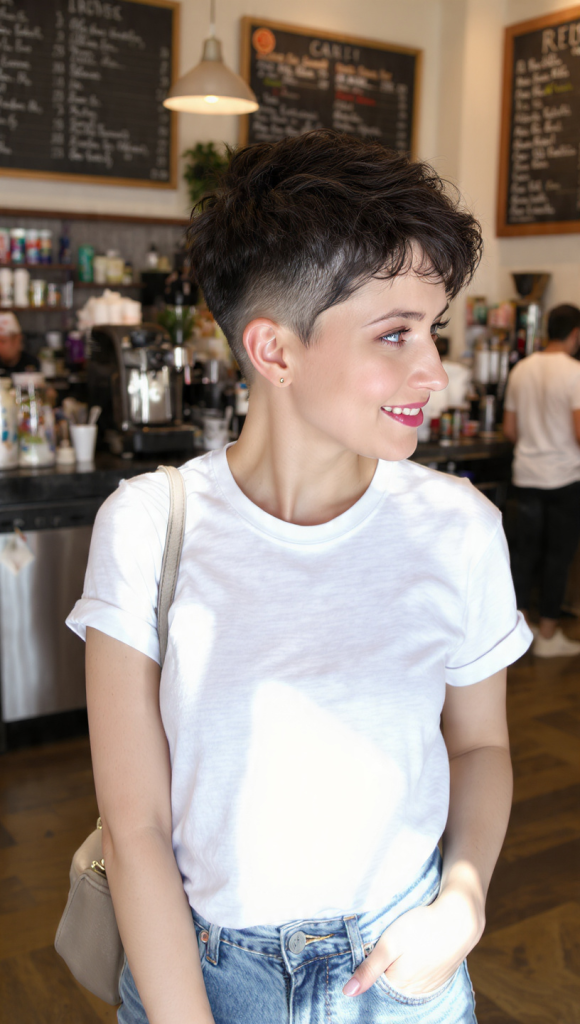
5. The Textured Crop with Hidden Undercut

- What it is: A cropped pixie (1–2 inches all over) with a hidden undercut just at the occipital bone.
- Why for thick hair: Gives lift at the crown without sacrificing a uniform, professional shape.
- Styling tip: Rub sea salt spray between palms and scrunch into dry hair for piece-y texture.
6. The Tapered Fade Undercut Pixie
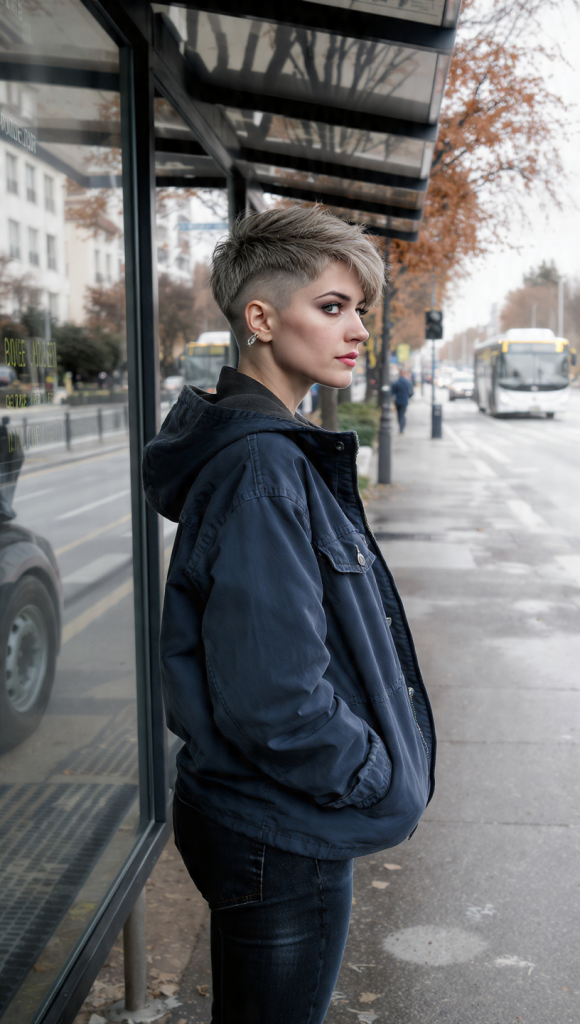
- What it is: Sides fade from very short at the ears (skin fade) to slightly longer near the top ridge.
- Why for thick hair: Gradual fading blends thick top layers seamlessly into the undercut, preventing a “helmet” look.
- Styling tip: Ask your barber for a mid-fade; style top with a light pomade for shine.
7. The Spiky Undercut Pixie
- What it is: Top is cut into short, spike-friendly layers (1–1.5 inches); sides and back are undercut to the skin.
- Why for thick hair: Thick hair holds spikes perfectly without collapsing.
- Styling tip: Use a strong-hold gel or wax; twist small sections upward between fingers.
8. The Long-Bang Undercut Pixie

- What it is: Sides and nape are undercut, but the top front is kept long enough to sweep across the forehead as a full bang.
- Why for thick hair: Brows frame the face while the undercut keeps the back from feeling heavy.
- Styling tip: Blow-dry bangs with a round brush for a soft curve; keep the rest matte.
9. The Carved Design Undercut Pixie
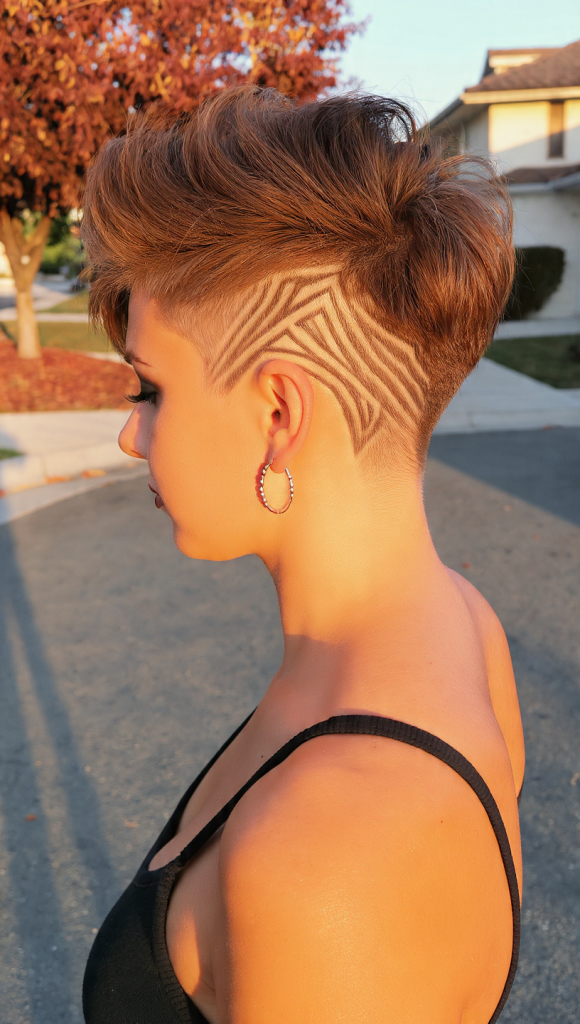
- What it is: The undercut area (usually one side or the nape) features a shaved-in pattern—lines, geometric shapes, or a zigzag.
- Why for thick hair: Dense hair holds crisp design lines better than fine hair.
- Styling tip: Maintain the design with weekly touch-ups; show it off by wearing the top slicked to the opposite side.
10. The Bowl-Meets-Undercut Pixie

- What it is: A rounded, bowl-like silhouette on top (soft and feminine) with an aggressive undercut below the parietal ridge.
- Why for thick hair: The round shape prevents the undercut from looking too harsh, while the undercut stops the round shape from becoming a “mushroom.”
- Styling tip: Use a smoothing serum on the top layer and keep the undercut clean-shaven for contrast.
The Grown-Out Phase: What to Expect and How to Manage It
One concern readers often have: What happens when I want to grow it out? Here’s the honest truth.
Week 1–4: The undercut looks clean and intentional. You’ll love it.
Week 5–8: The buzzed areas become fuzzy. Some people like this “velvet” stage. Others don’t.
Week 9–12: You’ll have a noticeable mullet-like flap if the top is long and the nape is growing out. This is the awkward phase.
How to survive the grow-out:
- Option 1: Keep trimming the top and let the undercut catch up – this means maintaining short hair until it evens out.
- Option 2: Get a transitional cut (like a stacked bob) that blends the lengths.
- Option 3: Use texturizing sprays and clips to hide shorter nape hairs until they reach chin length.
Bottom line: Growing out an undercut pixie takes patience, but it’s very doable with 2–3 strategic haircuts along the way.
Styling Products That Actually Work for Thick Hair + Undercuts
Thick hair needs hold without heaviness. Here’s your starter kit.
| Product Type | Best For | One Good Example (Drugstore) |
|---|---|---|
| Sea salt spray | Texture and grip on top layers | Not Your Mother’s Beach Babe |
| Matte paste | Piece-y, touchable separation | American Crew Defining Paste |
| Light mousse | Volume without crunch | Herbal Essences Body Envy Mousse |
| Curl cream (for curly hair) | Definition without weighing curls down | Cantu Coconut Curling Cream |
| Strong-hold gel (for spikes) | All-day hold | Eco Styler Olive Oil Gel |
What to avoid:
- Heavy oils or butters (they’ll flatten the undercut area and transfer to your collar)
- Shine serums (they make the shaved parts look greasy, not intentional)
- Thick pomades (thick hair plus thick product equals helmet head)
Application tip: Focus product only on the top section. Keep the undercut bare or use only a dry texture spray.
Talking to Your Stylist or Barber: A Script
Don’t walk in saying “give me an undercut pixie.” That’s too vague. Use this script instead.
*”I have thick hair, and I want to remove bulk with an undercut. I’d like to keep [2–3 inches] on top. For the undercut, please buzz the nape and/or sides with a #[2 or 3] blade. I do NOT want a disconnect that looks harsh – blend it slightly at the parietal ridge. Also, show me where my natural cowlicks are before you start cutting.”*
Three questions to ask during the consultation:
- “How high up should the undercut go to avoid looking like a mullet when it grows out?”
- “Will this cut work with my hair’s natural growth pattern?”
- “What’s the shortest length you recommend for my density so I don’t see scalp?”
Red flags: If the stylist says “undercuts are only for edgy people” or tries to talk you into thinning shears instead – find another stylist.
Maintenance Schedule: Keep It Looking Fresh
An undercut is a commitment. Here’s your calendar.
| Frequency | Task |
|---|---|
| Every 4 weeks | Trim the undercut (buzz it back to original length) |
| Every 6–8 weeks | Full pixie reshape (top and overall shape) |
| Every 2–3 days | Quick refresh of top texture with dry shampoo or sea salt spray |
| Daily (optional) | Rub a drop of lightweight oil through the top ends to prevent dryness |
Budget note: If you learn to buzz your own undercut at home (using a hand mirror and clippers with a guard), you can save $30–50 every month. The top should always be done by a pro.
6. Seasonal Considerations: Summer vs. Winter
Summer: The undercut pixie truly shines. You’ll feel the breeze on your neck. Sweat dries instantly. Just add a UV-protectant spray to your part line if you spend hours outside.
Winter: The exposed nape can get cold. Solution? Turtlenecks, silk scarves, or letting the undercut grow out to a #4 guard (still short but warmer). Some readers keep two versions: a tighter undercut for warm months and a looser one for cold months.
Conclusion
The undercut pixie isn’t just a haircut for thick hair – it’s a liberation. You stop fighting your density and start using it as an advantage. Those heavy, hot, uncooperative strands become textured, airy, and sculptural. Whether you choose a soft nape undercut or a bold skin fade with a carved design, the result is the same: less bulk, more confidence.
Yes, there’s maintenance. Yes, the grow-out requires a plan. But for anyone with thick hair who’s ever thought, “I love my volume but I hate the weight” – this is the answer you’ve been looking for.
Book the appointment. Show your stylist one of the 10 ideas above. And enjoy the feeling of running your hand over a fresh undercut on a warm day. There’s nothing else like it.