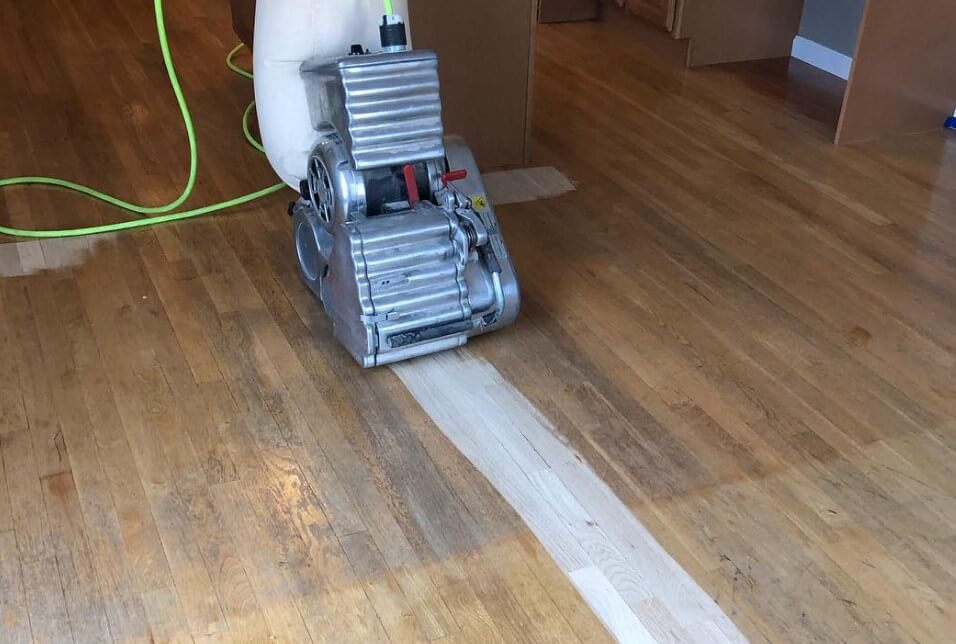
Refinishing hardwood floors can significantly improve the aesthetics and value of your home. It’s a task that might seem daunting at first but is entirely achievable with some patience, the right tools, and a step-by-step approach.
Highlights: What You Need to Know
- Time Commitment: Generally, a weekend to a few days, depending on the size and condition of your floors.
- Best for a Crystal Clear Finish: Waterborne polyurethane offers a clear finish and rapid drying times.
- Easiest to Apply: Water-based finishes are less odorous and easier to clean up, making them ideal for DIY projects.
- Most Durable: Oil-based polyurethane is renowned for its durability and resistance to wear.
- DIY Friendliness: Waterborne finishes are user-friendly, especially for those new to floor refinishing.
Detailed Guide to Refinishing Hardwood Floors

1. Assessment and Preparation: Inspect your floors to understand the extent of wear and damage. Remove furniture, and prepare the area by ensuring it’s free from dust and debris.
2. Sanding: Rent or purchase a drum sander and an edging sander. Begin with coarse-grit sandpaper to remove the old finish and gradually move to finer grits. This step is crucial as it preps the wood for the new finish, ensuring it adheres well and looks smooth.
3. Cleaning: Thoroughly clean the floors after sanding to remove all dust. This step is vital to prevent any particles from getting trapped under the finish, which could mar the appearance.
4. Staining (Optional): If you wish to change the color of your floors, apply a stain. Ensure the stain is compatible with your wood type. Apply evenly and allow to dry according to the manufacturer’s instructions.
5. Applying Finish: Apply your chosen finish, such as polyurethane. Use a roller or brush to apply the finish in thin, even coats. Allow sufficient drying time between coats as recommended by the finish manufacturer.
6. Final Touches: Once the final coat is dry, inspect your work. If necessary, apply a light additional coat to ensure an even, smooth finish. Replace the furniture only after the floor has fully cured, which can take several days depending on the type of finish used.
Tips for Success
- Test the Products: Before fully committing, test the stain and finish on a small, inconspicuous section of flooring to ensure you are satisfied with the appearance.
- Take Your Time: Each step, especially drying times, contributes to the final quality. Rushing can lead to a less satisfactory or durable finish.
- Keep Tools in Good Condition: Ensure sanding equipment is well-maintained and sandpapers are replaced as soon as they show wear.
Refinishing hardwood floors is a robust DIY project that, when done correctly, can significantly enhance the beauty and value of your home. With the right approach and adherence to the process, even beginners can achieve professional-looking results. Good luck on your refinishing adventure!
Sources:
- “Finishing Wood” by Editors of Fine Woodworking.