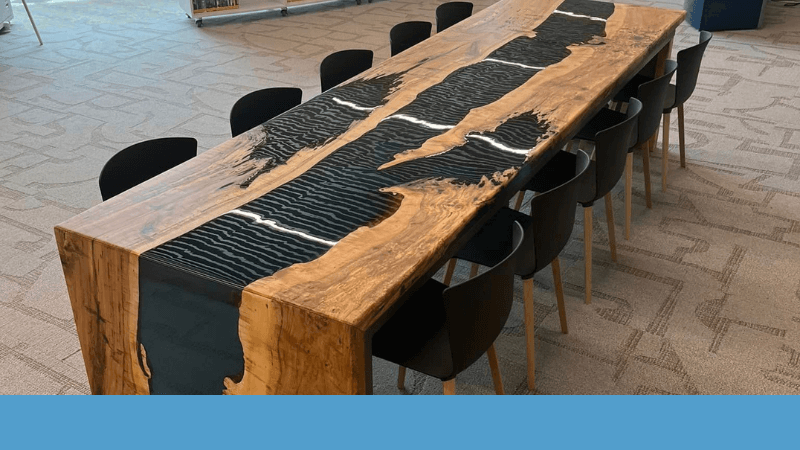
Cured epoxy resin is far from the picturesque desired look that makes you settle for that epoxy river table. The choice to go for epoxy resin for any project such as countertops, tables, and jewelry requires that the cured project undergoes the next necessary step of polishing. Epoxy resin polishing is a must to achieve that unique glossy finish that makes epoxy products so mesmerizing.
Polishing Epoxy Resin surfaces

The need to polish epoxy resin products such as epoxy and wood countertops is brought about by the fact that cured resin is never a perfectly smooth and shiny surface as one expects. There are imperfections such as scratches, unevenness, and dullness to be gotten rid of. The preparation of epoxy resin is a two-step process that involves first sanding the surface and then polishing with the right polishing compound. See Polishing Abrasives.
Sanding Epoxy Resin
Sanding is the first step that you must undertake right after the epoxy has cured to the desired hardness. When it comes to epoxy resin, there are two different types of sanding methods you can choose from. These are dry sanding and wet sanding.
Wet Sanding
The type of epoxy resin project determines the type of sanding to use. In cases where projects involve only epoxy wet sanding is the desired method and it involves the use of water while sanding. Waterproof sandpaper dipped in water is used in every pass of sanding.
Dry Sanding
On the other hand, if your project comprises both epoxy and wood such as river tables and kitchen countertops then you need to go for dry sanding since water can easily sip in the wood and damage it. However, it is advised that if you are confident about your skills water can still be used in a controlled manner such as spraying it while sanding instead of dipping the whole sandpaper in water. Dry sanding is often advised against because epoxy tends to melt due to the heat created when sanding.
Tools needed
The tools necessary for sanding include appropriate grit sanding paper. This often ranges from 120 grit sandpaper to 1500 grit where the 120-grit sandpaper is the coarsest, and the 1500 the finest. Sanding can be done using your hands or an orbital sander depending on the size of the project. Orbital sanders are recommended over hand sanding to achieve a smoother even finish. Sanding discs are used when using an orbital sander and they range in grit just as the sanding papers. Other tools you need include a mask to prevent the inhalation of epoxy dust which is harmful, water in a spray bottle, a micro fiber cloth, and a marker.
How to sand epoxy resin
Tools Needed:
- Various grits of sandpaper (coarse to fine)
- Sanding block or orbital sander
- Spray bottle filled with water
- Cloth or rag
- Marker
The Sanding Process:
- Prepare the Surface:
- Ensure the epoxy resin piece is clean and free from any dust or debris.
- Select the Proper Grit:
- Start with a coarse grit sandpaper (e.g., 80 or 120) if the surface has significant imperfections or needs reshaping.
- For surfaces with minor defects, begin with a medium grit (e.g., 180 or 220).
- Use finer grits (e.g., 320, 400, 600) for achieving a smoother finish.
- Sanding Technique:
- Attach the sandpaper to a sanding block or use an orbital sander with the appropriate grit.
- Perform several passes per grit of sandpaper.
- Each pass should involve left-to-right movements, overlapping with the previous pass, to ensure even sanding.
- Additionally, make top-to-bottom movements with overlapping strokes for consistent results.
- Clean Between Passes:
- Use the spray bottle filled with water to lightly mist the epoxy surface.
- Use a cloth or rag to wipe away any debris or residue.
- Repeat this cleaning process between each full pass to prevent clogging the sandpaper.
- Monitor Progress:
- Use a marker to make a visible mark on the epoxy surface.
- Continue sanding until the mark is completely removed.
- This indicates that the coarseness has been smoothed out before progressing to a finer grit.
- Finishing Touch:
- Finish sanding with a fine grit sandpaper (e.g., 1500) to achieve a smooth surface.
- Before sanding with the 1500 grit, spray water on the epoxy surface.
- Perform about four passes with the 1500-grit sandpaper.
- Thoroughly clean the epoxy surface with water and ensure it is completely dry before proceeding to polish.
How to Polish Epoxy Resin
Tools Needed:
- Suitable polishing compound
- Polisher
- Microfiber cloth
- Polishing pad
The Polishing Process:
- Prepare the Surface:
- Ensure the epoxy resin piece is clean and free from any debris or dust.
- Apply Polishing Compound:
- Take a suitable polishing compound and apply it to the polishing pad.
- Apply a small amount of the polishing compound directly onto the epoxy resin surface.
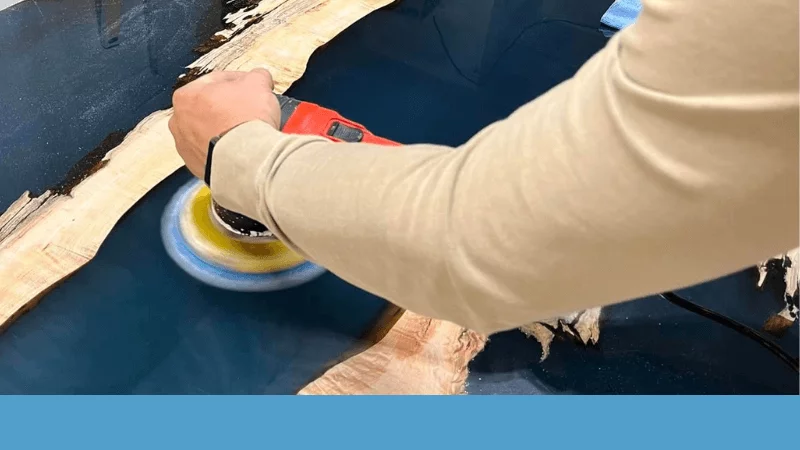
- Start Polishing:
- Turn on the polisher at a low-speed setting.
- Using the polisher, make gentle and even movements similar to those used during sanding.
- Complete several passes over the epoxy resin, applying more polishing compound after each pass.
- Continue polishing until the polish is completely diminished. This typically takes about three passes.
- Final Gloss:
- Once the polishing is complete, use a microfiber cloth to clean and buff the surface.
- Apply gentle pressure while buffing to achieve the desired gloss and shine.
- Continue buffing until the perfect gloss is achieved.
- Finishing Touch:
- After achieving the desired gloss, the polishing of the epoxy resin is complete.
- Use the microfiber cloth to wipe away any residue or excess polishing compound from the surface.
By following these steps, you can achieve a smooth and glossy finish on your epoxy resin piece.
Polishing Compound for Epoxy Resin
Understanding the purpose of polishing compound
Polishing the epoxy resin surface is not complete until the right type of polishing compound is used to buff the surface. Even after sanding with the finest grit sandpaper, there are still invisible marks and grooves on the surface that affect how glossy the surface appears. A suitable polishing compound is able to smoothen out even the tiniest unevenness and achieve a high gloss that leaves your epoxy resin surface looking reflective like a mirror.
Factors to Consider when Choosing a Polish
Abrasive strength
The right polishing compound has the ability to cut out the smallest invisible unevenness from your epoxy resin surfaces. Therefore, the compound must have the suitable coarseness necessary to take care of all the dullness still remaining after sanding.
Compatibility
Another key factor of a suitable polishing compound is the type of surface it is made for. These compounds exist in a variety of formulations that make them suitable for use on surfaces such as metal, wood, plastics, and cured epoxy resin. Therefore, look out for a compound that specifies epoxy resin used.
Ease of use
The suitable type of epoxy compound selected should be easy to use. Different products come in different forms such as in spray bottles, jars and squeezing tubes. Hence, the actual product can be a liquid or a paste. This is often a personal preference, so go for the one you feel confident with.
The best polishing compounds for epoxy
Stone Coat Countertops
If you are looking for a polishing compound to bring out the shine of your river table or any other epoxy piece, then stone coat countertops are the product for you. This unique product comes in an easy to use liquid formulation. The package consists of a bottle of the polishing bottle and another bottle of smoother cleaner to complete the polishing process.
Stone Coat Countertops do not compromise on quality. Its unique abrasive formulation enables it to achieve the smoothest surface on your epoxy resin project by removing scratches, blemishes, and other unwanted formations.
Another key distinguishing feature of this product is that it is safe to use as it conforms to the health requirements of ASTM D4236. Consequently, this product is safe for use on surfaces such as kitchen countertops that are in direct contact with food.
Promise Epoxy
Just like the above product, this one comes in a two-in-one package consisting of a polishing compound and a cleaner. The distinguishing feature of this product is that it is the most versatile polishing compound you can find in the market. As such if you are looking for a compound that is suitable for all your epoxy resin projects such as resin and wood, and pure resin projects then this is your product.
Promise epoxy is one of the best polishing compounds for polishing dull-looking or scratched, epoxy countertops, tables, arts and crafts, jewelry, rocks, coasters, and more. Moreover, it is compatible with cured epoxy resin & casting resin finishes.
Another key distinguishing factor is that it is easy to use and only a few passes are required. Moreover, the cleaning bottle is a spray type that is efficient for cleaning after polishing is done.
Epoxy Resin Polishing Summary
In conclusion, when working with epoxy resin projects such as countertops, tables, and jewelry, it is essential to go beyond the curing stage and give attention to epoxy resin polishing. Polishing is necessary to achieve the desired glossy finish and eliminate imperfections like scratches and dullness. The process involves sanding the cured surface, either through wet sanding or dry sanding depending on the project. Following the sanding process, the appropriate polishing compound is applied to buff the surface to a high gloss. Two recommended polishing compounds for epoxy resin are Stone Coat Countertops and Promise Epoxy, both offering quality results and ease of use. By following these steps and selecting the right polishing compound, you can achieve a smooth and reflective finish on your epoxy resin projects.