If you’re planning on creating a stunning resin art piece, one of the most important steps is to seal your wooden canvas before applying the resin. This ensures that the resin adheres properly and gives you the best possible finish. In this article, we’ll explore the best practices for sealing wood before resin, and give you tips on how to achieve a flawless result.
How to seal your wood before epoxy
To ensure that your epoxy project turns out flawlessly, it’s crucial to take a few precautions during the preparation phase. One of the most important things to keep in mind is to avoid mixing different types of goop, which can lead to inconsistent curing and undesirable results. Stick with the same brand and type of epoxy for all layers of your project.
Additionally, if your project will be exposed to UV radiation, you’ll need to protect your cured epoxy with a UV-inhibiting varnish or a high-quality paint layer. Otherwise, the epoxy will slowly degrade to dust over time.
Avoiding the Pitfalls of Amine Blush When Sealing Wood with Epoxy
It’s essential to be aware of the potential issue of amine blush. This chemical reaction causes a cloudy or waxy film on the surface of the cured epoxy. Not only can this affect the adhesion of subsequent coats, but it can also cause aesthetic issues, yellowing, decreased stain resistance, and reduced chemical resistance, among other problems.
In addition to these issues, the presence of amine blush can also leave some of the epoxy resins unreacted, leaving the coating in an under-cured state that can compromise its durability and longevity. To avoid these issues, it’s important to apply epoxy in the right conditions and follow the manufacturer’s recommendations to prevent amine blush from occurring. By taking the time to seal your wood properly and avoid potential pitfalls like amine blush, you can achieve a beautiful and long-lasting finish for your project.
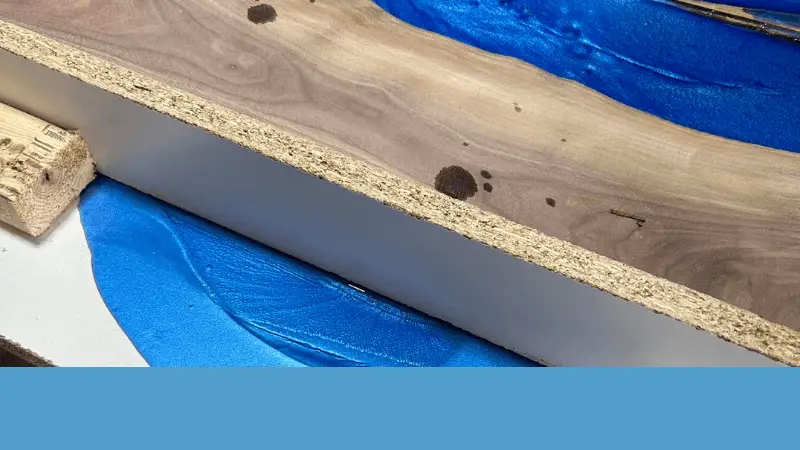
Why Seal Wood Before Resin?
To achieve a stunning, crystal-clear finish for your epoxy project, it’s essential to prevent stains and discoloration from the wood from bleeding through. There are two effective options for sealing the wood before pouring the epoxy: a free-flowing clear resin or a penetrating epoxy.
The clear resin is an excellent choice for creating a barrier that seals the wood and prevents any discoloration from leaching into the epoxy. For deeper penetration and a more thorough seal, you may want to opt for a penetrating epoxy, which has a high flow rate and permeates the wood fibers.
To get the best results, warm up the epoxy with a heat gun to help it flow more easily and achieve complete coverage.
Steps for Sealing Wood Before Resin
Sealing wood before applying epoxy is an essential step to ensure maximum bond strength and prevent stains or colors from infiltrating your clear epoxy. Here are the steps you should follow to seal your wood properly:
Step 1: Sand the Wood
Start by sanding the wood to ensure that the surface is smooth and even. Use coarse-grit sandpaper to remove any rough spots, splinters, or bumps, and work your way up to a finer-grit paper until the surface is completely smooth.
Step 2: Apply Epoxy
To seal the wood, apply a thin layer of epoxy using a brush or roller. You can use a free-flowing clear resin or a penetrating epoxy with a good flow rate that permeates the wood well. Warm up the epoxy with a heat gun to help it flow around.
Be sure to apply the epoxy in the right conditions and follow the manufacturer’s recommendations to prevent the occurrence of amine blush, a chemical reaction that can affect the adhesion of subsequent coats and compromise the coating’s durability.
Step 3: Sand Again
After the epoxy has cured, use a fine-grit sandpaper to lightly sand the surface of the wood. This will help to remove any bumps or rough spots and create a smooth, even surface for the final epoxy coating.
Step 4: Apply Final Epoxy Coating
Now that the wood is properly sealed and sanded, you’re ready to apply the final epoxy coating. Follow the manufacturer’s instructions for mixing the epoxy and hardener, and work in a well-ventilated area.
Using a brush or spreader, apply a thin layer of epoxy to the surface of the wood. Spread the epoxy evenly and avoid creating any air bubbles. If you notice any bubbles, use a heat gun or torch to gently remove them.
Allow the final epoxy coating to cure according to the manufacturer’s instructions. Once it has fully cured, you can enjoy a beautiful and long-lasting finish for your wood project.
In conclusion
Sealing wood before applying resin is a crucial step in creating a flawless resin art piece. By choosing the right sealer, properly sanding the wood, and following the manufacturer’s instructions for applying the resin, you can create a stunning, professional-looking finished product. So next time you’re planning a resin art project, be sure to take the time to properly seal your wooden canvas beforehand for best results.
Recommended Reading