When it comes to working with wood, sanding often gets a bad rap. It’s the step that many people dread, yet it plays a crucial role in achieving a smooth and flawless finish. Surprisingly, sanding is also where a significant amount of effort can go to waste if not approached correctly. In this comprehensive guide, we will unravel the mysteries of wood sanding, debunk common misconceptions, and equip you with the knowledge and techniques to sand like a pro.
Smoothing Furniture Parts: Hand Tools and Adding Character
Before the advent of machines, hand tools like bench planes, molding planes, and scrapers were used to smooth furniture parts. These tools, still available today, can effectively remove mill marks. In some woodworking projects, a finely planed surface can even be considered a final surface, adding character and a personal touch. For woodworkers on a budget or those who prefer working with hand tools, a simple tool like a scraper can be a valuable asset.
Preparation Before Assembly
It is generally better to prepare all wood parts before assembling them. This allows for securing each part to a workbench, ensuring clear visibility with good lighting, and working comfortably with the chosen tool. It also helps avoid the difficulty of sanding or scraping right-angle joints after assembly without accidentally scratching perpendicular pieces.
Turned and Carved Pieces
Turned and carved pieces usually do not require additional preparation. Turnings can be sanded, if necessary, while still on the lathe. Most carvings should not be sanded at all, as sanding tends to soften the crisp lines left by carving tools.
Sanding Basics
Efficient sanding begins with using sandpaper coarse enough to remove flaws while minimizing effort and avoiding excessive scratches. This principle applies to both hand sanding and machine sanding. In practice, starting with 80 or 100 grit sandpaper is often recommended. If the flaws are severe and 80-grit sandpaper doesn’t remove them quickly, switching to a suitable grit or using a scraper or plane can be effective alternatives.
Understanding Sandpaper
There are various types of sandpaper available for both portable and stationary sanding tools. Let’s focus on the essential information you need to know.
Categorizing Sandpaper by Color
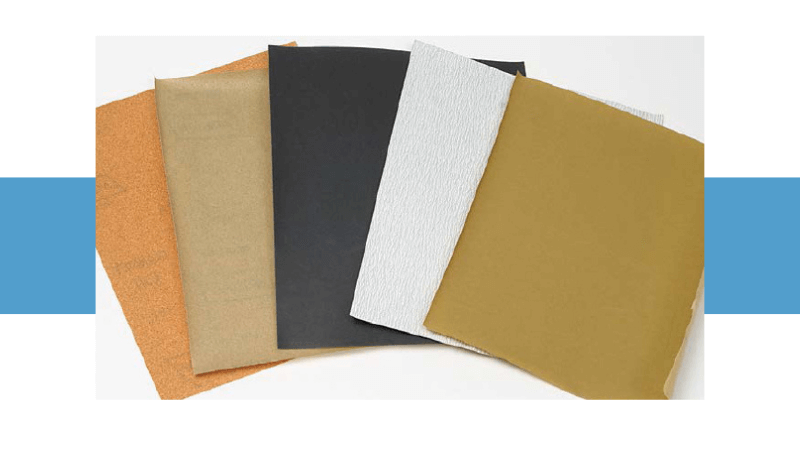
Sheet sandpaper, used for hand sanding, can be easily identified by its color. Here are the key colors and their purposes:
- Orange: Made with garnet abrasive, orange sandpaper is affordable and primarily used for sanding wood.
- Tan: Tan sandpaper is made with aluminum-oxide abrasive. It is more expensive than garnet but lasts longer. It is also meant for sanding wood.
- Black (wet/dry): Black sandpaper, designed with silicon-carbide abrasive and a waterproof adhesive, is used for sanding finishes with the help of water or oil lubricants.
- Gray and gold (dry-lubricated): These sandpapers, coated with a dry lubricant like zinc-stearate, are available in silicon-carbide or aluminum-oxide varieties. They are suitable for sanding finishes, especially sealer coats and thin finishes that don’t work well with wet lubricants.
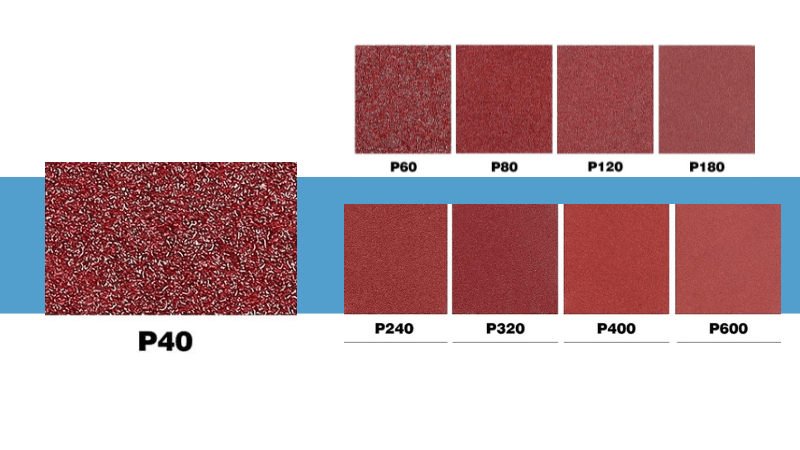
Sandpaper Grading
Two common grading systems are used for sandpaper: CAMI and FEPA. CAMI is the traditional American standard, while FEPA is the European standard indicated by a “P” before the grit number. These systems are similar up to around 220-grit, but they differ for finer grits. It’s important to note these differences, especially when using wet/dry sandpaper for finishing, as using the wrong grading can affect the desired sanding outcome.
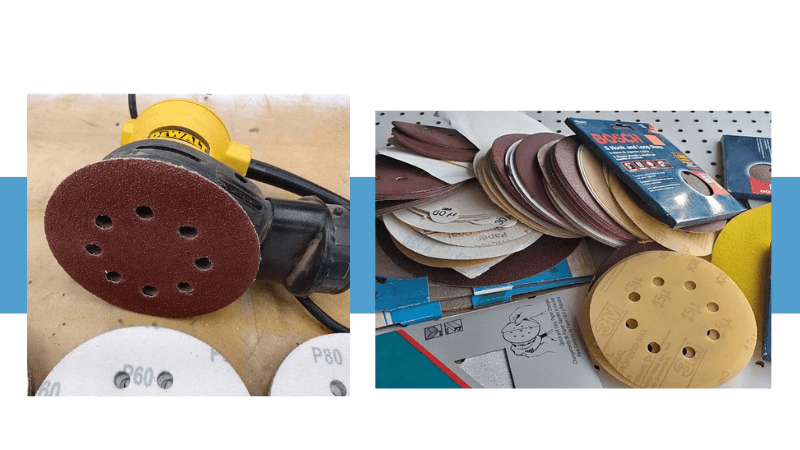
Disk Backings
For handheld sanding machines like random-orbit sanders, two types of sanding disks are commonly used: PSA (pressure-sensitive adhesive) and hook-and-loop. PSA disks are more affordable but cannot be easily removed and reattached, making them suitable for situations where the same grit is used until the disk wears out. Hook-and-loop disks, on the other hand, work like Velcro, allowing for easy switching of disks as needed.
Understanding the grading system and choosing the appropriate sanding disk backing can enhance your sanding experience and improve the final results.
Choosing the Right Grit
Conversely, if the flaws can be removed with a finer-grit sandpaper, such as 120 or 150, starting with a coarser sandpaper is a waste of time and energy. Many people mistakenly begin sanding stripped wood with 100-grit sandpaper when a light pass with 180- or 220-grit would be sufficient to remove the finish. It’s important to remember that the wood was already sanded before it was initially finished.
Adapting Sandpaper and Staying Focused
One mistake people often make when sanding is using worn-out sandpaper for too long, which is not efficient. It’s important to pay attention and notice when the sandpaper is no longer working effectively. By changing the sandpaper more frequently, you can save time and achieve better results.
Getting Rid of Rough Sanding Marks
After addressing any flaws, it’s necessary to remove the rough marks left by the coarse sandpaper. This can be achieved by using finer and finer sandpapers until you achieve the desired smoothness. The size of the scratches left by the sandpaper can affect the color intensity, especially when using stain. Usually, finishing with sandpaper that has a grit of 150, 180, or 220 is recommended. In some cases, sandpaper with a grit of 180 is enough. The goal is to have a surface that doesn’t show any marks or scratches after applying a stain or finish. If the scratch pattern looks even, you may be satisfied with sanding only up to 120 or 150 grit. Using stationary sanding machines can simplify this process.
Finishing with Hand Sanding
If you’re using a vibrating or random-orbit sander, it’s advisable to finish the sanding process by hand. Simply sand in the same direction as the wood grain using the finest-grit sandpaper you used with the machine. This will help eliminate any remaining imperfections and achieve a smooth surface.
Efficiency and Personal Sanding Techniques
In an ideal situation, sanding with each consecutive grit, such as 80, 100, 120, 150, and 180, would be the most efficient approach. However, many people end up sanding more than necessary with each grit, so it can be better to skip some grits. This is particularly true when using sanding machines.
Sanding is a personal process, and everyone has their own way of doing it. We all apply different amounts of pressure, use sandpaper to varying degrees, and sand for different lengths of time. The best way to determine if you’ve sanded enough is to apply a stain and check for any visible marks or scratches. It’s a good idea to practice on scrap wood first to figure out what works best for you.