Lacquer is a popular finish used in woodworking to enhance the beauty of a surface and provide protection. However, like any other finishing technique, lacquer can sometimes present challenges and problems. In this article, we will explore some common spray lacquer finish problems and offer troubleshooting tips to help you achieve a flawless finish.
Common Lacquer Problems and Solutions (quick find)
Spray lacquer problems can occur at the most inconvenient times, causing frustration for anyone working with this finish. Understanding the causes and finding quick solutions is essential for a smooth and successful lacquer application. In the following table, we have compiled a summary of common lacquer problems, their causes, and recommended solutions. To explore a specific problem in detail, simply click on the corresponding link in the table below. This will direct you to a detailed description of the problem and its troubleshooting steps.
| Problem | Cause | Solution |
|---|---|---|
| Blushing | Rapid evaporation of lacquer thinner, drawing humidity into the film | -Thin the lacquer with a slower-evaporating thinner -Warm the lacquer before spraying -Abrade the surface if needed |
| Cotton Blush | Insufficiently dissolved lacquer due to weak lacquer thinner | -Sand or wash the surface with proper lacquer thinner |
| Fish Eyes | Silicone contamination from furniture polish or other substances | -Remove or seal the silicone in the wood -Lower the surface tension of the finish -Spray multiple mist coats |
| Pinholes | Air trapped in large pores breaking through the film | -Sand and apply additional coats of lacquer |
| Press Marks | Insufficient hardening due to temperature, solvent, or coat thickness | -Increase ambient temperature -Adjust the amount of lacquer retarder -Apply thinner coats |
| Orange Peel | Inadequate leveling caused by lacquer drying too quickly | -Adjust air pressure and spray gun distance -Apply thinner coats -Consider wet sanding or leveling agents |
| Dry Spray | Lacquer drying before properly reaching the surface | -Adjust air pressure and fluid flow -Maintain proper distance -Check for clogs -Apply thin and even coats |
| Blistering | Trapped solvents or moisture in the lacquer film | -Ensure cleanliness of the workpiece -Allow proper drying time -Avoid spraying in unfavorable conditions |
Spray lacquer finish problems
Many spray lacquer finish problems are temperature or humidity related. Fortunately, there are ways to address these problems and achieve a successful finish.
Blushing
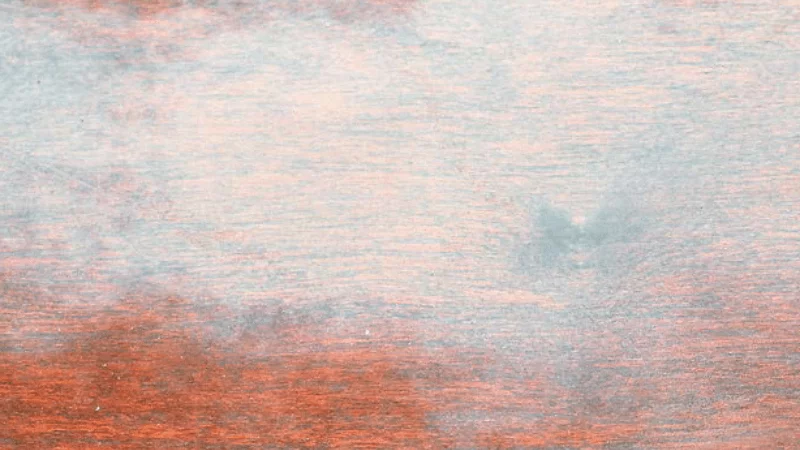
Blushing is a common problem that can occur when spraying lacquer in high humidity. It can be quite alarming to see the finish turn white shortly after application. This phenomenon happens because the moisture from the air gets trapped in the fast-drying lacquer, resulting in a white appearance. However, there are effective solutions you can implement to address this issue.

Solution:
- Pause spraying and apply lacquer thinner to the surface. This will help remove the white appearance caused by the trapped moisture.
- If the blushing persists, it may be necessary to wait for better weather conditions. Once the weather improves, sand the surface lightly and reapply the lacquer thinner to remove the blush.
- In cases where the blushing persists even after the above steps, you can mix lacquer retarder into the lacquer thinner. The recommended ratio is 1 part retarder to 10 parts thinner.
- The lacquer retarder extends the wet or active time of the thinner, allowing it to effectively eliminate the blush. However, keep in mind that the use of retarder will slow down the dry and cure time of the lacquer.
- It’s important to be patient and allow sufficient drying time for the lacquer to fully cure and any remaining blush to disappear.
Cotton Blush
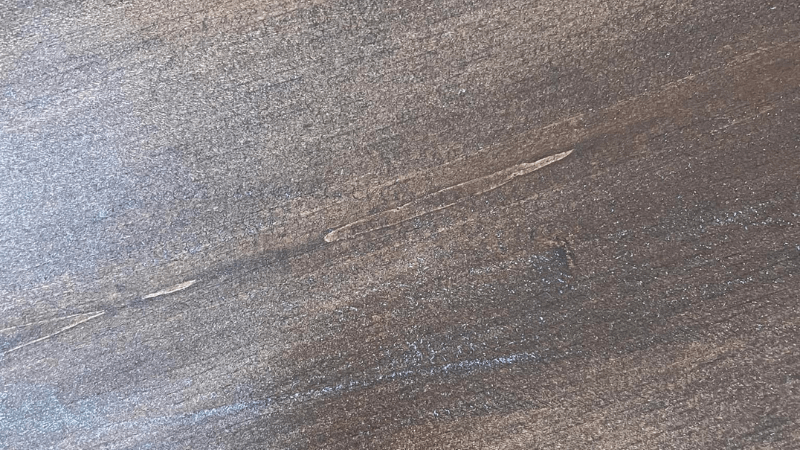
Problem: Cotton blush appears as small, dusted pieces of white cotton on the sprayed lacquer. It occurs when the lacquer thinner used to thin the lacquer isn’t strong enough to fully dissolve the lacquer.

Solution:
- Sanding: To remove the cotton blush, gently sand the surface using fine-grit sandpaper. This helps smoothen out the affected areas and prepare it for refinishing.
- Washing with lacquer thinner: Another option is to wash the surface with the appropriate lacquer thinner. Moisten a clean cloth or rag with the lacquer thinner and gently wipe the affected areas. This helps dissolve and remove the cotton blush from the surface.
- Thinning with proper lacquer thinner: When applying more lacquer, ensure that you use the proper lacquer thinner for the best results. Consult the lacquer manufacturer’s instructions or a professional for guidance on the appropriate lacquer thinner to use. Thinning the lacquer correctly helps prevent the recurrence of cotton blush.
Fish Eyes
Fish eye or “cratering” is a defect that sometimes occurs in lacquer finishes. It appears as randomly spaced craters on the dried finish, resembling orange peel but with distinct characteristics. The main cause of fish eye is contamination from substances like oil, which repel the lacquer as it begins to dry, resulting in the formation of these craters or “eyes.”

To effectively address fish eye in lacquer finishes, follow these steps:
- Prompt removal: As soon as you notice fish eye, remove the affected finish immediately. This prevents further contamination and allows for proper cleaning.
- Scrub with lacquer thinner: Clean the wood surface by scrubbing it with a scrub brush dipped in lacquer thinner. This helps remove any contaminants and excess lacquer.
- Thoroughly wipe down: Use clean rags soaked in lacquer thinner to wipe down the wood surface, ensuring all residues and excess thinner are removed.
- Sealing option – Dewaxed shellac: If fish eye reappears even after cleaning, you can consider using dewaxed shellac as a sealing layer. Apply the shellac to the affected area, following the manufacturer’s instructions. This helps encapsulate the fish eye and provides a smooth surface for subsequent lacquer layers.
- Professional fish-eye additive: Some professional solvent lacquer finishes offer fish-eye additives specifically designed to address this issue. If available, follow the manufacturer’s instructions and add the fish-eye additive to your lacquer. This additive helps modify the surface tension of the lacquer, reducing the occurrence of fish eyes.
- Seek professional advice: If you encounter persistent fish-eye problems despite taking the above steps, it may be helpful to consult professionals or lacquer manufacturers for further guidance and recommendations tailored to your specific lacquer product.
Pinholes
Problem: Pinholes are tiny bubbles that develop over large pores and become small holes when sanded level. They occur when air trapped in large pores breaks through the lacquer film.
Solution:
- Try sanding the finish back and dusting on a few coats of lacquer before applying a wet coat to fill the pinholes.
- If the issue persists, strip off the lacquer and begin again by dusting on several coats followed by wetter coats.
Press Marks or Printing
Problem: Press marks or printing can occur when the lacquer hasn’t fully hardened due to temperature, solvent, or coat thickness.
Solution:
- Increase the ambient temperature of the finishing room to help the lacquer dry faster.
- If you’ve added lacquer retarder to solve other problems, consider reducing the amount or giving the finish more time to harden.
- Apply thinner coats of lacquer or give the finish additional time to harden completely, especially if you’re applying a thick film.
Orange Peel
Orange peel is a common issue in lacquer finishes, characterized by a textured surface resembling the skin of an orange. It occurs when the lacquer dries too quickly, leading to insufficient leveling. To address this problem and achieve a smoother finish, consider the following
Solutions:
- Adjust air pressure: Fine-tuning the air pressure on your spray gun can help achieve a finer spray pattern. Experiment with different pressure settings to find the optimal level that promotes better leveling and reduces orange peel.
- Increase spraying distance: Increasing the distance between the spray gun and the workpiece allows the lacquer to disperse more evenly before reaching the surface. This helps to minimize the formation of orange peel. Test different distances to find the one that yields the best results.
- Apply thinner coats: Rather than applying heavy coats of lacquer, opt for thinner coats and build up the finish gradually. Thinner coats dry more evenly and have a better chance of leveling out, resulting in a smoother surface. Apply multiple coats, allowing each one to dry properly before applying the next.
- Utilize leveling agents or wet sanding: Consider using a lacquer leveling agent, which is specifically designed to address orange peel issues. These agents help the lacquer flow and level more effectively, reducing the texture. Alternatively, you can perform wet sanding between coats using fine-grit sandpaper or abrasive pads. This process helps to remove imperfections and promote a smoother surface.
Dry Spray
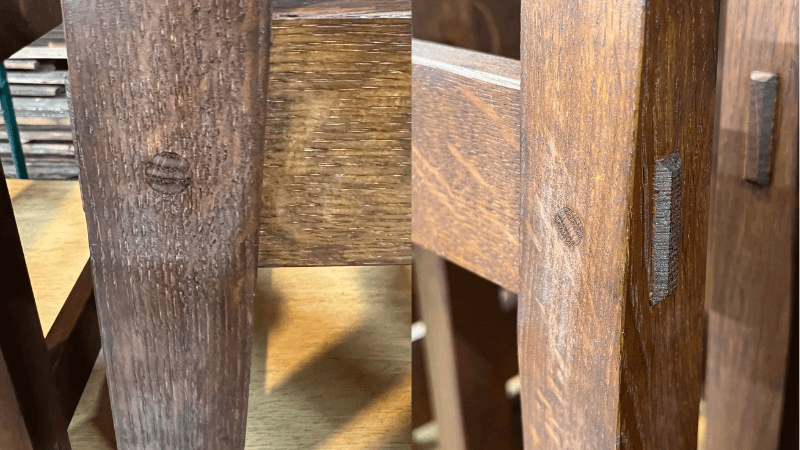
Dry spray is a common problem that results in a rough finish. It occurs when overspray lands on a partially dry surface or when an area doesn’t receive enough finish for it to flow and level out. This issue is often observed on the inside of cabinets, around legs, stretchers, and other intricate areas. Fortunately, there are simple steps you can take to address this problem and achieve a smoother finish.

To resolve dry spray issues, follow these guidelines:
- Identify the affected areas: Inspect the surface for roughness caused by dry spray. Focus on prominent areas that require attention.
- Sand the rough areas: Using very fine sandpaper with a grit of 400 to 600, gently sand the rough surface. Be careful not to apply too much pressure, as you don’t want to remove too much of the underlying finish.
- Re-spray if necessary: For prominent areas where the roughness is noticeable even after sanding, you may consider re-spraying. Before doing so, make sure to mask off surrounding areas to protect them from overspray. This will ensure that you achieve an even and consistent finish.
- Use steel wool as an alternative: If re-spraying is not feasible or desired, another option is to smooth the rough area with steel wool. Wait until the finish has fully dried for several days before using steel wool to gently buff the surface. This can help soften the roughness and improve the overall appearance.
Blistering
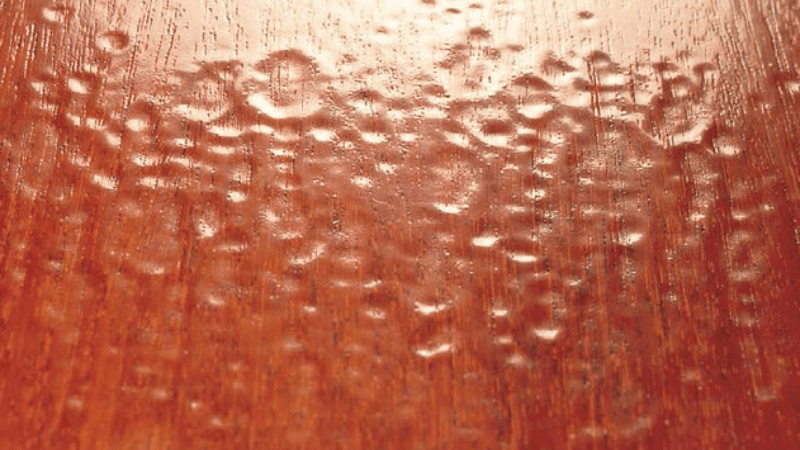
Problem: Blistering occurs when bubbles or blisters form in the lacquer finish, usually caused by trapped solvents or moisture.
Solution:
- Ensure that the workpiece is clean and free from any contaminants before applying lacquer.
- Allow sufficient drying time between coats to prevent solvent entrapment.
- Avoid spraying lacquer in high humidity or excessively cold conditions.
- If blistering occurs, allow the lacquer to dry thoroughly, then sand the affected area lightly and reapply the lacquer.
Conclusion: Spray lacquer problems and solutions
In conclusion, understanding and addressing spray lacquer finish problems is essential for achieving professional and flawless results. By familiarizing yourself with the common issues discussed in this article and implementing the appropriate solutions, you can overcome challenges related to blushing, dry spray, orange peel, fish eye, and cotton blush. Remember to consider factors such as temperature, humidity, and proper thinning techniques to optimize your lacquer spraying process. With practice and knowledge, you’ll be able to achieve beautiful, smooth, and durable finishes that enhance the beauty of your woodworking projects. Happy spraying!