20 Easy Cat Woodcarving Ideas for Beginners
If you’re looking for a first woodcarving project, it’s hard to beat a cat. Cats curl up, tuck their paws underneath, and wrap their tails around their bodies, which means most cat poses are compact, rounded shapes with nothing thin sticking out to snap off. That makes them one of the most forgiving animals a new carver can choose.
Cats are also full of personality, so even a simple, chunky carving with two pointed ears and a couple of curved lines for eyes reads instantly as a cat. You don’t need to sand away every knife mark, either. Many of the pieces below proudly show their flat, faceted cuts, a look that’s part of the charm rather than a sign of inexperience.
The 20 ideas in this collection range from palm-sized sleeping cats to cat-topped spoons and wearable pendants. Each one comes with a beginner tip, and a couple of more advanced designs are included along the way as goals to work toward once you’ve found your feet. If you’re unsure which ones suit you, our guide to choosing a project that matches your skill level can help.
What You’ll Need
Most of these cats start from a small block of basswood, the go-to wood for beginners because it’s soft, has a tight, even grain, and holds detail without splitting. Pre-cut blanks in sizes like 1″ x 1″ x 3″ and 2″ x 2″ x 4″ are inexpensive and save you from cutting your own.
For tools, a sharp carving knife will handle nearly every project here, and our guide to choosing the right whittling kit can help you pick one. A small detail knife helps with faces and ears, and a hook knife is needed for the cat-topped spoons and the cat-and-bowl dish. A coping saw is useful for cutting out flat pieces and trimming waste from blanks before you start carving. Keep a leather strop and honing compound nearby, because a sharp blade is safer and easier to control than a dull one. Always wear a cut-resistant glove on the hand holding the wood, and consider a thumb guard for your knife hand.
For finishing, a set of acrylic paints, a fine-tip pen or wood-burning tool for small details, and a coat of Danish oil or paste wax will cover almost everything. For spoons and anything that will touch food, skip the paint on the working parts and use a food-safe finish such as mineral oil or a beeswax blend.
20 Ideas
1. Sitting Cat: Draw It First, Then Carve Away Everything That Isn’t Cat
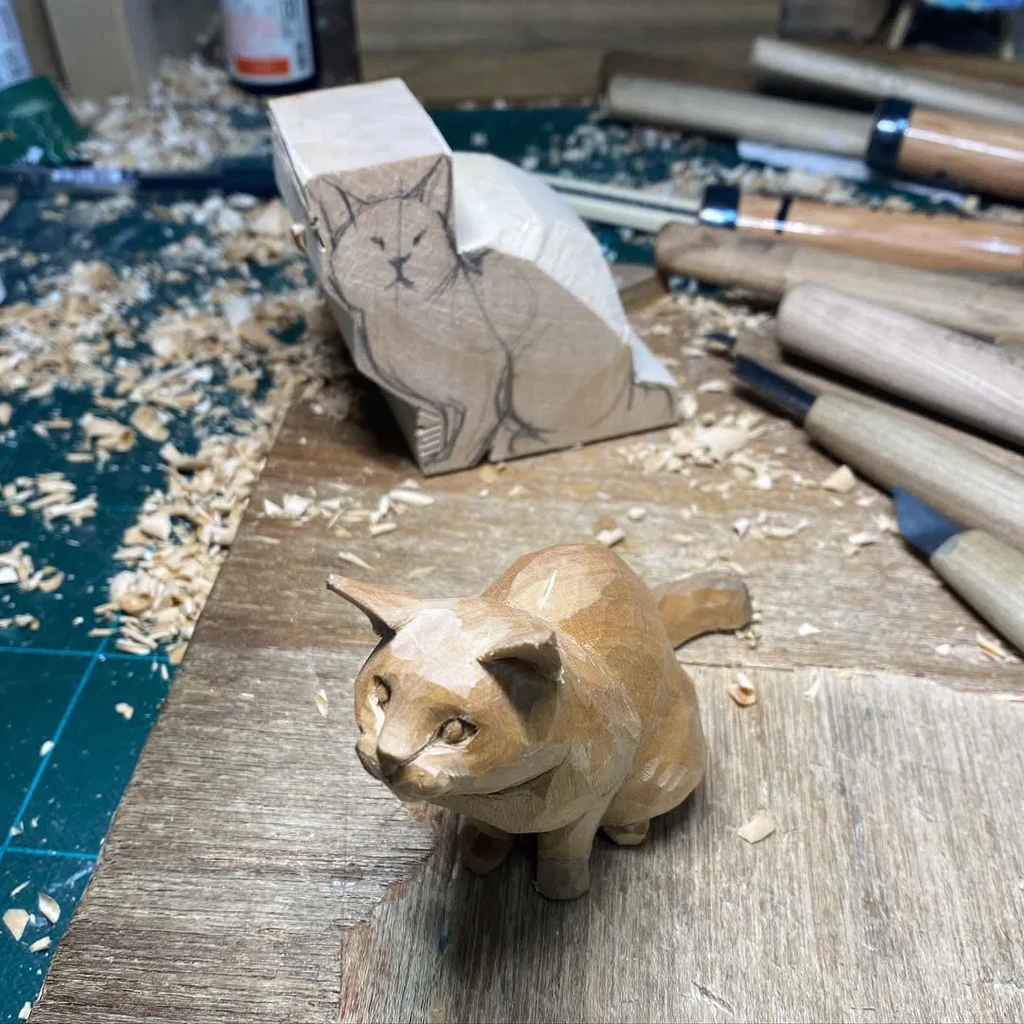
Beginner tip: Start with a simple version. Keep the face plain, with tiny dots or shallow cuts for the eyes, and leave the legs as one chunky shape rather than carving each paw. Once that feels comfortable, you can add more detail to your next cat.
2. Yawning Cat: A Big Personality in One Big Yawn
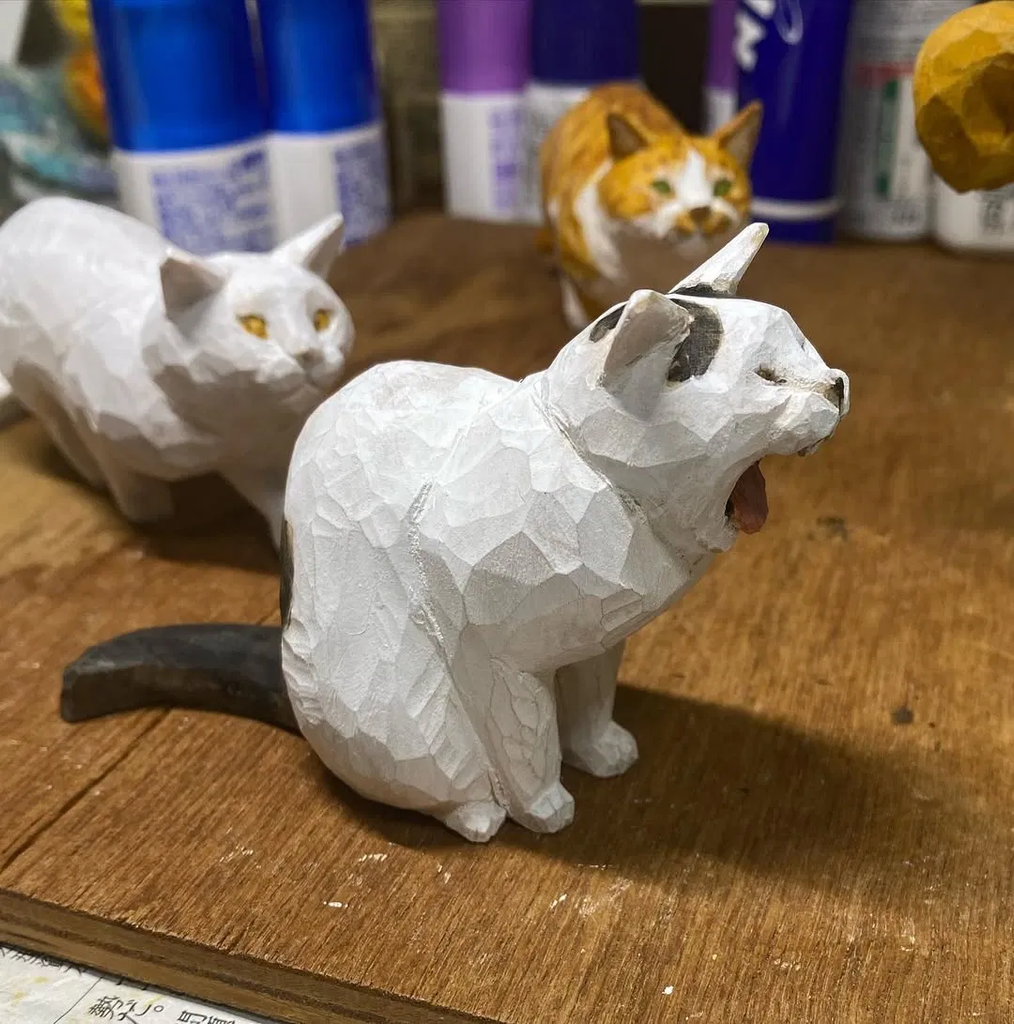
Beginner tip: Paint is a great friend to new carvers. Simple patches of black or orange can turn a plain, chunky cat into a character, and a coat of paint hides small imperfections. If the open mouth feels too tricky, carve it closed and add a small painted line instead. You’ll still get a cute cat.
3. Cat Face Pendants: A Wearable Gift That Fits on Your Fingertip
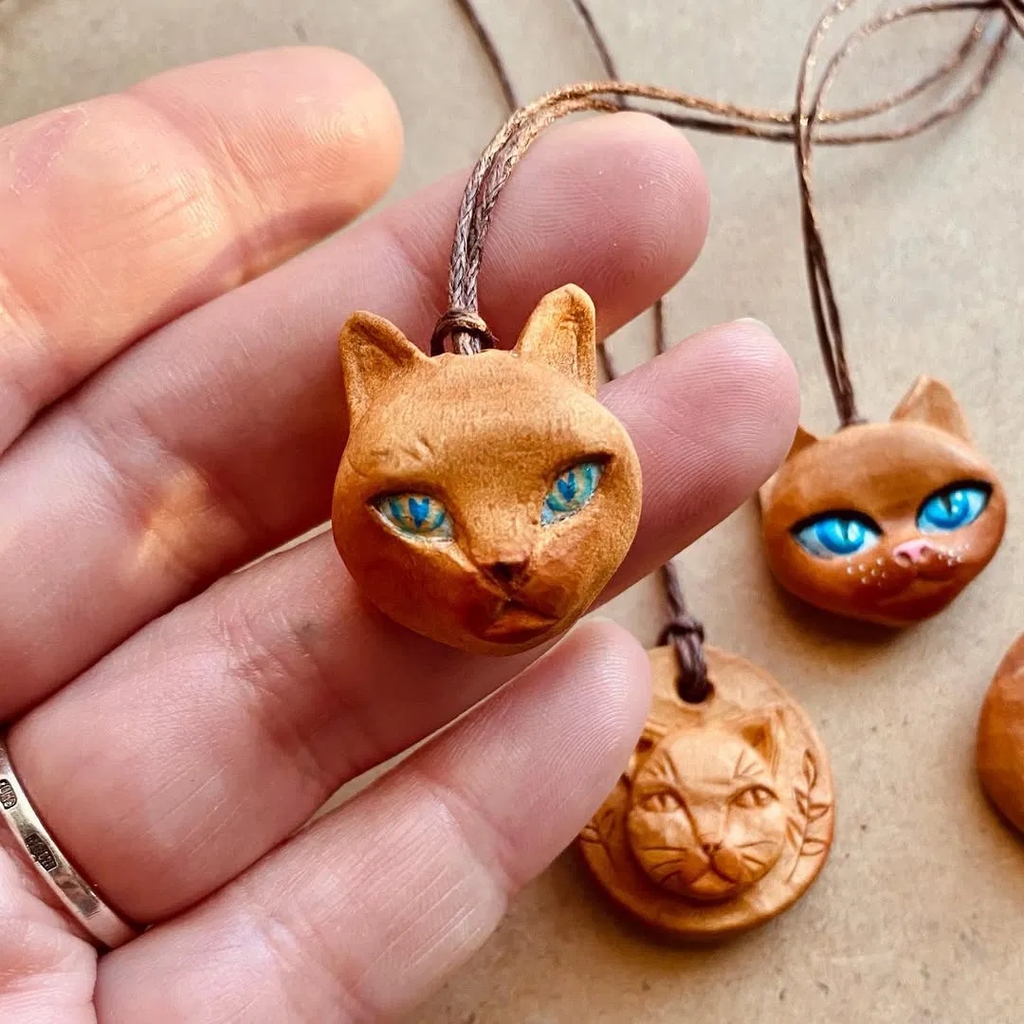
Beginner tip: Small pieces like these look fiddly, but a simple version is very doable. Start with a flat, round disc, carve a basic cat-face outline with shallow cuts, and add color with paint for the eyes and nose. The paint does much of the work, so you don’t need to carve every fine detail. Drill a small hole at the top for the cord, and you have a handmade gift.
4. Sleeping Cat in a Red Blanket: Tucked In, Tuckered Out, and Easy to Carve
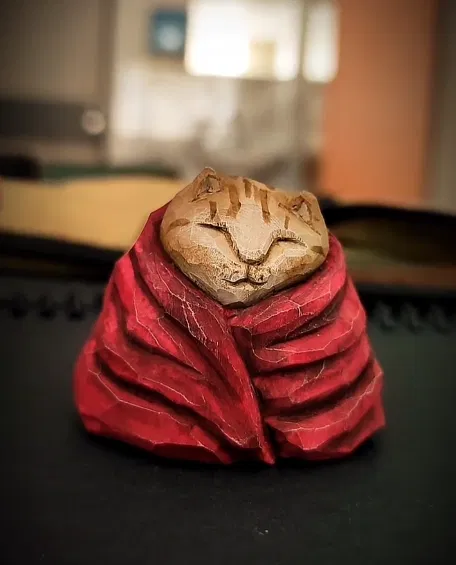
Beginner tip: This is one of the friendliest designs for amateurs because the body is basically a chunky, rounded block. The folds are just repeated diagonal cuts, so there’s no delicate shaping to worry about. Closed eyes are also easier than open ones, since a couple of small curved lines are enough. Finish with a coat of red paint and you have a charming piece with very little fine detail.
5. Stretching Cat: Catch a Cat Mid-Stretch Without Snapping a Leg
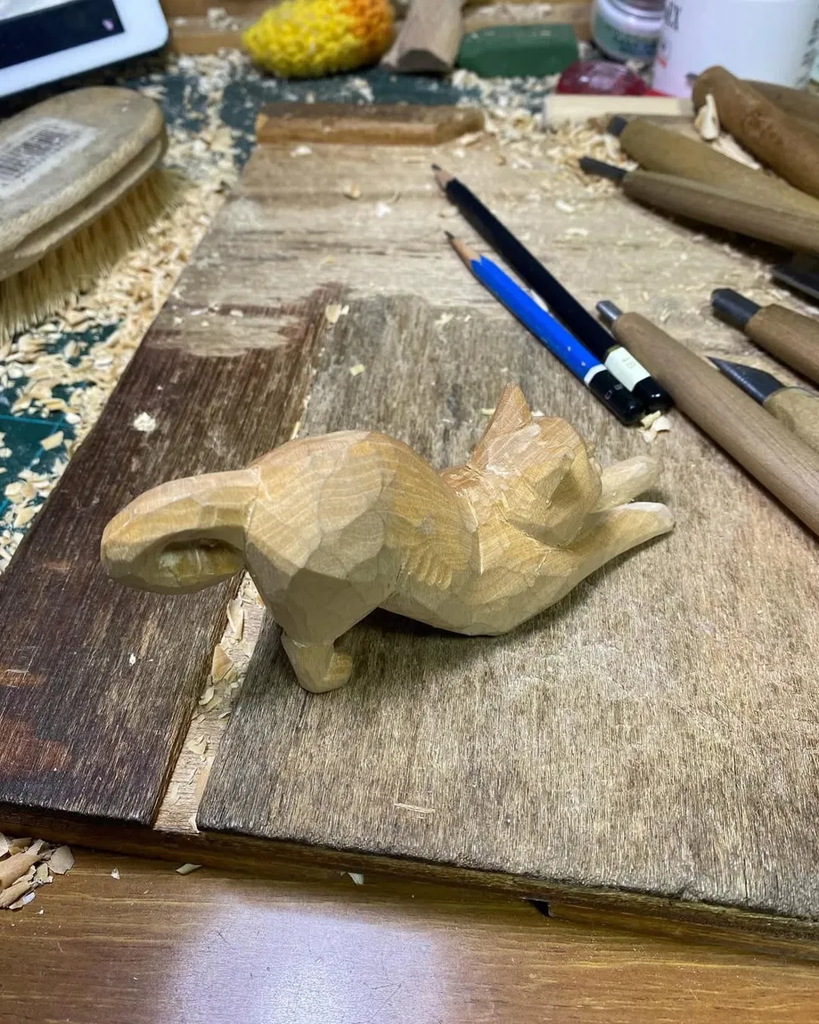
Beginner tip: A stretching pose is one of the trickier cat designs, because the stretched-out front legs are thin and can snap if you cut too thin. For a first attempt, keep the legs short and chunky, or carve the front paws tucked under the body. You’ll still get a cute cat, with much less risk of breaking a piece off.
6. Cat Lying on Its Back: Belly Up and Built to Last
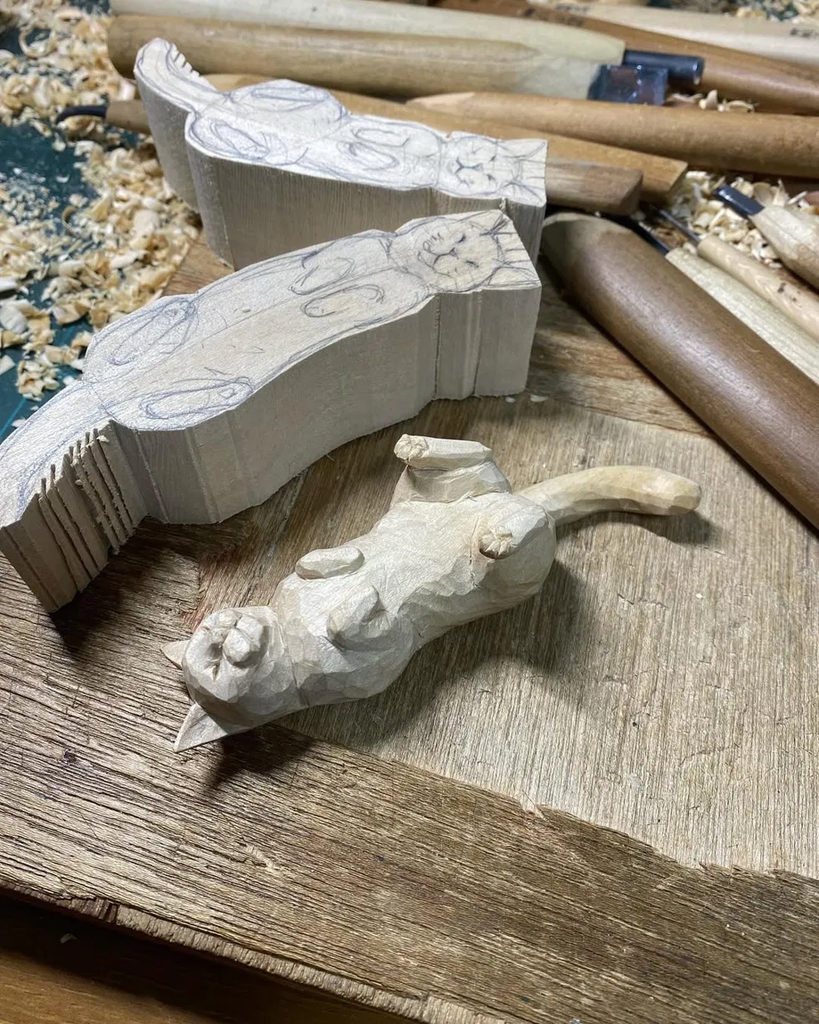
Beginner tip: A cat lying flat is a friendly pose for amateurs, because it rests on the table with no thin legs holding it up. Keep the paws round and chubby, since tiny paws can snap off.
Cat-Topped Spoons and Cat Coaster: Stir Your Tea with a Tiny Tabby
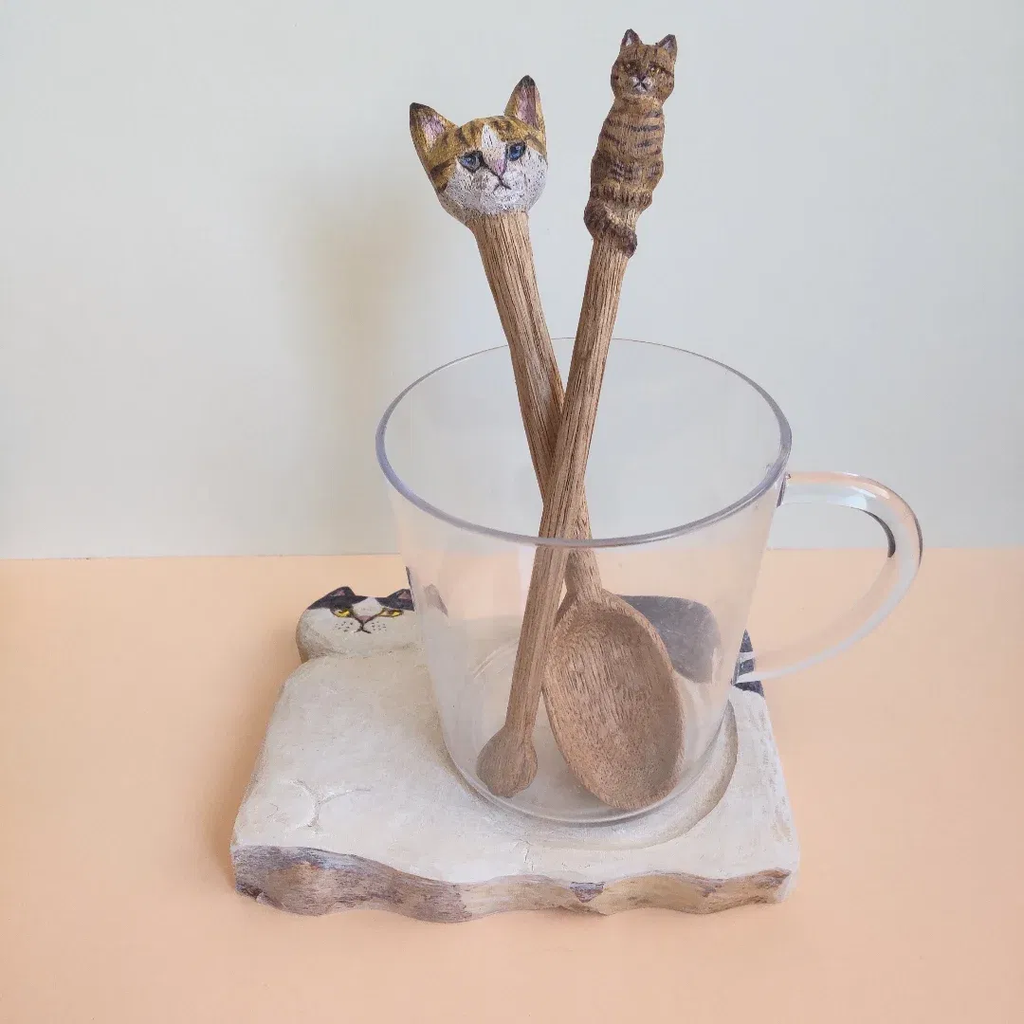
Beginner tip: This is a lovely way to turn the classic spoon project into a gift. Carve a simple spoon first, then leave a chunky block at the top of the handle and shape it into a cat head with two ears. Paint adds the eyes and stripes, so you don’t have to carve them.
8. Little Sitting Cat: Let a Pen Do the Tricky Bits
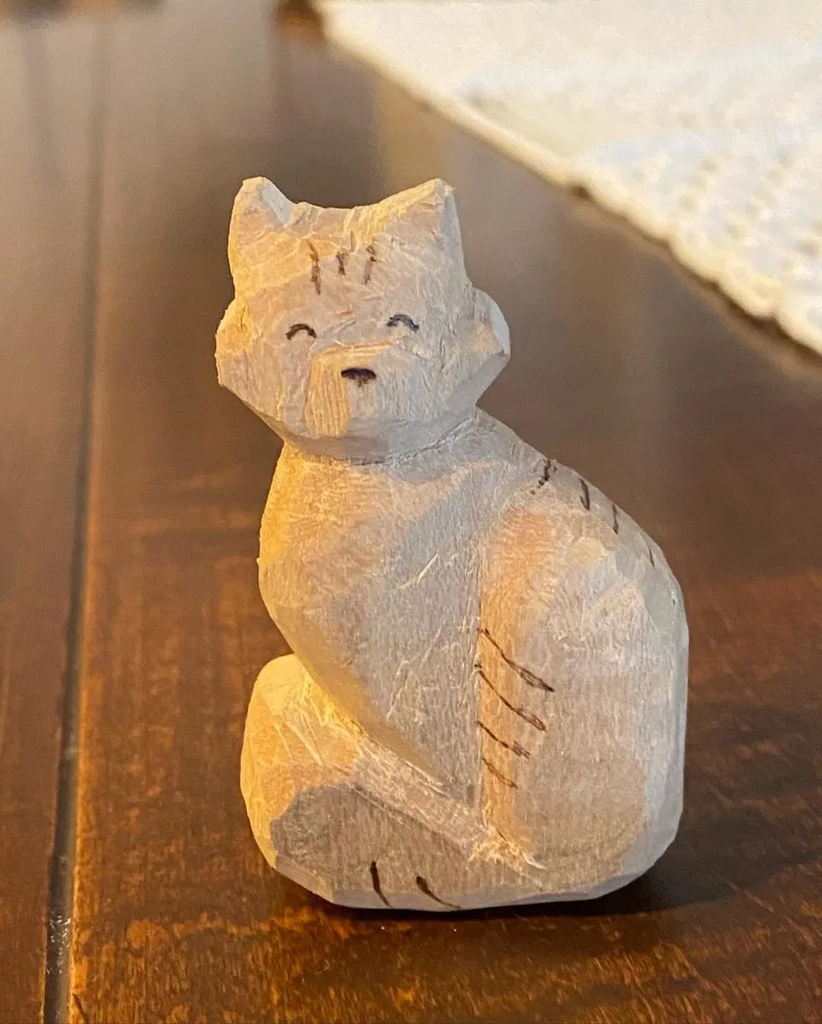
Beginner tip: This is one of the most amateur-friendly designs in the collection. There are no thin legs or delicate parts to snap, and the details are drawn on with a pen rather than carved. If you’re nervous about the face, do the same: carve the head as a smooth, rounded shape, then add the eyes, nose, and stripes with a fine-tip pen or a wood-burning tool once the shape is done.
9. Two Sleeping Cats: Double the Naps, Double the Charm
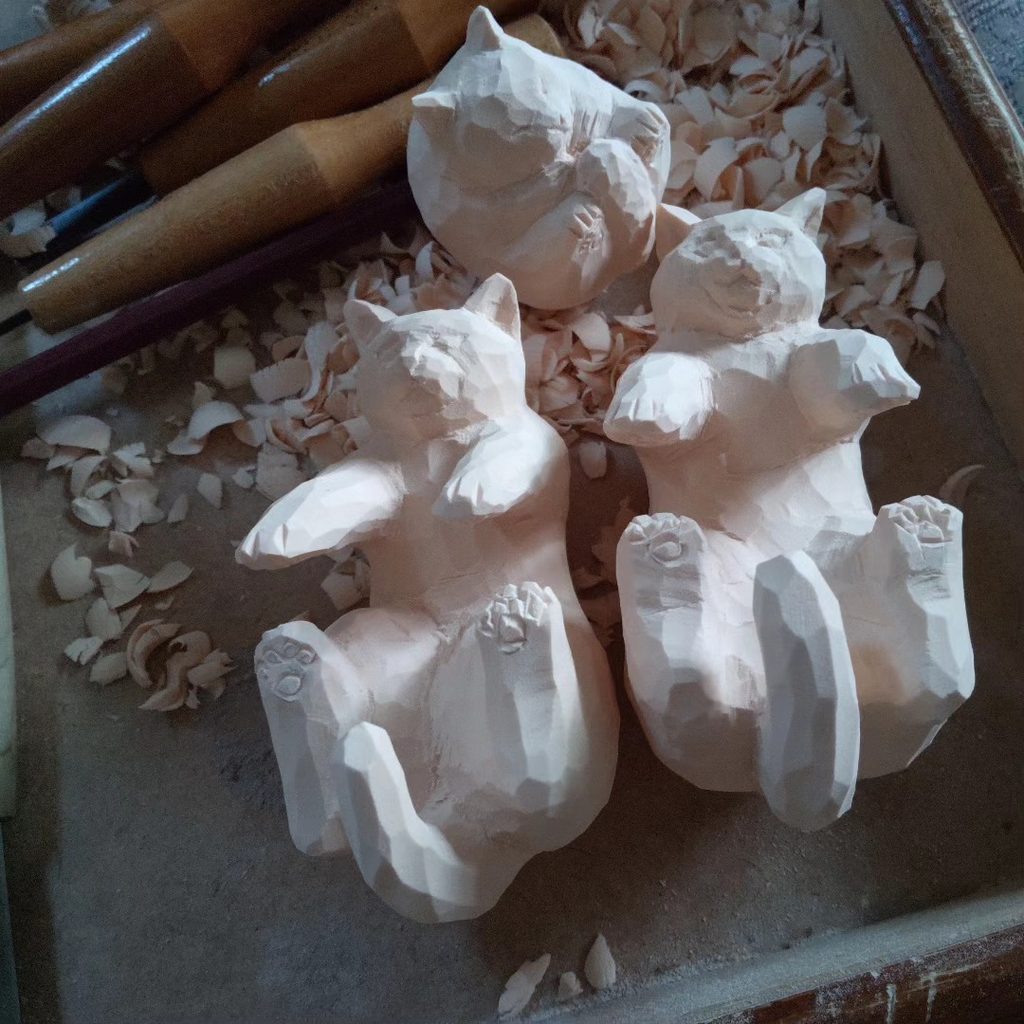
Beginner tip: A curled-up sleeping cat is one of the easiest animals for amateurs to carve, because it’s a rounded, compact shape with no thin legs to break. Closed eyes are just a small curved line, and paint does most of the work.
10.Cat Hanging on a Branch: Just Hanging Around on Your Wall
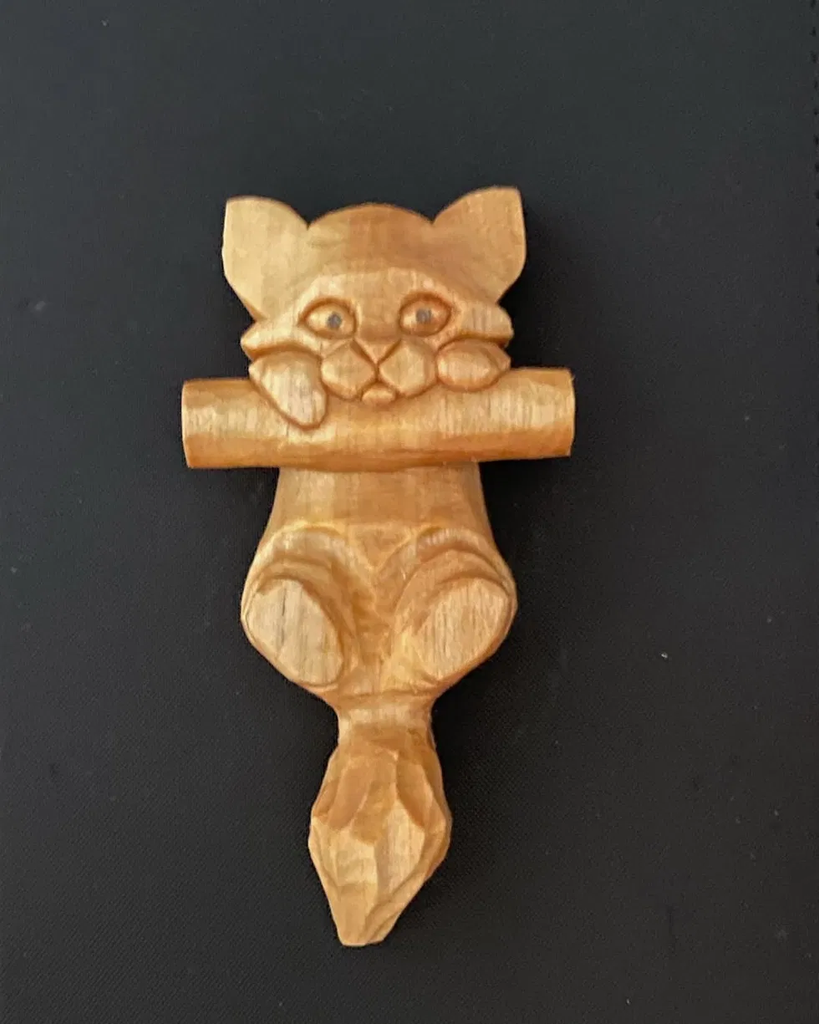
Beginner tip: Start with the outline: draw the cat and bar on a flat piece of wood, cut around the shape, and then carve simple rounded forms for the head, paws, and feet. The face is the trickiest part, so a beginner can keep it simple with two round eyes and a small nose, without carving each cheek and whisker pad.
11. Hamburger-Hat Character: The Quirkiest Snack-Topped Friend You’ll Ever Carve
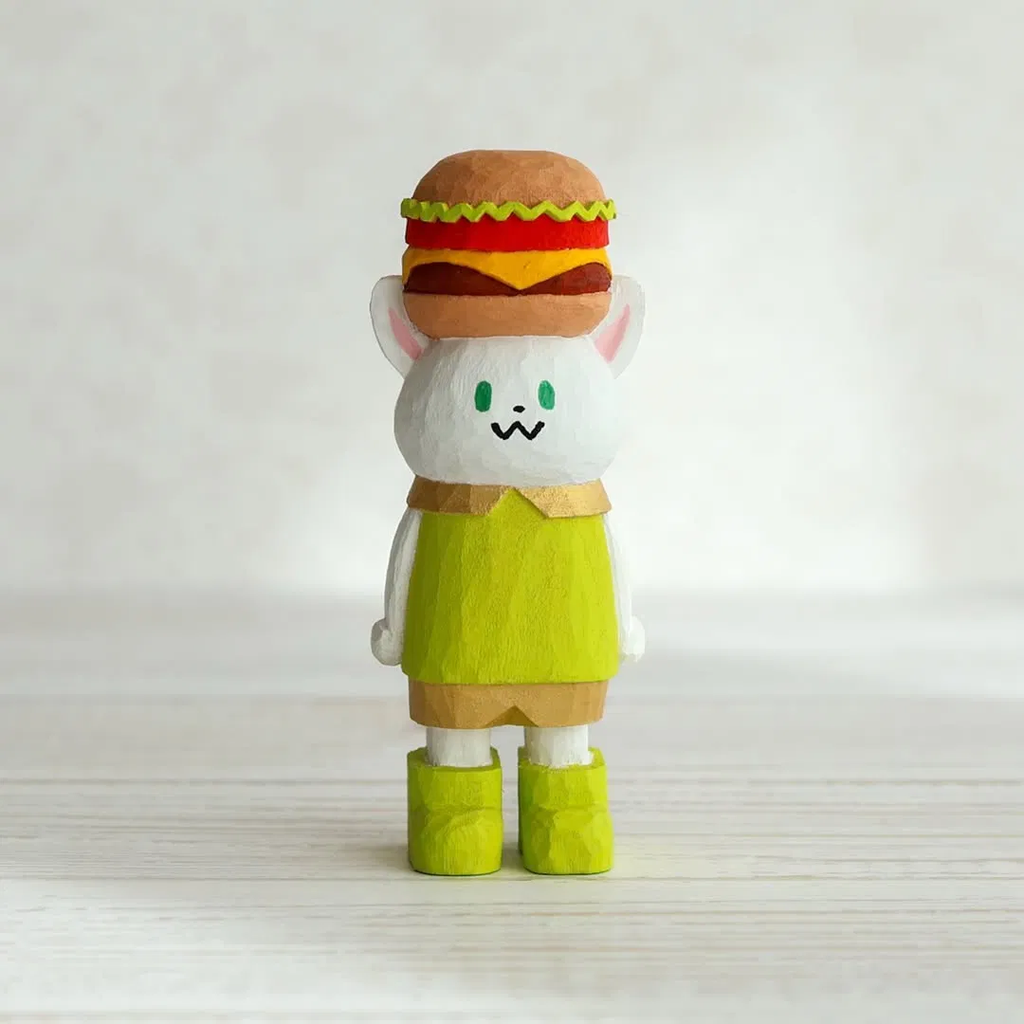
Beginner tip: This design looks playful, but the shapes underneath are simple. The body is a tall, straight block, the head is a rounded ball, and the boots are two chunky blocks. All of the color and fine detail is painted on, so there’s very little to carve.
12. Row of Cat Figures: One Simple Column, Six Different Personalities
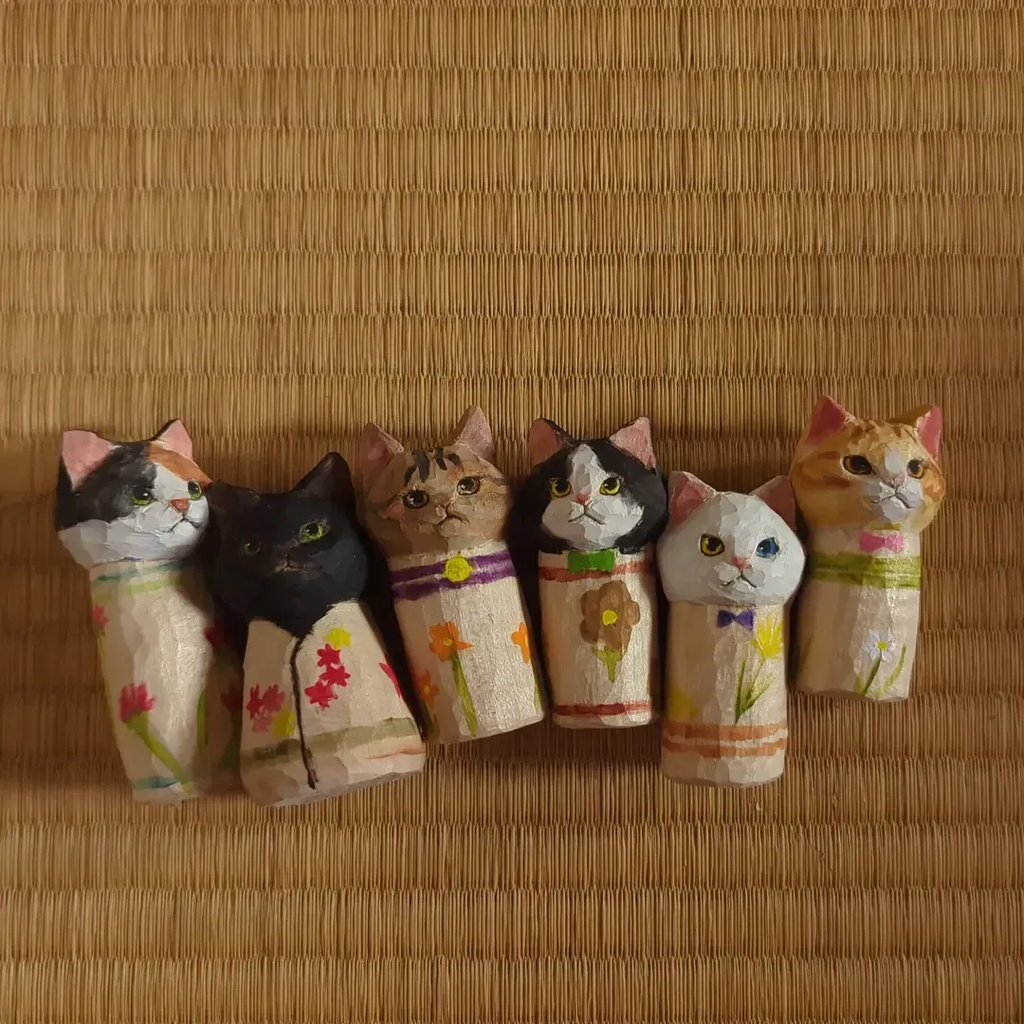
Beginner tip: This is a great amateur project because all the effort goes into one small part. The body is just a straight, chunky column, like a short piece of dowel or branch, so the only real carving is the head with its two pointed ears.
13. Graceful Standing Cat: A Gallery-Worthy Goal to Work Toward
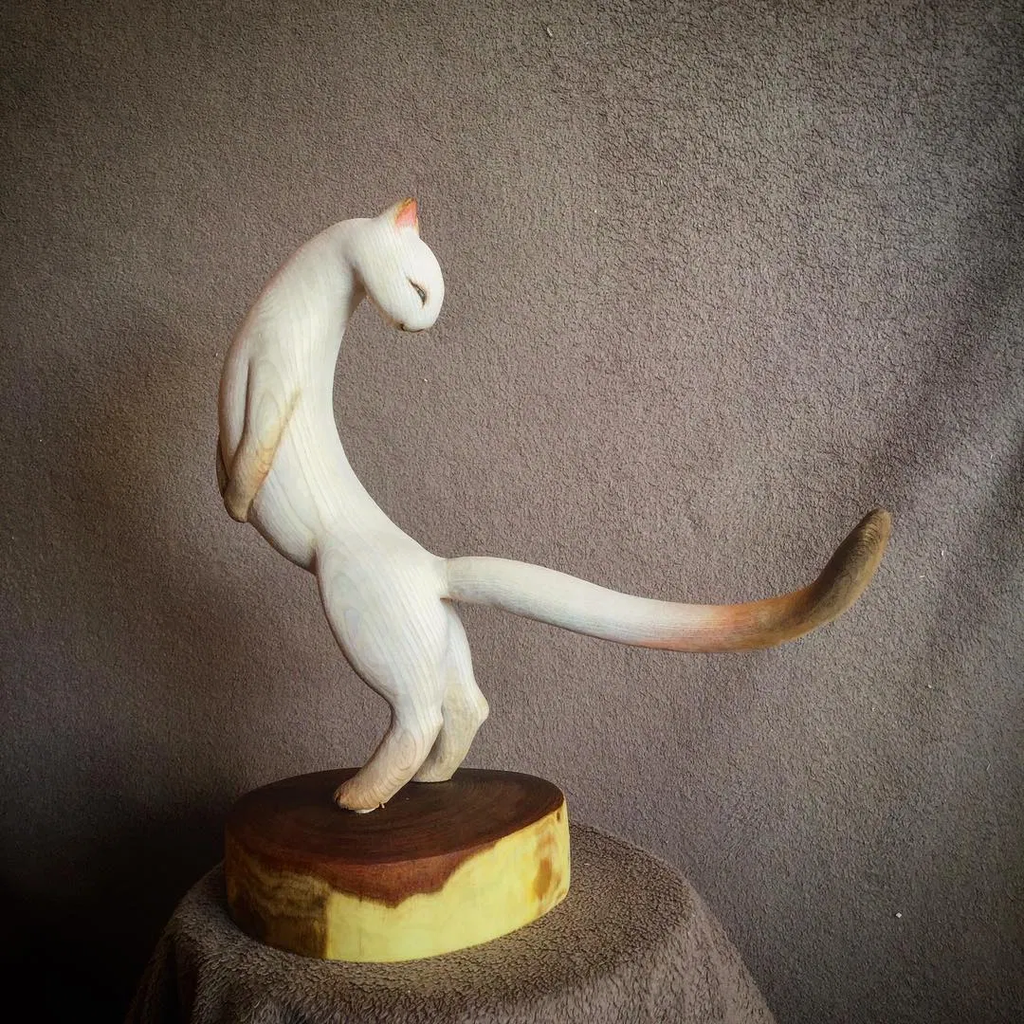
Beginner tip: This is an advanced piece, and I’d present it to amateur readers as inspiration rather than a first project. The thin neck, slim legs, and long tail are very easy to snap, and the smooth, flowing surface takes a lot of patient shaping and sanding. Mount any small carving on a slice of branch or a natural wood base for an instant “display piece” look, and try a gently curved pose once they’ve finished a few chunky animals. A thicker, shorter tail is a much safer start.
14. Tiny Curled-Up Cat: A Pocket-Sized Ball of Calm
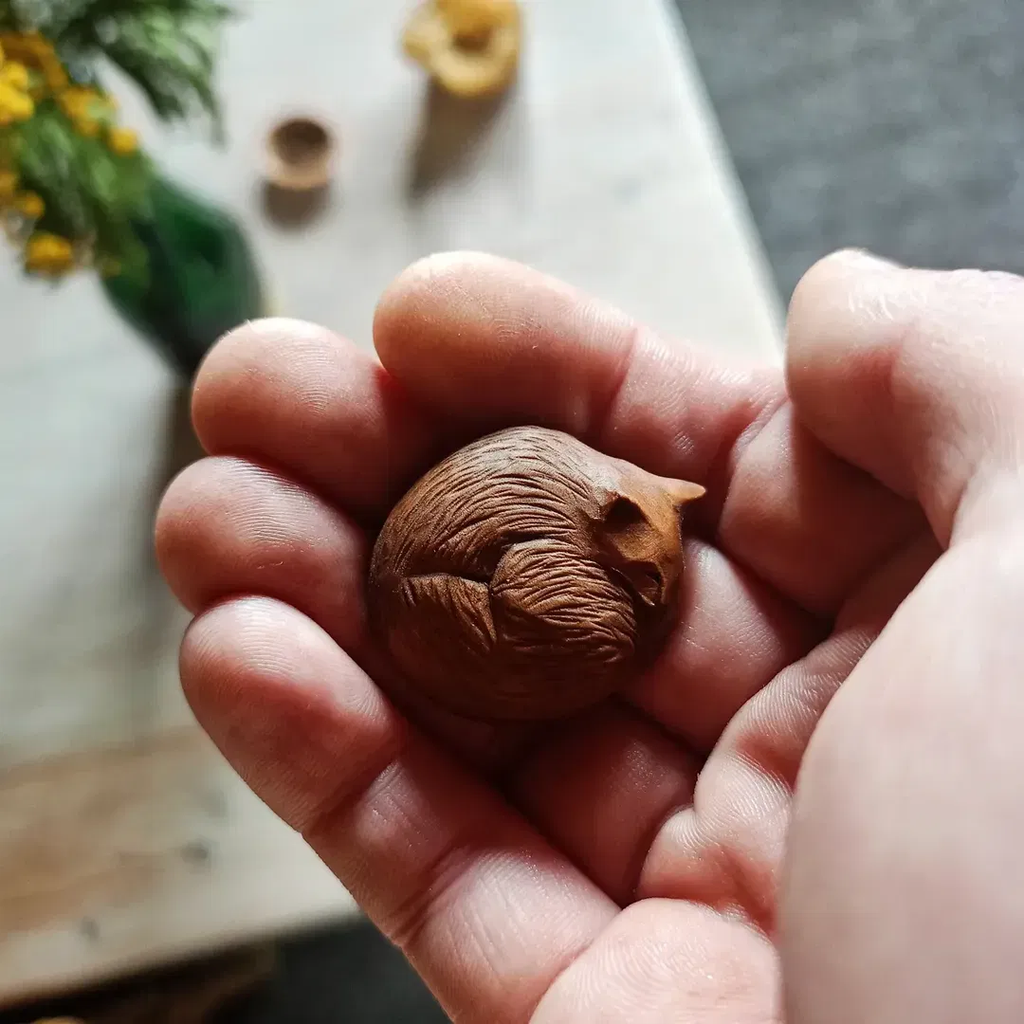
Beginner tip: The basic shape is very friendly for amateurs, because a curled-up cat is essentially a smooth ball or egg with a small ear and a tail line. There are no thin legs or delicate parts to snap. The fur texture is the hard part, since it takes many fine, patient cuts, so a beginner can skip it and leave the surface smooth or add just a few shallow lines.
15. Cat-and-Bowl Dish: A Keepsake Dish with a Lazy Guard Cat
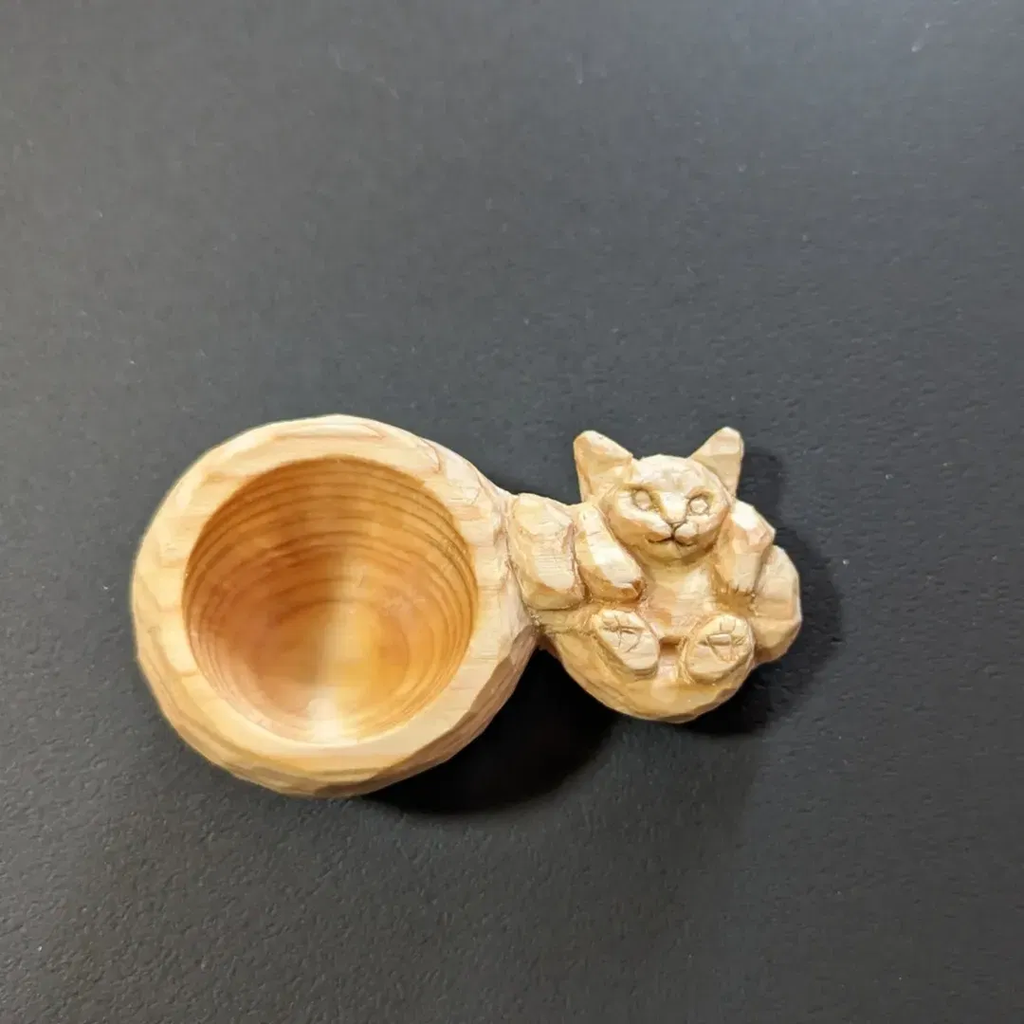
Beginner tip: Hollowing a shallow bowl is a satisfying skill to learn, and it prepares readers for spoons and scoops. The cat can stay simple: a rounded body, two ears, a small face, and paws shaped as little bumps. If the toe details feel too fiddly, skip them.
16. Cat with a Flower Collar: Blooming with Personality
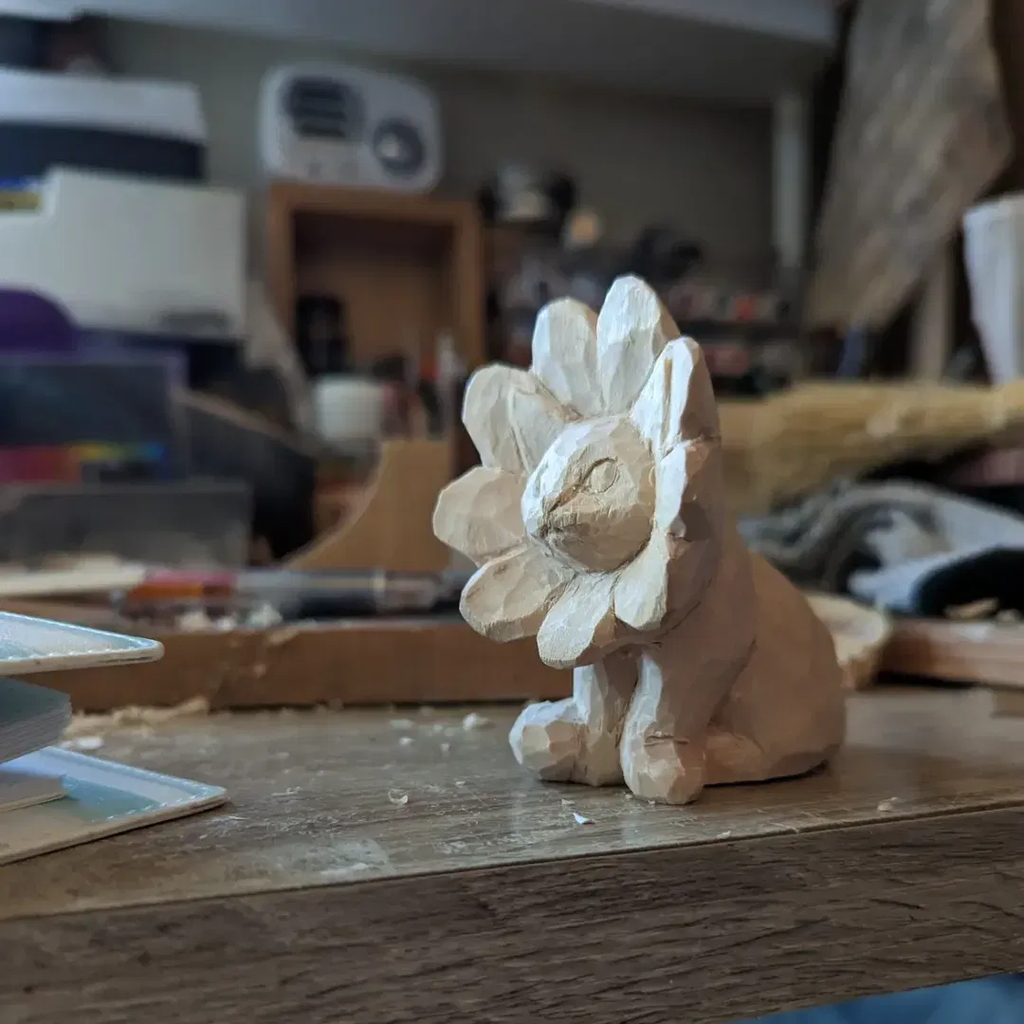
Beginner tip: The petals look impressive, but they’re just repeated, simple cuts around the head. Draw a circle on the wood, mark evenly spaced petals, and carve each one as a thick, rounded shape. Keep them chunky, since thin petals can snap off.
17. Little Standing Cat Figure: Stack Simple Shapes, Get a Storybook Cat
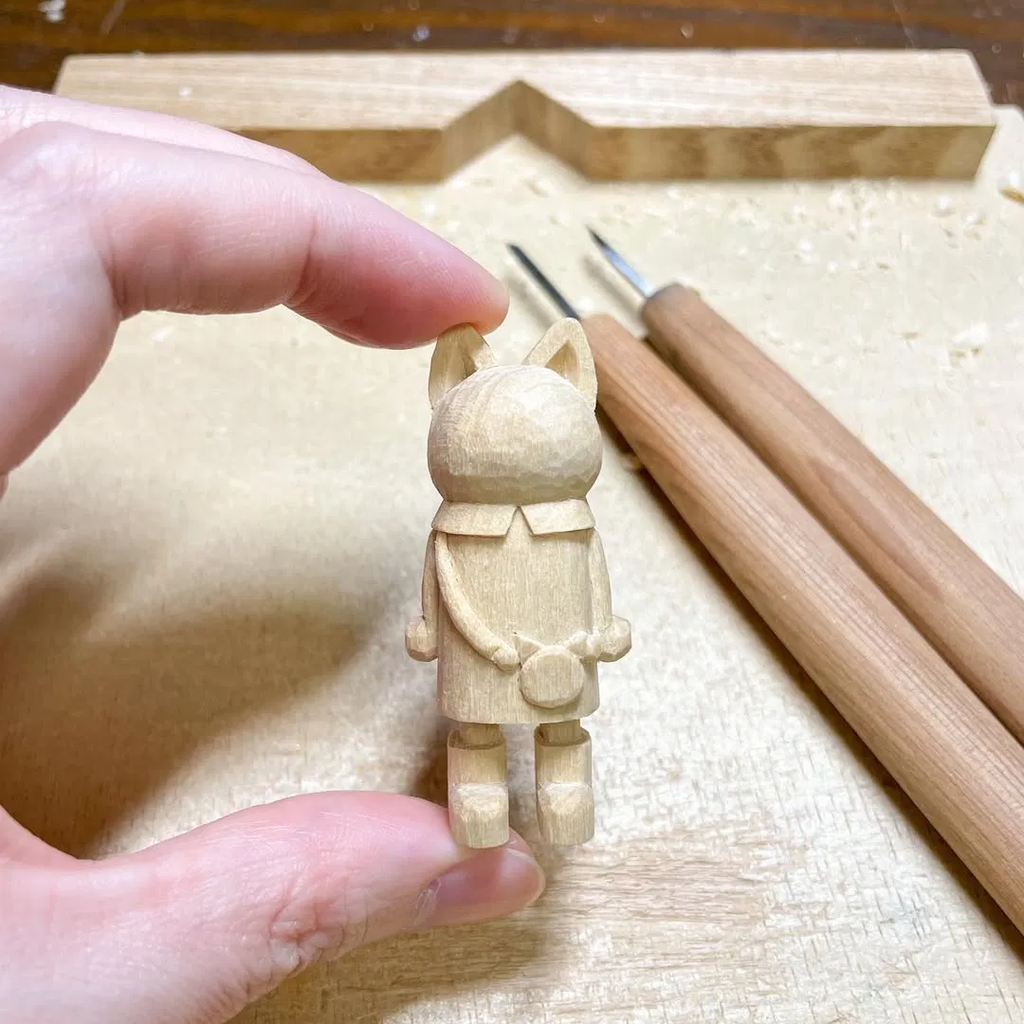
Beginner tip: This is a wonderful example of how a complicated-looking figure is really just a stack of simple shapes: a ball for the head, a tall block for the body, and two short blocks for the boots.
18. Tiny Sitting Cat: Small Enough to Pinch, Sweet Enough to Keep
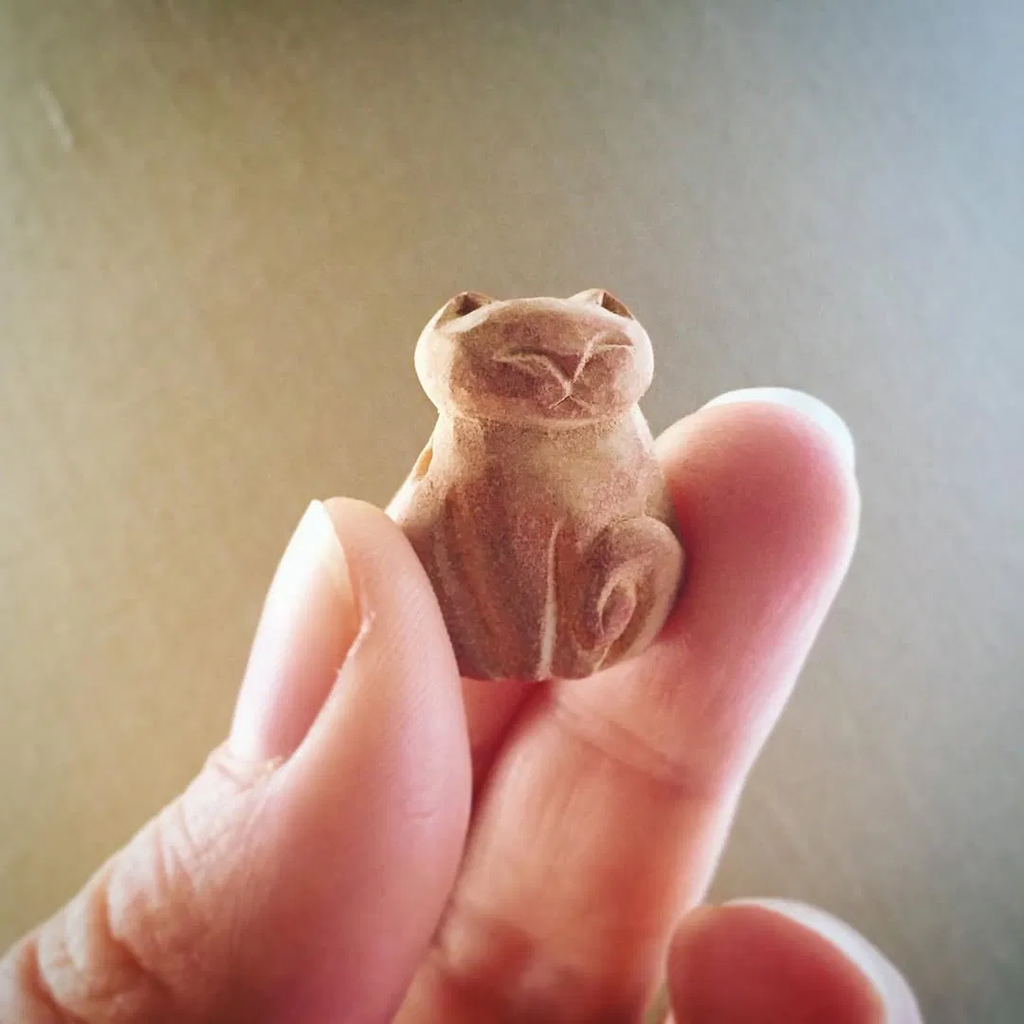
Beginner tip: Small pieces like this look delicate, but the design is very forgiving. It has no legs or other thin parts, just a rounded body with a few shallow lines for the tail and face.
19. Cat Keychain Charm: Carry a Shy Little Friend Everywhere You Go
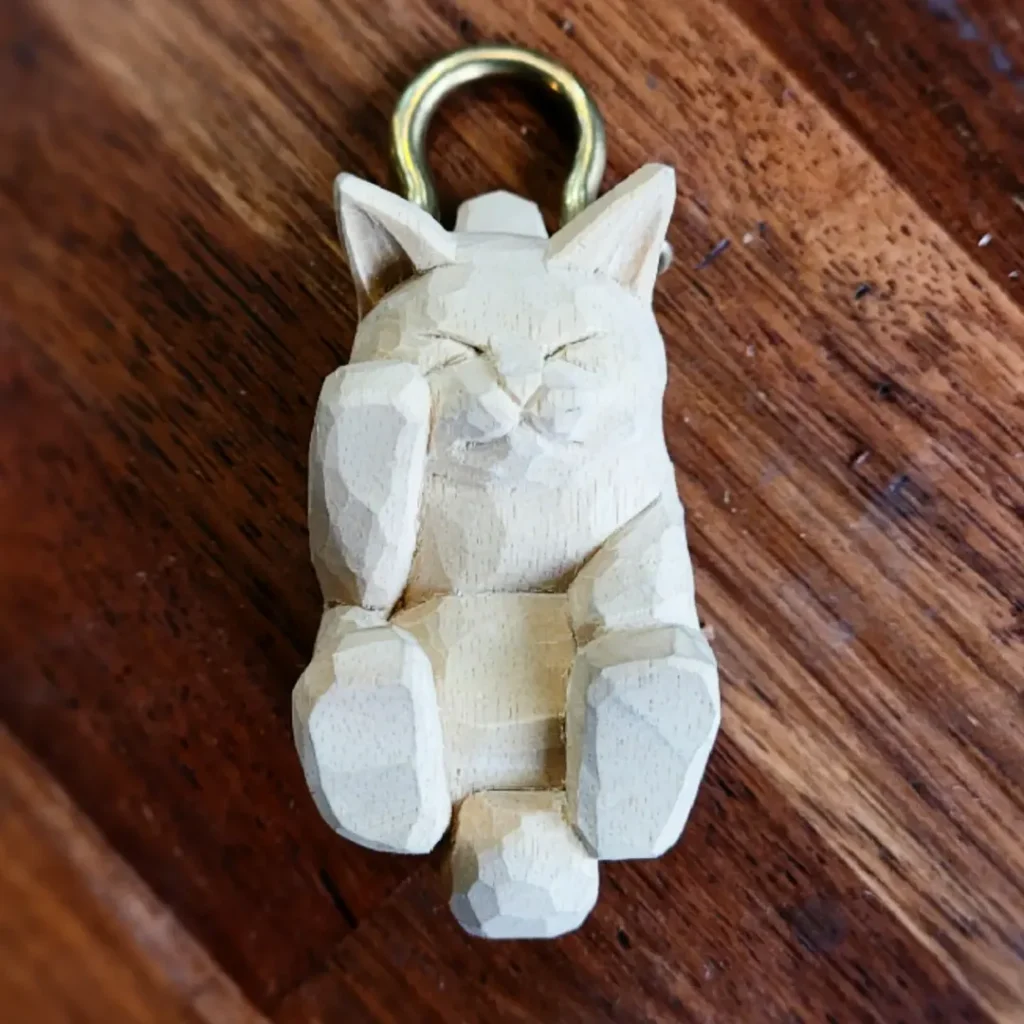
Beginner tip: This is a great model for amateurs because it’s all chunky, rounded shapes with nothing thin to snap. Carve the head, the raised paw, and the two big feet as simple, blocky forms, and mark the face with a few light lines.
20. Two Standing Cats: The Chatty Pair to Aim for Next
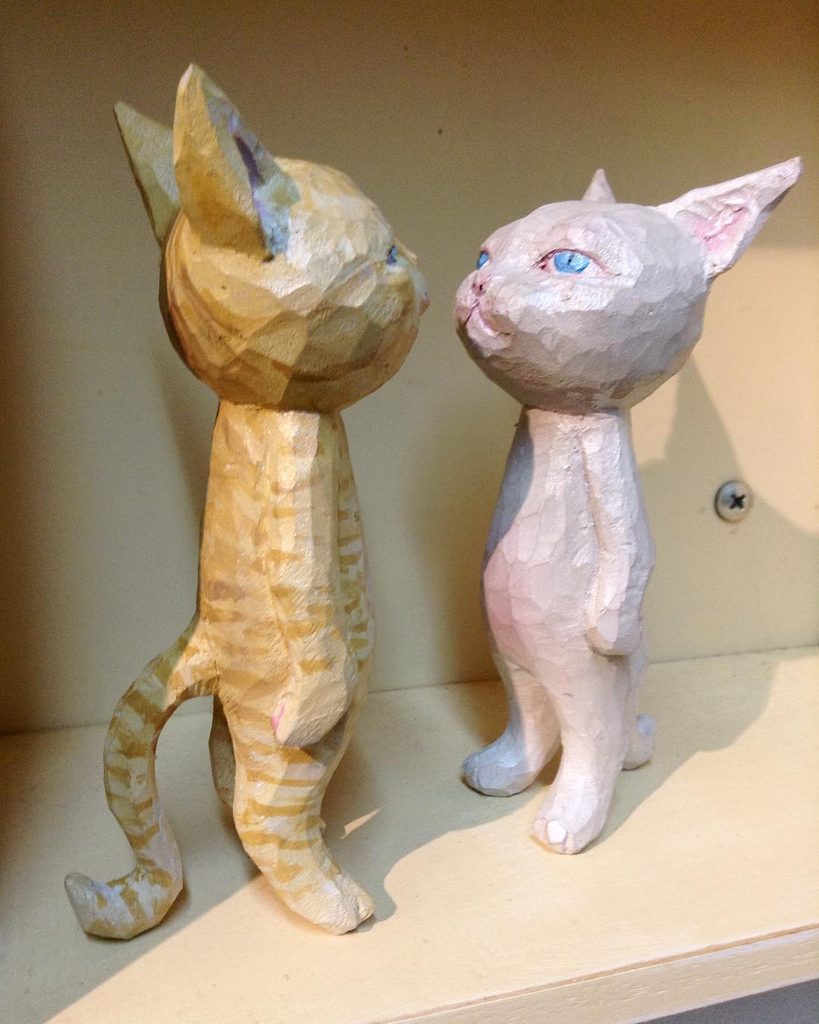
Beginner tip: This is a more advanced design, so I’d present it as a “next level” idea. The tall, thin legs, long tails, and large ears are easy to snap, and the standing pose takes careful planning.
Tips for Carving Better Cats (goes after idea #20)
Always carve with the grain rather than against it. If the wood starts to tear or split instead of slicing cleanly, turn the piece around and cut from the other direction. Take small, controlled cuts rather than big ones, since you can always remove more wood but you can’t put it back.
Keep thin parts chunky, especially ears, tails, and legs. Wood is weakest across the grain, so a thin ear or tail that runs across it can snap with a single careless cut. If in doubt, leave it thicker than you think it needs to be, then refine it at the very end.
Strop your knife every 15 to 20 minutes of carving. A blade that glides through the wood gives you cleaner facets and far more control. When it comes to painting, thin your acrylics with water so they soak in like a stain and let the knife marks show through. Our guide on how to seal and paint basswood covers this in more depth. For tiny details like whiskers, stripes, and eyes, a fine-tip pen or a wood-burning tool is often easier and neater than carving.
Finally, keep your first cat, however lumpy it turns out. Looking back at it after your fifth or sixth carving is one of the best ways to see how far you’ve come.
Frequently Asked Questions
What is the best wood for carving cats?
Basswood is the most popular choice for beginners because it’s soft, carves smoothly, and holds detail well. Butternut, aspen, and white pine are also good options if basswood is hard to find, and if you end up with a harder piece, there are easy ways to soften wood for carving.
How long does it take to carve a simple cat?
A small, chunky sitting or sleeping cat can usually be finished in a few hours, or over two or three evenings if you’re brand new. Pieces with hollowing, like spoons and bowls, take longer.
Do I need to sand my cat carving?
No. Many carvers deliberately leave the flat, faceted knife cuts visible, a style closely linked to Scandinavian flat-plane carving. Sanding is a personal choice, and a coat of paint or oil looks great over tool marks.
Conclusion
Cats make the perfect first carving because they reward simple shapes, forgive small mistakes, and come to life with just a few cuts and a dab of paint. Start with a curled-up sleeper or a chunky sitting cat, then work your way toward the spoons, pendants, and standing figures as your confidence grows. Before long, you’ll have a whole shelf of little wooden cats, each with its own personality. And if you’d like a spooky black cat for October, our simple Halloween carving ideas have you covered.
