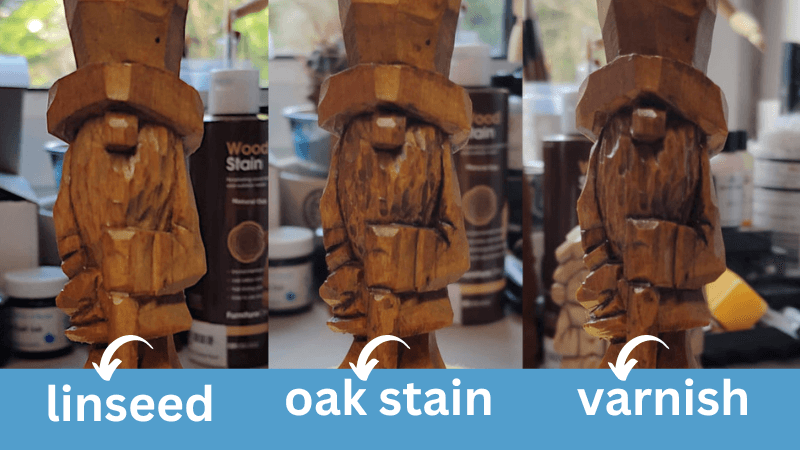
Staining wood to enhance its color and beauty is a popular technique in wood finishing. However, when it comes to staining over a base coat of linseed oil, there is a scarcity of information available online. In this article, we will explore the concept of finish compatibility and delve into the possibility of applying stain over linseed oil to achieve stunning results.
Staining over Various Finishes:
Staining over existing finishes offers a fascinating way to add color to wood, particularly for clear finishes. This technique, known as glazing, allows the initial finish’s color to be transformed by applying a layer of stain on top. Glazing has long been a well-kept secret among professional finishers but is now gaining popularity among amateur enthusiasts, thanks to the wealth of information available on the internet.
Staining over Linseed Oil:
Can you successfully apply this technique over a linseed oil base coat? The answer is a resounding yes! Linseed oil serves as an excellent base coat for staining. Its inherent characteristics, such as its ability to penetrate deeply into the wood and enhance the natural grain, make it an ideal foundation for the glazing process.
To achieve the best results when staining over linseed oil, follow these steps:
- Prepare the Wood Surface: Ensure that the wood is clean, smooth, and free from any dust or debris. Sanding the surface lightly with fine-grit sandpaper can help create an even base for the stain.
- Choose the Right Stain: Select a high-quality stain that is compatible with linseed oil. Water-based stains or gel stains are often recommended for their ease of use and compatibility with various finishes.
- Test the Stain: Before applying the stain to the entire surface, it is crucial to conduct a test on a small, inconspicuous area. This will help you assess the color and ensure that the stain interacts well with the linseed oil base coat.
- Apply the Stain: Using a clean cloth, foam brush, or applicator pad, apply the stain evenly over the linseed oil base coat. Work in the direction of the wood grain, allowing the stain to penetrate and achieve the desired color. Remove any excess stain to avoid blotching or uneven coloration.
- Evaluate and Adjust: After applying the stain, evaluate the results. If the desired color intensity has not been achieved, you can repeat the staining process to deepen the hue. However, remember that the color will deepen further with subsequent coats, so proceed with caution.
- Allow for Drying and Curing: Once you have achieved the desired color, allow the stain to dry completely. Follow the manufacturer’s instructions regarding the recommended drying time. After drying, protect the stained wood with a suitable topcoat, such as varnish or polyurethane, to enhance its durability and longevity.
Note Better

Performing a test on a scrap piece of wood before applying any finishes can provide valuable information about the potential outcomes. When using a combination of linseed oil, stain, and a topcoat, it’s important to note that the wood may end up slightly darker than anticipated. To minimize the risk of an undesirable outcome, it’s advisable to conduct the entire process on the test piece first. This way, you can assess the final result and make an informed decision before committing to the same approach on your main project.
See: Sanding sealer before stain
Conclusion: Stain over linseed oil
Incorporating the glazing technique by staining over a linseed oil base coat can yield exceptional results in wood finishing. The compatibility of linseed oil with various stains allows you to enhance the natural beauty of the wood while adding your desired coloration. By following the proper preparation and application techniques, you can achieve the best of both worlds, creating a stunning finish that showcases the wood’s grain and depth of color.