When it comes to staining wood, achieving precise control over stain penetration can be crucial in certain situations. Consider scenarios where minimizing or eliminating the contrast between the side grain and end grain becomes essential. Using a sanding sealer before staining wood can help control stain penetration and achieve a more even appearance.
In this article, we delve into the myriad advantages of utilizing a sanding sealer prior to staining, while providing step-by-step guidance on its correct application.
Advantages of Using a Sanding Sealer:
Sanding sealer can be used as a type of pre-stain conditioner. It helps to seal the wood pores and create a more uniform surface, which can result in more predictable stain absorption. Here are some advantages of using a sanding sealer and the correct process to follow:
Blotching prevention:
Wood species like pine or cherry are notorious for exhibiting blotchy stains when directly applied. However, the application of a sanding sealer acts as a protective barrier, sealing the wood fibers and minimizing uneven absorption of the stain. This process results in a more uniform color distribution, effectively reducing unsightly blotches. (more on that later)
Accentuated grain definition:
Wood pores play a significant role in the overall appearance of the grain. Employing a sanding sealer allows you to highlight and emphasize these natural features without altering the wood’s original color. By sealing the pores, the sealer creates a captivating contrast between the grain and the surrounding wood surface.
Color harmony:
Achieving a seamless color match between different wood pieces can be a challenge, especially when working with older floorboards or combining various wood types. However, with the aid of a sanding sealer, you can bridge the gap and create a cohesive look. By applying the sealer, two distinct woods can be made to resemble each other, fostering harmony and a unified aesthetic.
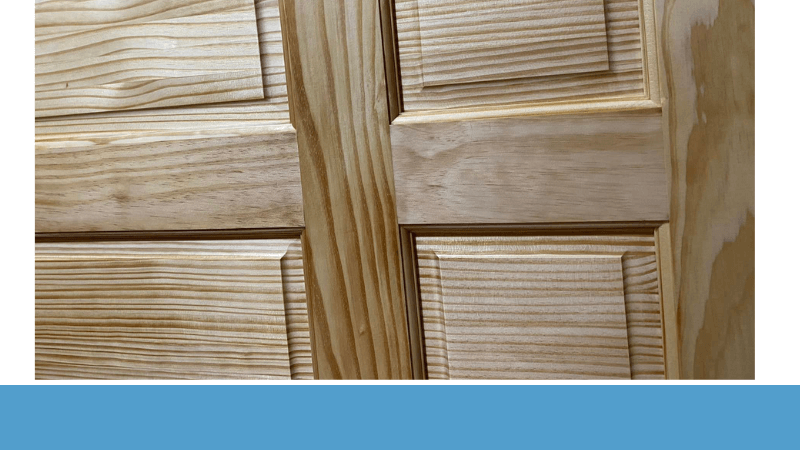
Minimized contrast between side and end grain:
In woodworking projects, the contrast between side grain and end grain can sometimes be jarring, resulting in an uneven appearance. To mitigate this issue, a sanding sealer proves invaluable. By applying the sealer before staining, you can control the penetration of the stain, effectively reducing or eliminating the noticeable contrast between the side grain and the end grain. The result is a more balanced and visually appealing finish.
How to use sanding sealer before staining
- Prepare the wood surface: Start by sanding the wood to a smooth and even finish. Remove any existing finish or debris and make sure the surface is clean and dry.
- Choose the appropriate sealer: Select a sanding sealer that is compatible with the type of stain you intend to use. Some sealers are specifically designed for water-based stains, while others work well with oil-based stains.
- Application: Apply the sanding sealer evenly to the wood surface using a brush, cloth, or sprayer. Follow the manufacturer’s instructions regarding the recommended application method and drying time. (For a more detailed guide see Applying Sanding Sealer)
- Sanding: Once the sealer has dried completely, lightly sand the wood surface with fine-grit sandpaper, such as 220-grit, to smooth out any raised wood fibers or imperfections. This step helps create a smooth and uniform surface for stain application.
- Stain application: After sanding, you can proceed with applying the stain. The sanding sealer should have minimized uneven absorption, allowing for a more controlled and predictable staining process.
- Finishing: Once the stain has dried according to the manufacturer’s instructions, you can apply a protective finish, such as varnish or polyurethane, to seal and protect the wood.
Problematic woods to stain can be sealed first
Indeed staining certain types of wood, such as oak and pine, achieving an even and consistent result can be a daunting task. These woods have a tendency to develop splotches and uneven coloration when stained directly. However, there is a solution: sealing the wood before applying the stain. By using a sanding sealer as a preliminary step, you can gain better control over how the wood surface interacts with the stain, thereby minimizing the risk of excessive absorption and resulting in a more uniform finish.
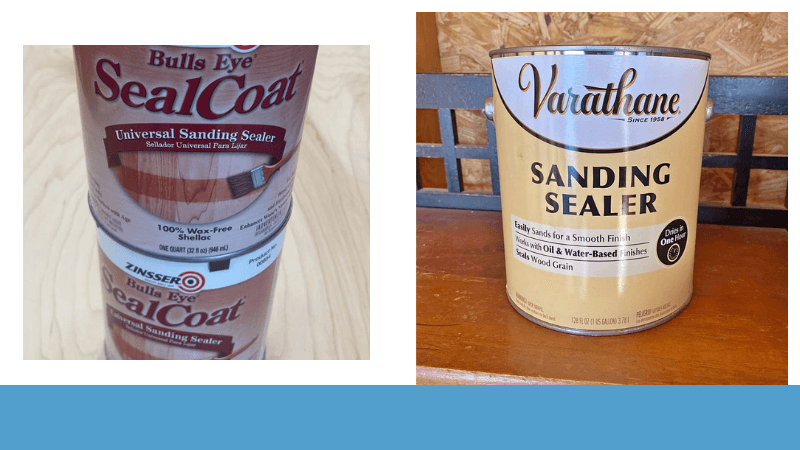
What sanding sealer to use before staining
There is a common misconception that a special sealer must be used because the finish alone cannot adequately seal the wood. However, this belief is not entirely accurate. In fact, the first coat of any finish possesses sealing properties and can serve as a sealer itself. The only exceptions to this rule, as mentioned earlier, are varnish and lacquer, which can be challenging to sand.
When a finish is applied to wood, it penetrates the surface, undergoes a curing process, and effectively seals the wood pores. This sealing action occurs as the finish forms a protective barrier that prevents liquids, including subsequent coats of finish, from permeating through the cured first coat. Therefore, in most cases, utilizing the initial coat of finish as a sealer is sufficient for sealing the wood and preparing it for further finishing layers.
Using Shellac as a Sealer before staining wood:
When dealing with certain types of wood, such as pine, which poses challenges due to its resinous nature, using shellac as a sealer can be highly beneficial. Shellac can be either sprayed or brushed onto bare wood to create a protective seal before applying the stain. Its unique properties make it an effective solution for addressing drying and bonding issues associated with resinous woods like pine.
By applying shellac as a sealer, you effectively lock in the challenges posed by the wood’s resin content, creating a trouble-free surface that is ready to receive the stain. The shellac forms a barrier, preventing the resin from interfering with the stain application and ensuring a more even and predictable result.
Once the wood has been sealed with shellac, you have a couple of options for proceeding with the staining process. Firstly, you can apply the stain as a glaze over the shellac-sealed surface. This method allows the stain to highlight the wood’s natural grain and color while benefiting from the protective seal provided by the shellac.
Alternatively, you can choose to tone the topcoat finish by mixing your desired stain into the finishing product. This approach allows you to achieve a custom color while still taking advantage of the sealed surface provided by the shellac.
In either case, using shellac as a sealer offers several advantages. It not only mitigates the potential issues caused by the resinous nature of certain woods but also creates a stable and well-prepared surface for the stain application. By incorporating shellac into your wood finishing process, you can ensure a smoother and more successful staining experience.
Will a sanding sealer change the shade of a stain?
The use of a sanding sealer before staining can potentially alter the shade of the stain. Generally, a sanding sealer tends to make the stain appear lighter compared to applying the stain directly on the bare wood. This is because the sealer forms a barrier on the wood surface, reducing the stain’s absorption and penetration into the wood fibers. As a result, the color intensity of the stain may be slightly muted or appear lighter when applied over a sealed surface. It is important to consider this effect when selecting and testing stains to achieve the desired color outcome.
Sanding sealer vs wood conditioner
Sanding Sealer: Enhancing the Finishing Process
Sanding sealer serves as the first coat for finishes with poor sanding qualities, such as varnish or lacquer. Its primary goal is to create a smooth and even surface for subsequent layers of finish. By sealing the wood surface, it fills in pores and imperfections, resulting in a refined final finish. While it can offer some stain control, its main function is to facilitate the sanding process and promote a flawless finish for clear coatings.
Wood Conditioner: Achieving Even Stain Absorption
Wood conditioner is specifically formulated as a pre-stain treatment for certain types of wood, particularly those prone to uneven stain absorption and blotching. Its purpose is to limit the penetration of stain into the wood fibers, ensuring a more consistent and uniform color when staining. By reducing the appearance of blotches, wood conditioner allows for a more even stain application, especially on porous wood species like pine or maple.
Choosing the Right Product for Your Needs
While sanding sealer and wood conditioner can be used interchangeably to some extent, understanding their primary functions can help you select the most suitable product for your specific requirements. If you aim to achieve a flawless finish on a varnish or lacquer coat, sanding sealer is the ideal choice. On the other hand, if you’re working with wood that tends to absorb stain unevenly, using a wood conditioner prior to staining will help you achieve a more consistent and desirable result.
Can you use sanding sealer before staining?
Yes, using a sanding sealer before staining is a common and recommended practice in woodworking. Sanding sealer serves as a preparatory step to ensure a smoother and more even staining process. It helps to seal the wood’s surface, minimizing absorption and allowing for better control over the stain’s application.
By applying a sanding sealer, you can reduce grain raising, which can lead to a rough and uneven stain finish. Additionally, it helps to seal off any resins, oils, waxes, or odors present in the wood, preventing them from interfering with the staining process.
However, it’s important to note that certain finishes, such as varnish and lacquer, may require specific sanding sealers due to their sanding challenges. Overall, incorporating a sanding sealer into your wood finishing routine can greatly enhance the results, promoting a more professional and visually appealing outcome.