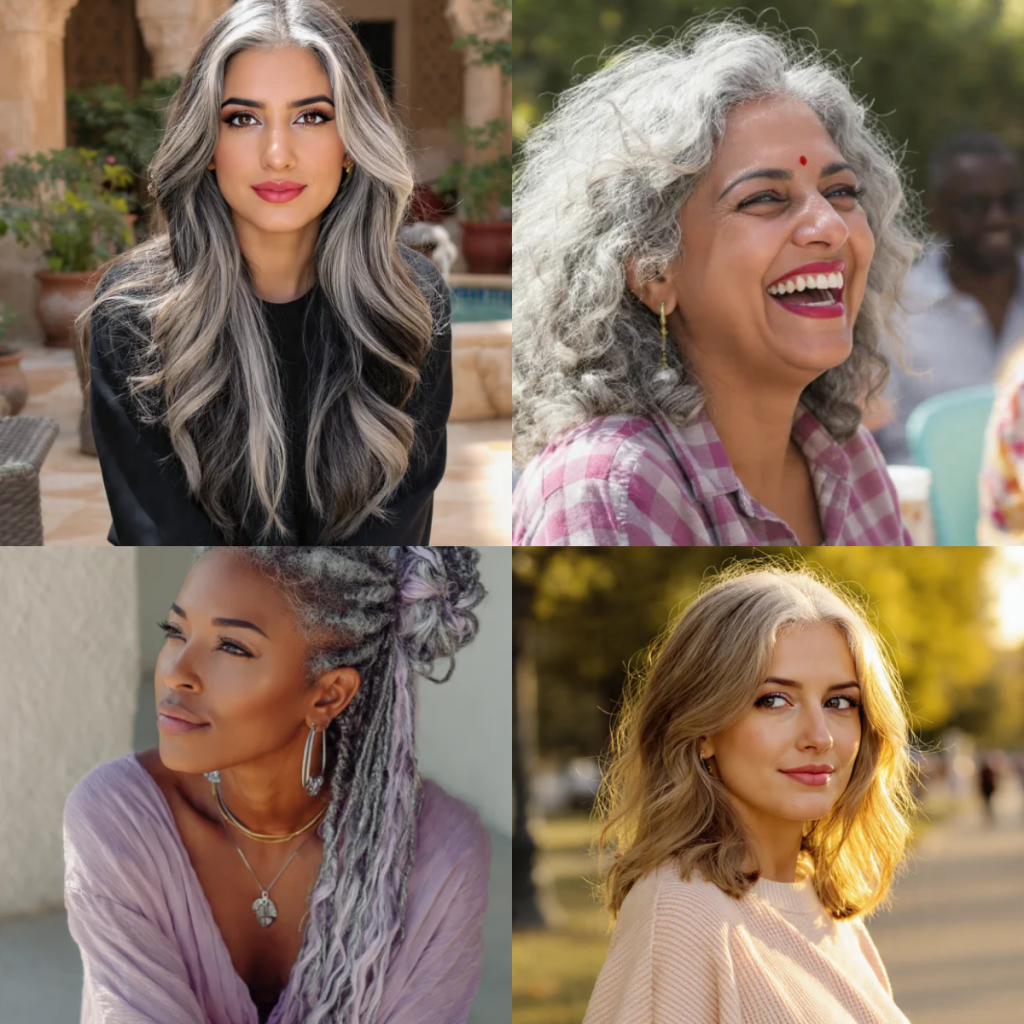
Gone are the days when gray hair was something to “cover up” or “fix.” Today, silver strands are celebrated as a symbol of confidence, wisdom, and natural beauty. Whether you’re fully embracing your natural gray, transitioning from dyed hair, or simply looking to add dimension to your existing silver mane, highlights are the secret weapon you need.
Unlike all-over color, highlights work with your gray hair—breaking up harsh root lines, adding texture, and creating a shimmering, multi-tonal effect that looks intentional and luminous. From icy platinum streaks to warm caramel ribbons, here are 9 well-structured ideas to inspire your next salon visit.
How to Choose the Right Highlighting Technique for Your Gray Hair
With so many options, it can feel overwhelming. Use this quick decision guide:
- Low maintenance? → Root Shadow + Bright Ends (Idea 9) or Reverse Gray Lowlights (Idea 6)
- First time highlighting gray? → Baby Lights (Idea 2) or Salted Caramel (Idea 3)
- Want to look younger instantly? → Money Piece Highlights (Idea 4)
- Love bold, edgy styles? → Peek-a-Boo Gray (Idea 5) or Chunky Silver Streaks (Idea 7)
- Playing with fashion colors? → Pastel Tint-Over Highlights (Idea 8)
- Fully gray and want elegance? → Icy Melt (Idea 1)
9 well-structured ideas to inspire your next salon visit:
1. The Icy Melt: Seamless Silver-to-White Blending
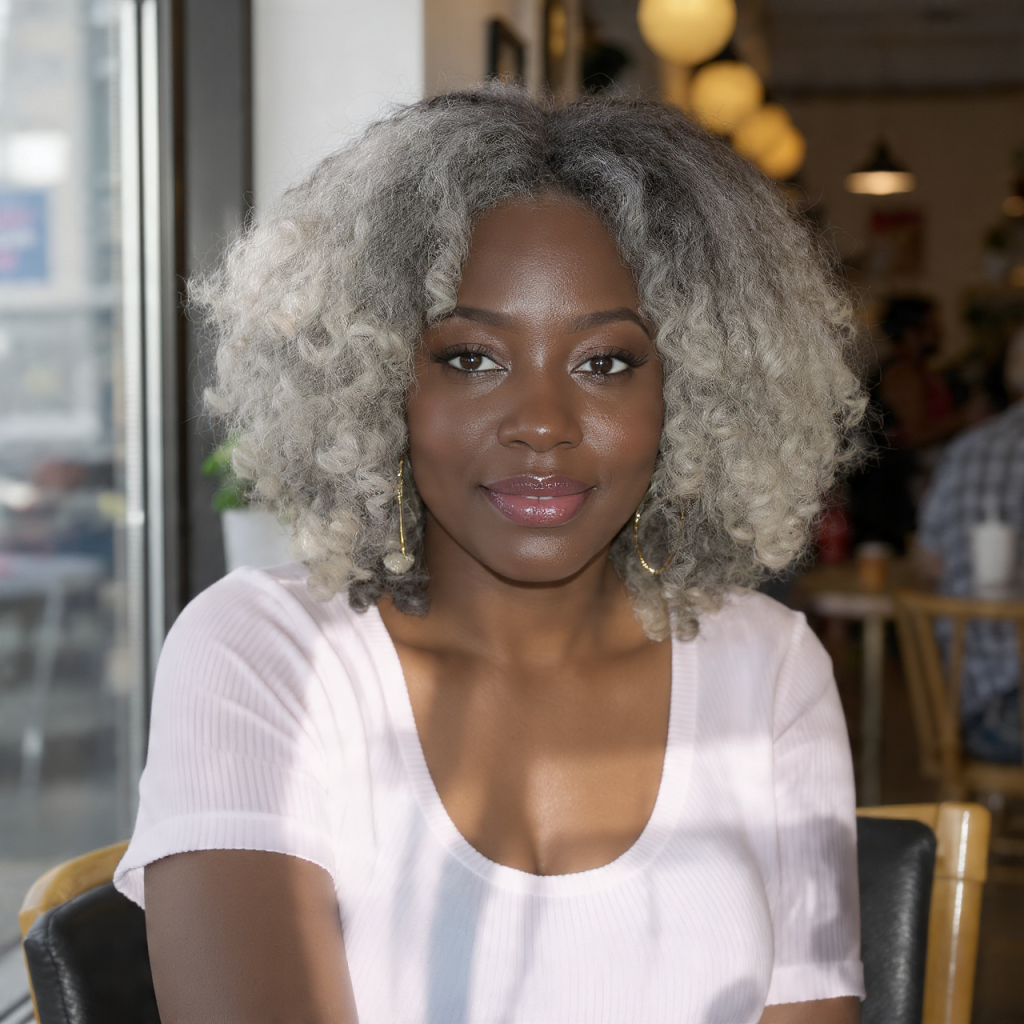
Best for: Those with 50% or more gray who want a uniform, icy look.
Instead of hiding your gray roots, this technique embraces them. Your stylist will paint ultra-fine, icy white highlights through the mid-lengths and ends, creating a “melted” gradient from your natural silver roots to a cool, bright white finish. The result is a high-glam, low-maintenance style that grows out beautifully.
2. Baby Lights: The Subtle Gray Blur
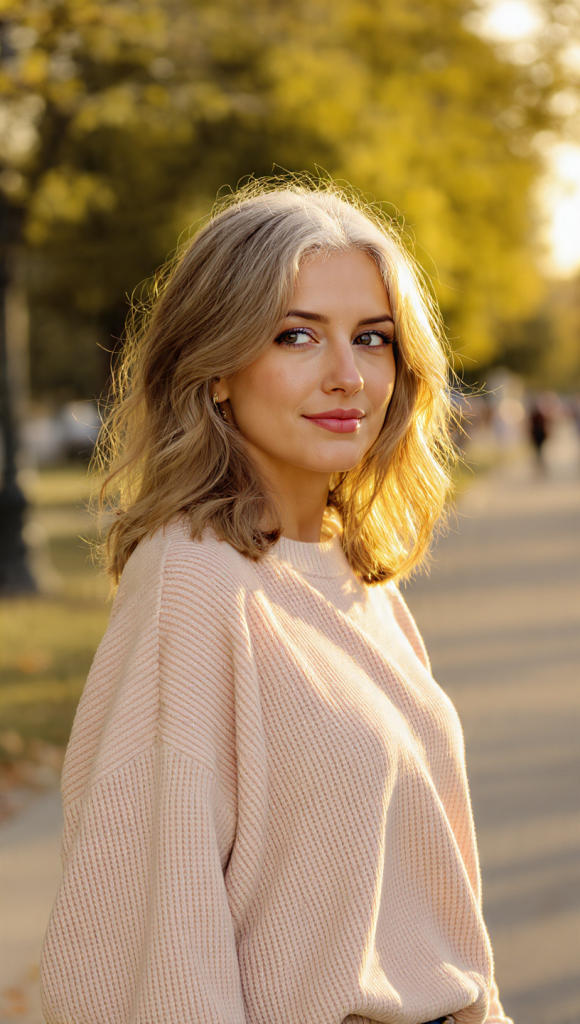
Best for: First-timers nervous about commitment.
Baby lights are super-fine, delicate highlights (thinner than traditional foils) that mimic the natural sun-kissed variation in children’s hair. When applied to gray hair, they blur the line between your silver strands and any remaining pigmented hair. The effect is incredibly soft, natural, and dimensional—perfect for a gentle introduction to gray highlighting.
3. Salted Caramel: Warm Tones on Cool Silver
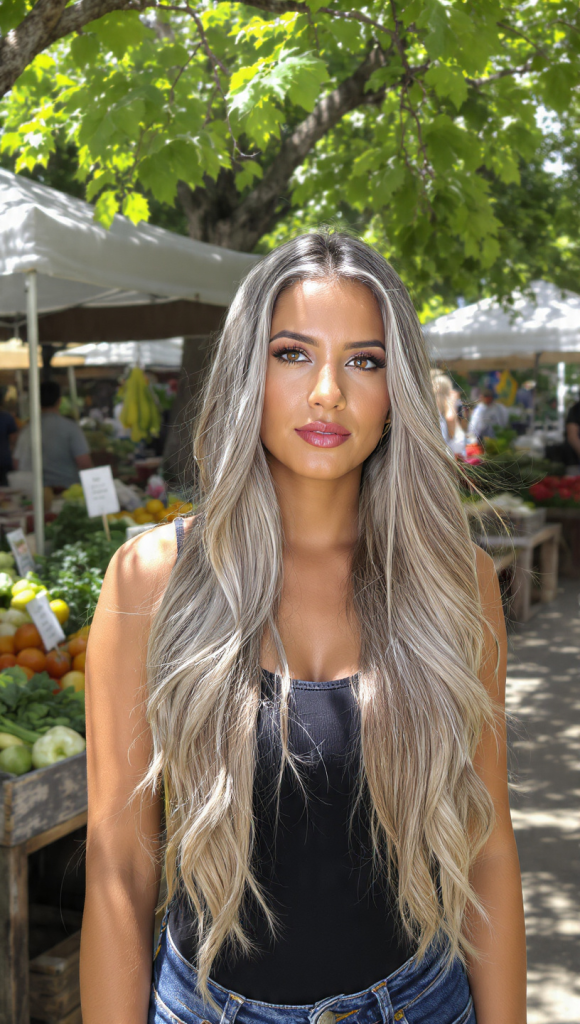
Best for: Warm skin tones and those missing their old blonde or brown hues.
Contrary to popular belief, gray hair looks stunning with warm highlights. Ask your colorist for thin ribbons of beige, champagne, or soft caramel woven through your gray base. The contrast between the cool silver and warm caramel creates a “salted caramel” effect—rich, appetizing, and surprisingly modern. It softens the face and adds instant warmth.
4. The Gray Luminate: Money Piece Highlights

Best for: Framing the face and brightening your complexion.
A “money piece” refers to the face-framing strands at the front of your hair. On gray hair, painting these sections with an even brighter, almost platinum silver highlight creates a halo effect around your face. It’s a small detail with a big impact—instantly lifting your features and making your eyes pop. No full-head color required.
5. Peek-a-Boo Gray: Hidden Depth

Best for: The bold and experimental.
This technique places bright silver or white highlights underneath the top layer of your hair (the “underlights”). When your hair is down, they remain hidden secrets. But when you twist your hair up, tie a ponytail, or move in the wind, those bright gray streaks flash into view. It’s edgy, unexpected, and perfect for anyone who loves an element of surprise.
6. Reverse Gray Highlights (Lowlights)
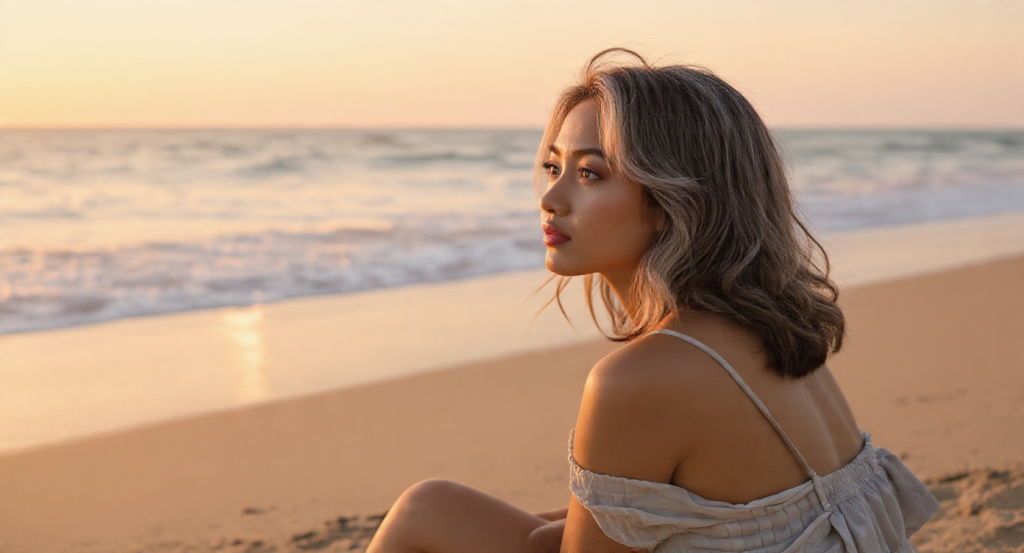
Best for: Transitioning from fully dyed hair to natural gray.
If you’ve been coloring your hair dark for years, adding silver highlights directly on top can look harsh. Instead, try reverse highlighting: add a few soft, ash-brown or charcoal lowlights into your growing gray roots. This breaks up the harsh demarcation line, softens the transition, and adds depth to flat, all-over gray. Think of it as training wheels for going natural.
7. The Silver Sable: Chunky ’90s Streaks
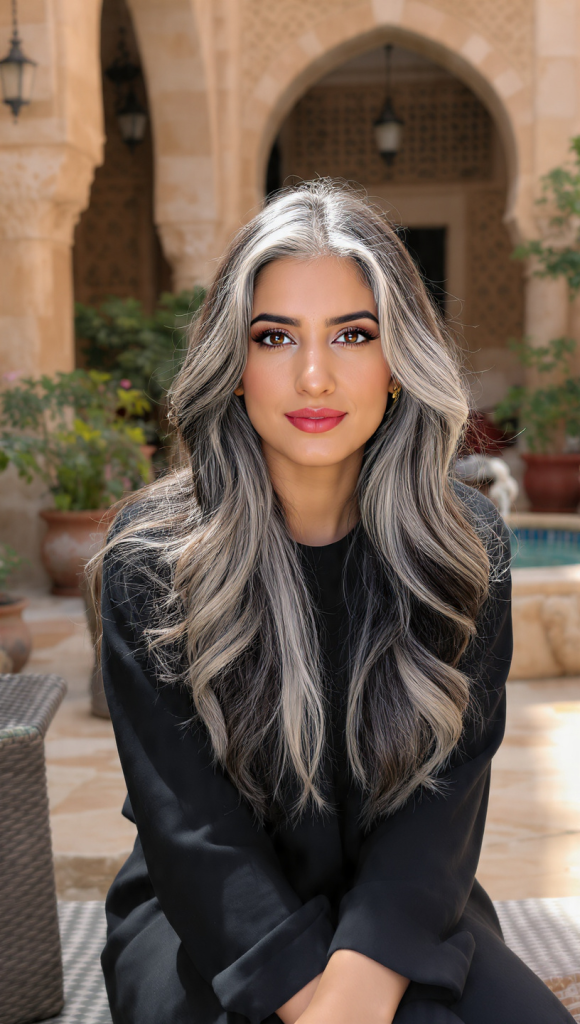
Best for: Retro lovers and high-contrast looks.
Everything old is new again. Take inspiration from the chunky, bold streaks of the 1990s—but update the color. On a dark salt-and-pepper base, apply thick, deliberate ribbons of pure silver-white. This creates a graphic, high-contrast look that is both nostalgic and fashion-forward. It works best on straight or gently waved hair where the streaks can really show off.
8. Pastel Gray Tint-Over Highlights
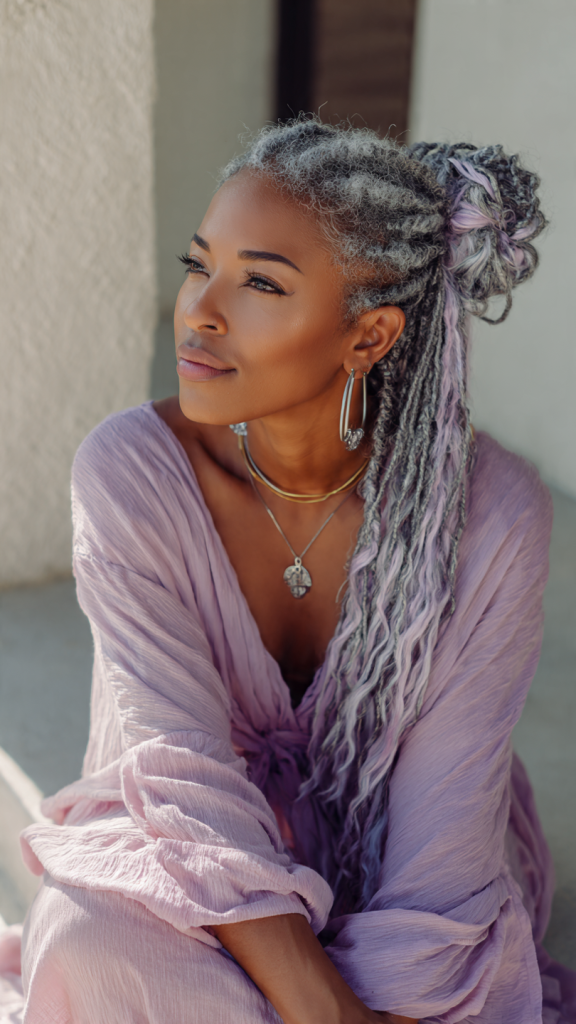
Best for: Creative spirits who love temporary color.
First, add a set of crisp platinum or white highlights. Then, apply a semi-permanent pastel toner (think lavender, baby blue, or soft rose gold) over just the highlighted strands. Because gray hair acts like a clean white canvas, pastels show up beautifully but fade out gracefully in 4–6 washes. It’s a low-commitment way to play with color without damaging your natural gray.
9. Root Shadow + Bright Ends

Best for: Low-maintenance lifestyles.
Keep your natural dark or salt-and-pepper roots untouched. Then, from the mid-shaft to the ends, paint thick, bright silver or white highlights. This creates a “root shadow” effect—your natural color acts as a smudged, grown-out shadow at the top, while the ends shine bright. You can easily go 3–4 months between salon visits without any visible regrowth lines.
The Difference Between Highlights and Lowlights on Gray Hair
Many women confuse these two terms. Here’s the simple breakdown:
| Highlights | Lowlights |
|---|---|
| Lighter than your natural gray | Darker than your natural gray |
| Add brightness and shimmer | Add depth and contrast |
| Best for making gray look intentionally silver | Best for breaking up solid gray that looks flat |
| Ideal for warm skin tones (using champagne/beige) | Ideal for cool skin tones (using ash brown/charcoal) |
Pro tip: The most natural-looking gray hair often uses both. Highlights add life; lowlights add dimension. Ask your stylist for a “combination weave.”
Pre-Salon Preparation: Getting Ready for Gray Highlights
Before you book your appointment, do these three things:
- Stop using purple shampoo for one week. Purple shampoo can deposit tint that interferes with how your colorist reads your natural gray.
- Bring 3–5 reference photos. Words like “icy” or “caramel” mean different things to different stylists. Photos are universal.
- Do a strand test if your hair is damaged. Gray hair can be more porous. A strand test shows how your hair will lift and take color.
- Wash your hair 24–48 hours before. Natural oils protect your scalp during the highlighting process. Don’t come in with freshly washed hair.
Aftercare: Keeping Gray Highlights Bright and Healthy
Gray highlights require specific care to stay brilliant and avoid turning yellow or brassy.
Do This:
- Use purple shampoo once a week to neutralize yellow tones
- Apply a leave-in conditioner with UV protection (gray hair is more prone to sun yellowing)
- Book toner gloss appointments every 6–8 weeks to refresh brightness
- Use silk or satin pillowcases to reduce friction and fading
Avoid This:
- Heat styling without a protectant (gray hair is more fragile)
- Swimming in chlorinated water without a swim cap or pre-wetting
- Hard water (install a shower filter if your area has hard water)
Product recommendations to ask your stylist about: Blue/purple masks, bonding oils, and silver-enhancing glosses.
Frequently Asked Questions About Gray Hair Highlights
Q: Will highlights damage my gray hair?
A: Any chemical process causes some stress, but a skilled colorist using low-volume developer (10 or 20 vol) can highlight gray hair safely. Regular deep conditioning is essential.
Q: How long do gray highlights last?
A: Permanent highlights last until they grow out (8–12 weeks before roots show). Semi-permanent toners on top of highlights fade in 4–6 weeks.
Q: Can I highlight heavily dyed gray hair?
A: Yes, but if you’ve been using permanent dark dye, you may need a color remover or a transition period with lowlights first. Consult a professional.
Q: Will highlights cover my gray roots?
A: No—highlights are streaks of color, not full coverage. For full root coverage, you need all-over color. Highlights are best for dimension, not hiding gray.
Q: Is it expensive to maintain gray highlights?
A: More than single-process color, less than full foil highlights on virgin hair. Budget for a partial highlight every 10–12 weeks plus toner glosses in between.
Q: Can I do gray highlights at home?
A: Strongly not recommended. Gray hair lifts unpredictably, and foil placement requires professional skill. At-home kits often result in orange, patchy, or damaged results.
When to Consult a Professional (And When to Wait)
Book a consultation immediately if:
- You have more than 30% gray hair
- You’ve never had highlights before
- Your hair is previously bleached or permed
- You want to transition from dark dye to natural gray
You can wait (or DIY is safer) if:
- You have less than 20% gray and just want subtle dimension
- You’re only adding a few face-framing pieces
- You’re using a temporary spray or powder for a single event
Red flags your stylist should watch for: Excessive porosity, uneven gray patterning, or previous metallic salt dyes (common in box colors from the 80s/90s).
Conclusion
Gray hair is not a problem to be solved—it’s a canvas to be celebrated. The right highlights can transform flat, dull silver into a multidimensional masterpiece that catches the light and turns heads. Whether you choose the subtle whisper of baby lights, the warm embrace of salted caramel, or the bold drama of chunky silver streaks, there is a highlighting technique for every personality, every skin tone, and every lifestyle.
Remember these key takeaways:
- Highlights add brightness; lowlights add depth. Use both for the most natural look.
- Maintenance matters. Purple shampoo, regular toning, and UV protection keep your silver shining.
- Work with your natural gray, not against it. The most stunning results honor your unique pattern of silver strands.
Your gray hair tells a story of experience, confidence, and authenticity. Highlights simply help that story shine a little brighter. Book that consultation, bring your inspiration photos, and walk out of the salon feeling not covered up—but fully, brilliantly seen.
Your silver era has arrived. Wear it proudly.
