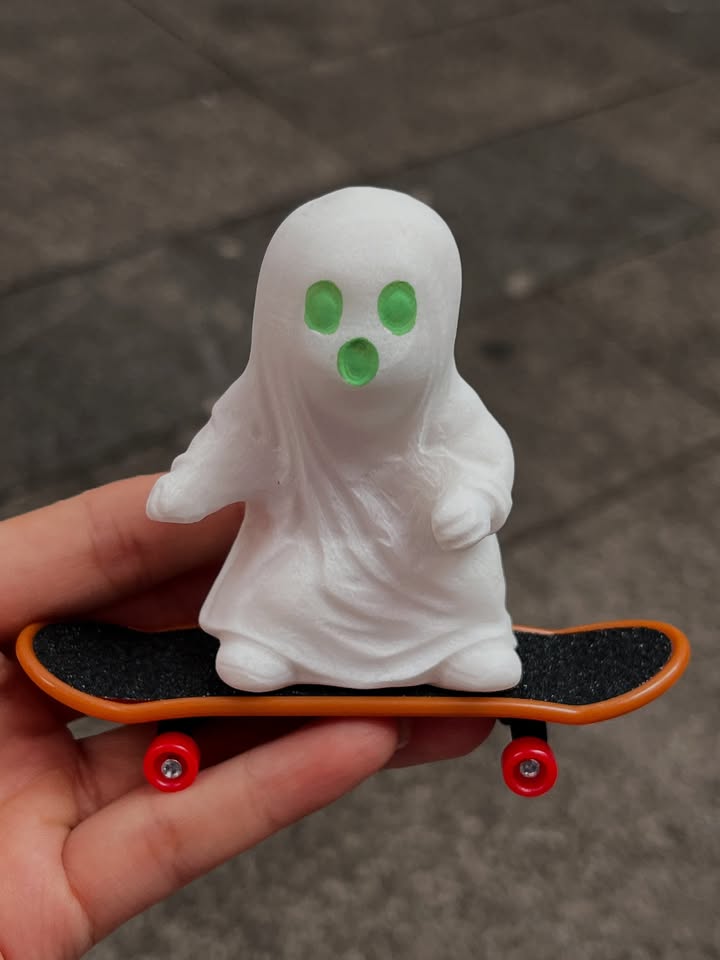
Meta description: Looking for easy Halloween woodcarving projects? These 20 simple Halloween carving ideas, from tiny ghosts to log pumpkins, are perfect for beginners and can be finished in an evening.
Pumpkins rot within a week. A carved wooden ghost can sit on your shelf every October for the next thirty years. That’s the quiet appeal of Halloween woodcarving: you get the same spooky, cozy fun as pumpkin night, but you end up with a keepsake instead of a mushy porch step.
The good news is that you don’t need a workshop full of tools or years of experience. Most of the projects below start from a small block of basswood and a single carving knife, and many of them can be finished in one or two sittings. They’re arranged roughly from easiest to slightly more involved, so if you’re brand new, start at the top and work your way down.
What You’ll Need
You can check out Best Whitling Kits for Beginners
For nearly every project on this list, the basics are a sharp carving knife, a pencil, a few basswood blocks, and a cut-resistant glove for the hand holding the wood. Basswood is the go-to choice because it’s soft, has a tight even grain, and holds detail without splitting. Pre-cut blanks in sizes like 1″ x 1″ x 3″ and 2″ x 2″ x 4″ are inexpensive and save you from having to cut your own.
A leather strop with honing compound will keep your knife sharp as you work, which matters more than most beginners realize, because a dull blade is harder to control and more likely to slip. A small V-tool and a small round gouge are helpful for a few of the projects but aren’t essential to get started. For finishing, thinned acrylic paints and a coat of Danish oil or paste wax will cover everything here.
20 Simple Halloween Carving Ideas
1. Candy Corn
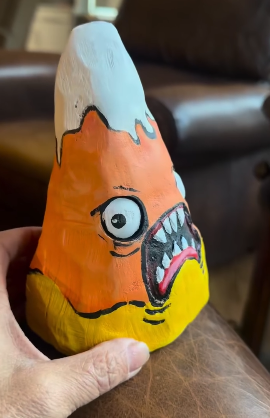
If you’ve never carved anything before, candy corn is the perfect first project. It’s essentially a rounded triangle with a flat bottom, so there’s very little that can go wrong. Start with a 1″ x 1″ x 2″ blank, draw the triangle shape on two sides, and whittle away the corners until it has soft, puffy edges.
The real magic happens with paint. A yellow base, an orange middle band, and a white tip instantly make it recognizable. Carve a whole bowlful and mix them in with the real candy for a fun party prank.
Blank: 1″ x 1″ x 2″ basswood · Time: under an hour
2. Floating Ghost
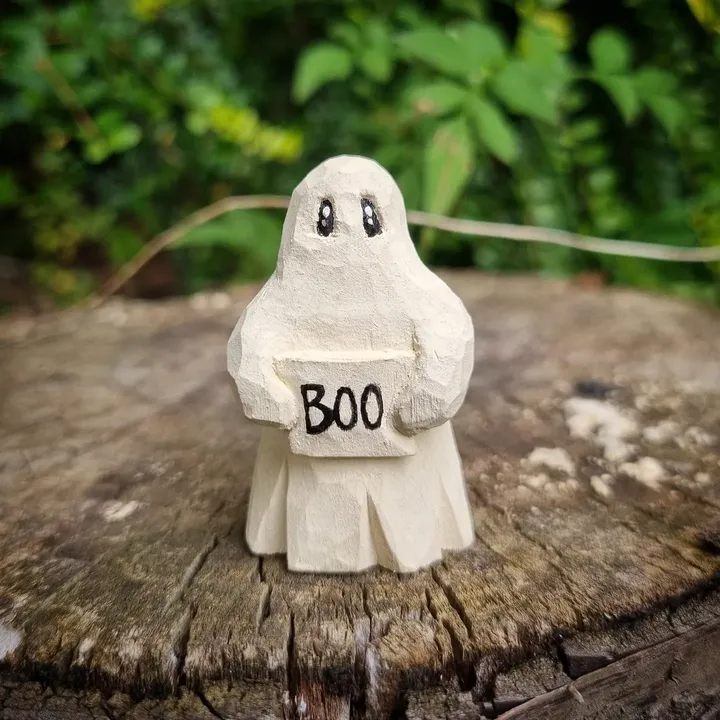
A ghost is basically a teardrop with a wavy hem, which makes it one of the most forgiving carvings you can attempt. Using a 1″ x 1″ x 3″ blank, round off the top into a dome, then taper the body slightly toward the bottom and cut a few shallow scallops along the base to suggest flowing fabric.
For the face, you can either drill two small holes for eyes and a larger one for a surprised “O” mouth, or simply paint them on in black. Leaving the ghost as natural wood gives it a rustic look, while a coat of white paint makes it pop on a dark shelf.
Blank: 1″ x 1″ x 3″ basswood · Time: about 1 hour
3. Mini Jack-O’-Lantern
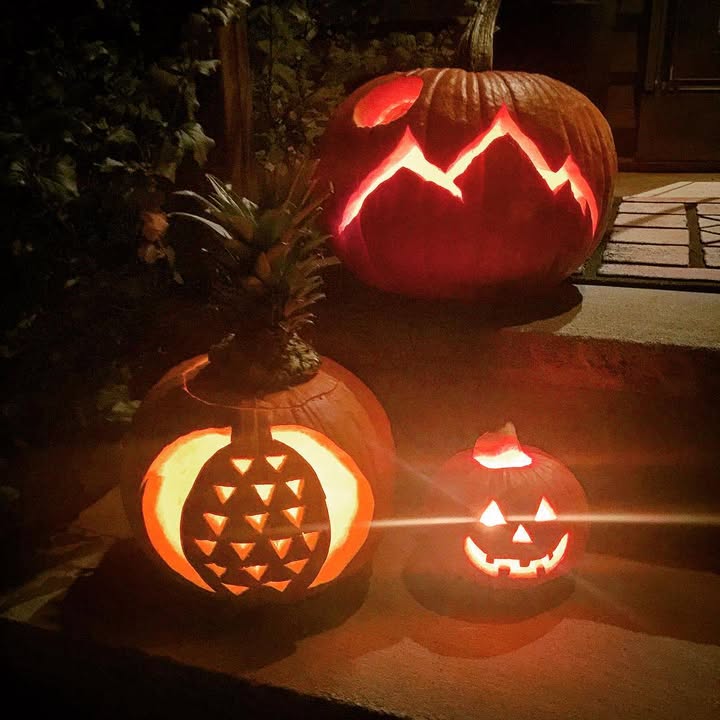
This is the woodcarver’s answer to the classic carved pumpkin. Start with a 1.5″ cube and round it into a slightly squashed ball, leaving a little square nub on top that you’ll shape into the stem. Once it’s round, use a V-tool or the tip of your knife to cut shallow grooves from the stem down to the base to create the pumpkin’s ribs.
You can carve the face as shallow triangular chips or paint it on after finishing. A bright orange coat with a green stem makes these look wonderful lined up along a mantel.
Blank: 1.5″ x 1.5″ x 1.5″ basswood · Time: 1 to 2 hours
4. Square-Headed Monster

Here’s a project that uses the shape of the blank to your advantage. Because a basswood block is already square, a flat-topped monster head requires very little shaping. Round the lower corners slightly for a jawline, then cut a jagged fringe of hair across the forehead with your knife or V-tool.
Carve a heavy brow, a simple nose, and a stitched scar across the cheek using tiny crosshatch cuts. Push two small nails or short pieces of dowel into the sides of the neck for bolts, paint the face green, and you’ve got a friendly monster with loads of personality.
Blank: 1.5″ x 1.5″ x 2″ basswood · Time: 1 to 2 hours
5. Spooky Eyeball
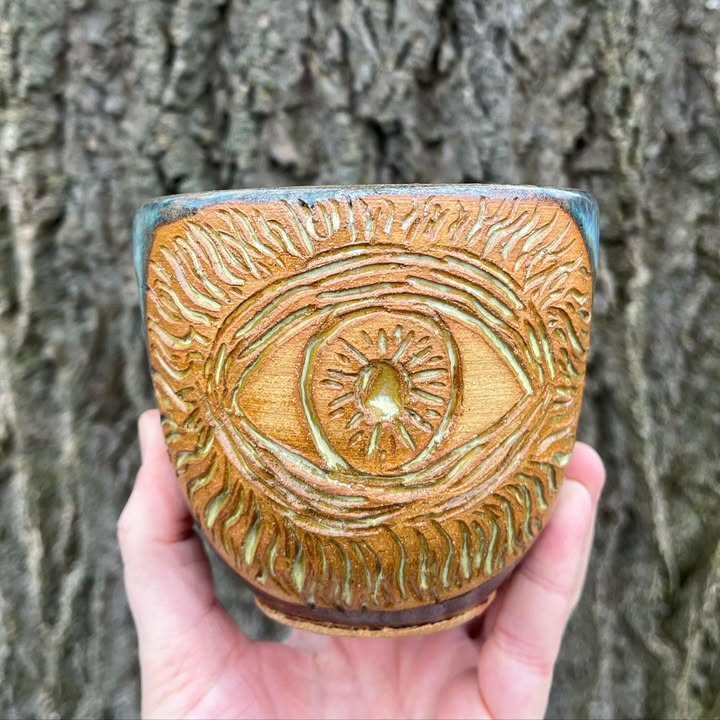
Carving a sphere is a great skill-building exercise, and an eyeball is the most fun excuse to practice it. Start with a cube, mark a line around the middle in each direction, and knock off the corners to create an eight-sided shape. Keep removing the high spots until it’s round.
Paint the whole thing white, add a colored iris and a black pupil, then use a very fine brush to add thin red veins. Put a few in a glass jar or scatter them across a party table for maximum creep factor.
Blank: 1.5″ cube of basswood · Time: about 1 hour plus painting
6. Toadstool Mushroom
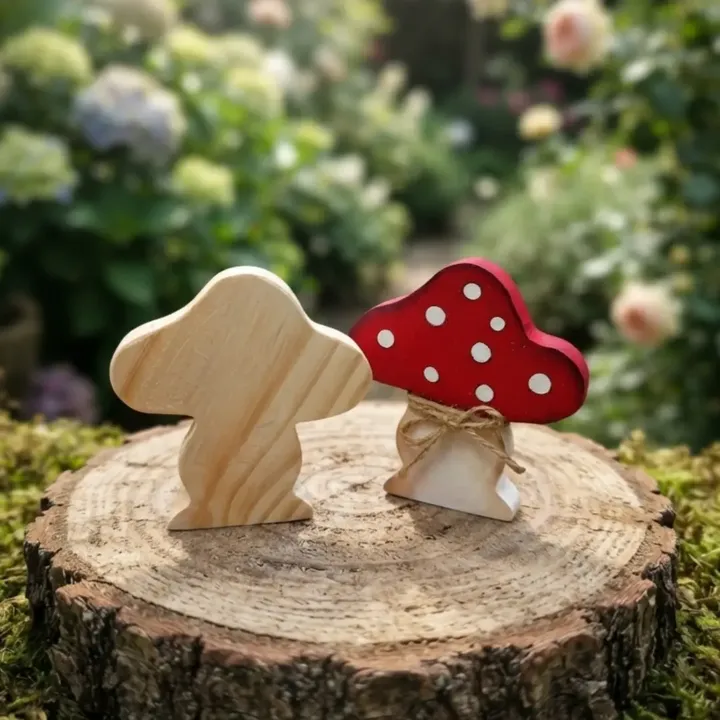
Mushrooms are one of the classic first carvings for good reason, and they fit perfectly into a spooky forest theme. Use a 1″ x 1″ x 3″ blank and mark where the cap will end. Make a stop cut around the block at that line, then carve the stem narrower below it and shape the cap into a dome above.
For a Halloween twist, paint the cap red with white dots in the style of a fly agaric toadstool, or go with a deep purple and green for something more witchy. Carve three or four at different heights and group them together on a slice of log.
Blank: 1″ x 1″ x 3″ basswood · Time: about 1 hour
7. Halloween Gnome
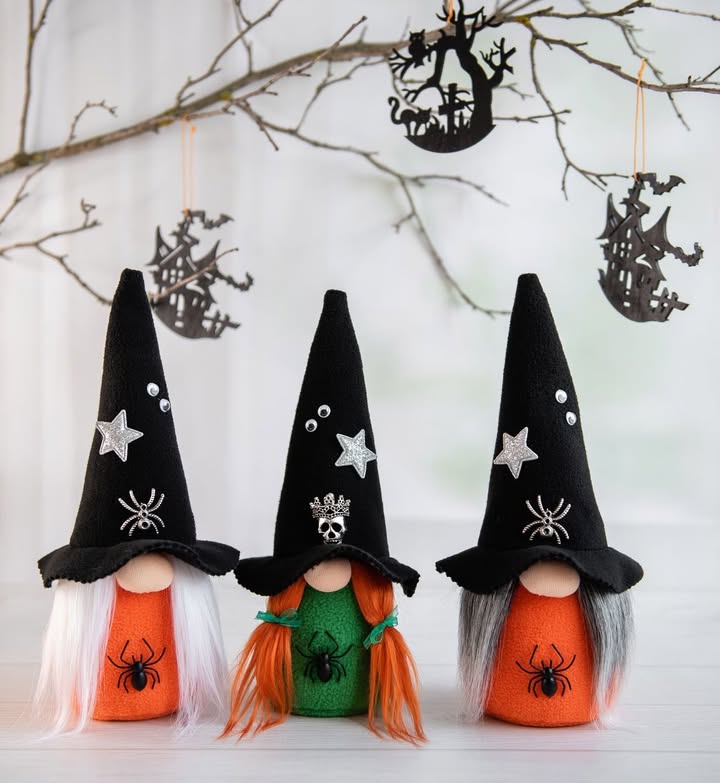
Gnomes are practically the unofficial mascot of beginner whittling, and giving one a witch hat turns it into a seasonal favorite. Use a 1″ x 1″ x 4″ blank and dedicate the top half to a tall pointed hat, letting the tip bend slightly to one side. The bottom half becomes a big bushy beard with a round nose poking out between the two.
Paint the hat black or purple with an orange band, and leave the beard natural or give it a light gray wash. Once you’ve made one, you’ll want to make a whole coven.
Blank: 1″ x 1″ x 4″ basswood · Time: 1 to 2 hours
8. Carved Tombstone
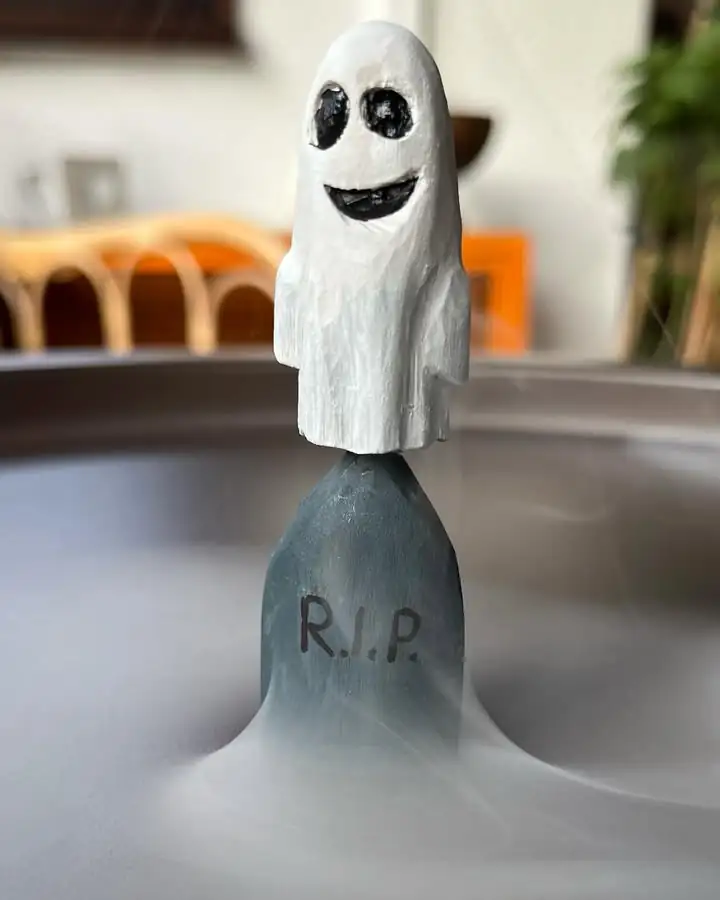
A little graveyard is a great addition to any Halloween display, and tombstones are mostly flat, so they’re very approachable. Take a piece of basswood about 3/4″ thick, draw a rounded top, and cut the shape out with a coping saw before cleaning up the edges with your knife.
Pencil in “RIP” or a funny epitaph, then carve the letters with a V-tool or chip carving knife. Knock off a few edges and add small cracks to make it look weathered, then dry-brush gray paint over the surface so the carved letters stay darker.
Blank: 3/4″-thick basswood board · Time: 1 to 2 hours
9. Bat Ornament
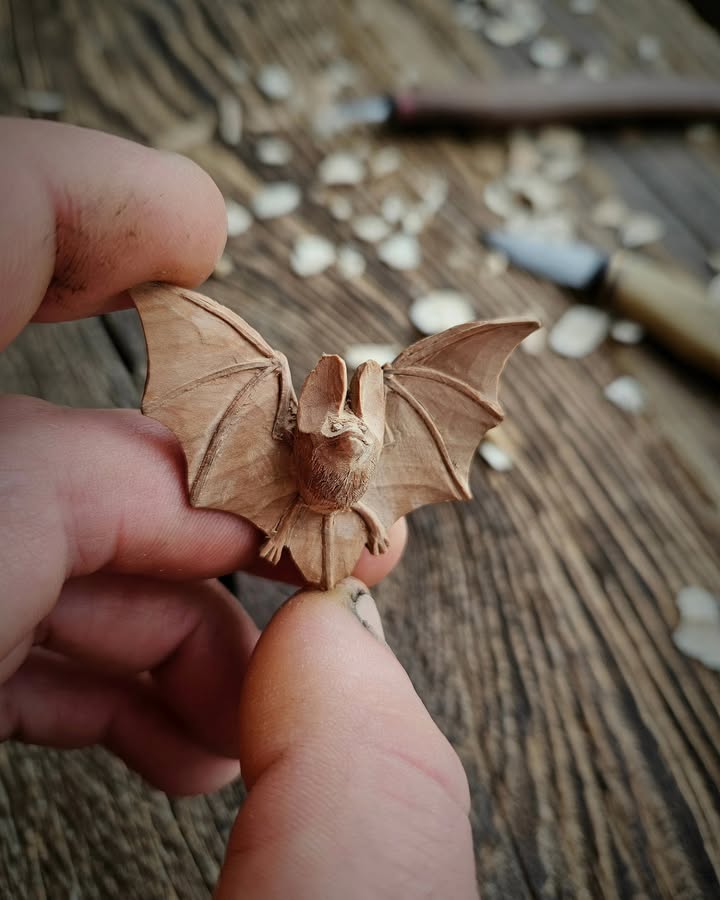
Bats make fantastic hanging ornaments for a spooky tree or a window display. Start with thin basswood, around 1/4″ thick, and trace a bat silhouette with wings spread wide. Cut the outline with a coping saw or scroll saw, then use your knife to soften the edges and carve a little shape into the body and head.
Add a few shallow lines on the wings to suggest the bones, drill a small hole near the top, and thread through some twine. Paint them black with tiny white or red eyes, and make a whole flock in an afternoon.
Blank: 1/4″-thick basswood sheet · Time: under an hour each
10. Sitting Black Cat
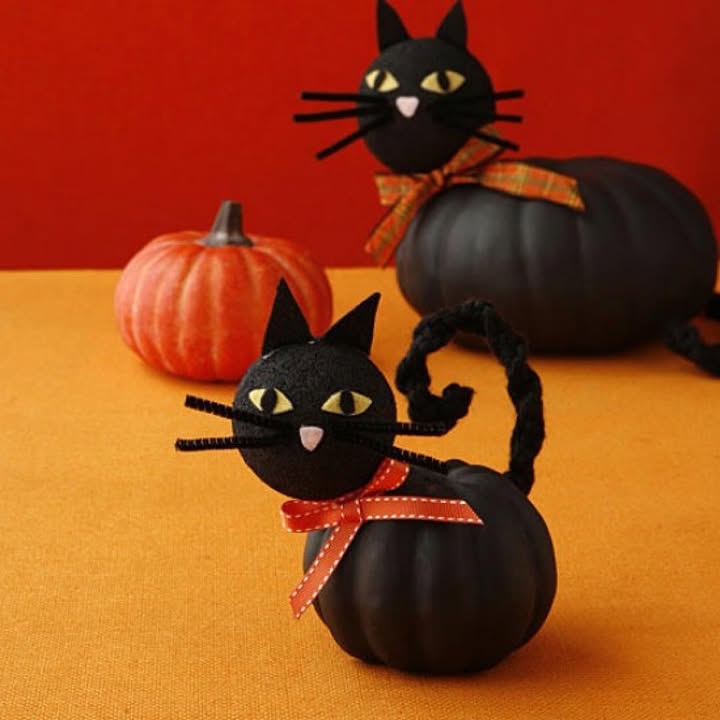
A black cat sitting upright is a simple, elegant silhouette that looks great from any angle. Draw the side profile on a 1″ x 1″ x 3″ blank, including two pointed ears at the top and a curved back. Carve away the waste, then round the body and wrap the tail around the front paws in shallow relief.
Paint it matte black and leave the eyes as bright yellow or green dots. For extra charm, give it a tiny orange bow around the neck.
Blank: 1″ x 1″ x 3″ basswood · Time: 1 to 2 hours
11. Wrapped Mummy
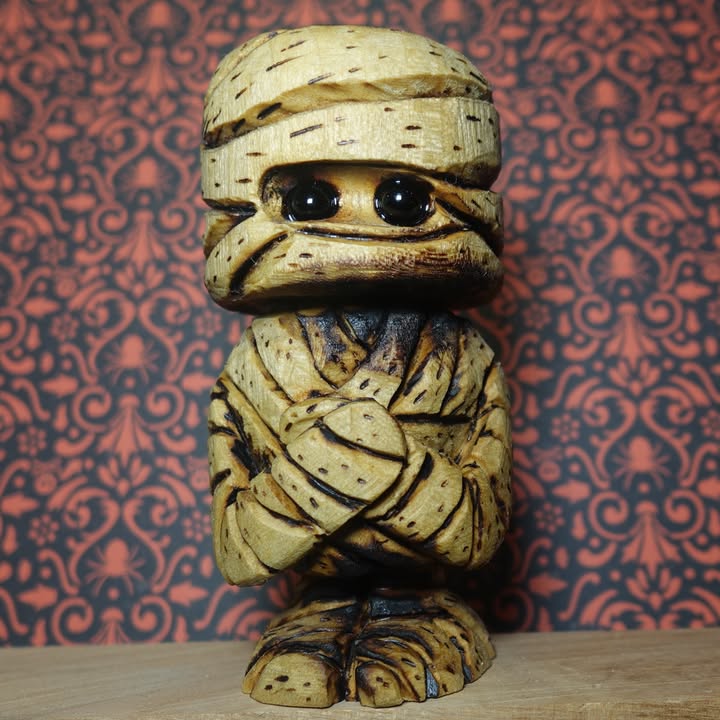
Mummies look impressive but are surprisingly simple, because the bandage texture hides small mistakes. Start with a 1″ x 1″ x 4″ blank and lightly round it into a soft, upright shape with a slightly narrower head section.
Use a V-tool or your knife to cut diagonal bands around the body, letting some overlap and change direction so they look randomly wrapped. Leave a narrow gap across the face and paint two eyes peeking through. An off-white coat followed by a thin brown wash gives it that aged, dusty look.
Blank: 1″ x 1″ x 4″ basswood · Time: 1 to 2 hours
12. Cartoon Skull
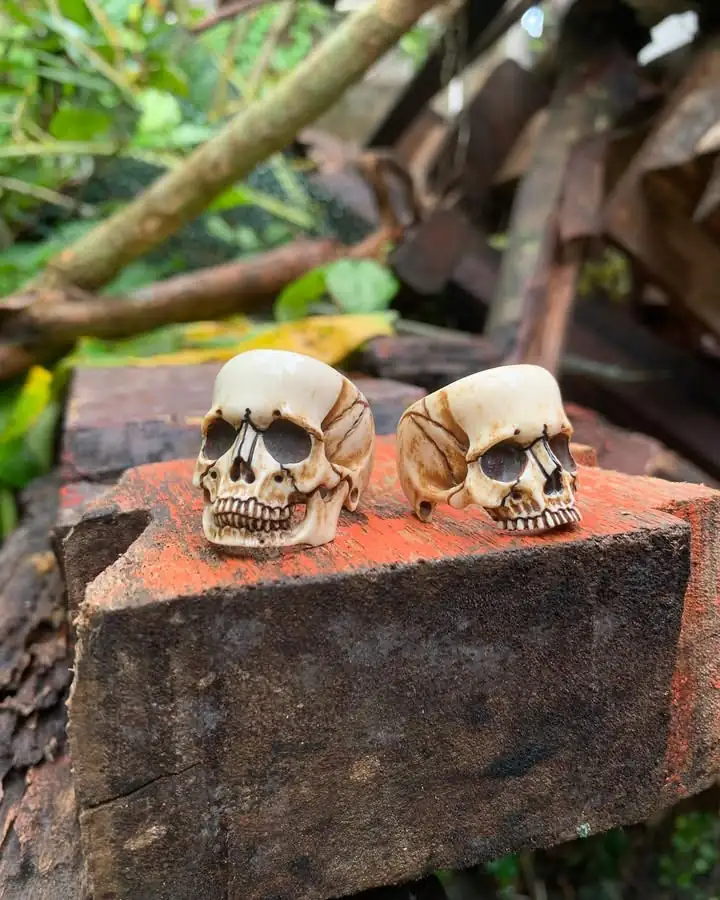
A skull doesn’t need to be anatomically accurate to look great. A chunky, cartoonish version is easier to carve and arguably more fun. Begin with a 1.5″ cube and round the top into a cranium, then narrow the lower third slightly for the jaw area.
Use a small round gouge to scoop out two deep eye sockets, carve a small upside-down heart or triangle for the nose, and cut a row of vertical lines for teeth. Leaving it unpainted with just a dark wash in the recesses gives it a bone-like, antique feel.
Blank: 1.5″ cube of basswood · Time: about 2 hours
13. Witch’s Cauldron
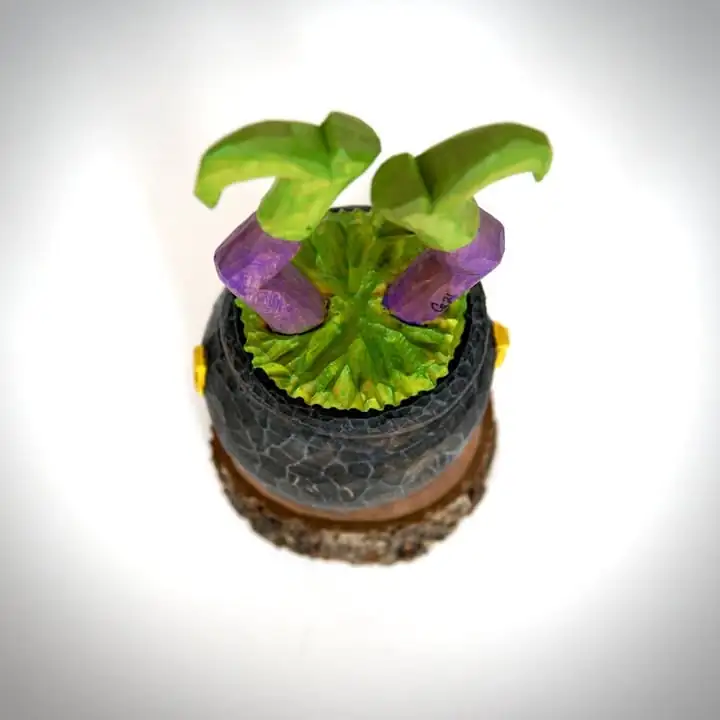
A tiny bubbling cauldron makes a perfect prop for your gnomes and black cats. Carve a rounded pot shape from a 1.5″ cube, leaving a thick rim around the top. Then use a small gouge to hollow out the top slightly.
Carve or glue on three stubby legs underneath so it sits properly. Paint the pot black and fill the top with bright green “potion,” adding a few raised bumps for bubbles before painting.
Blank: 1.5″ cube of basswood · Time: about 2 hours
14. Little Owl
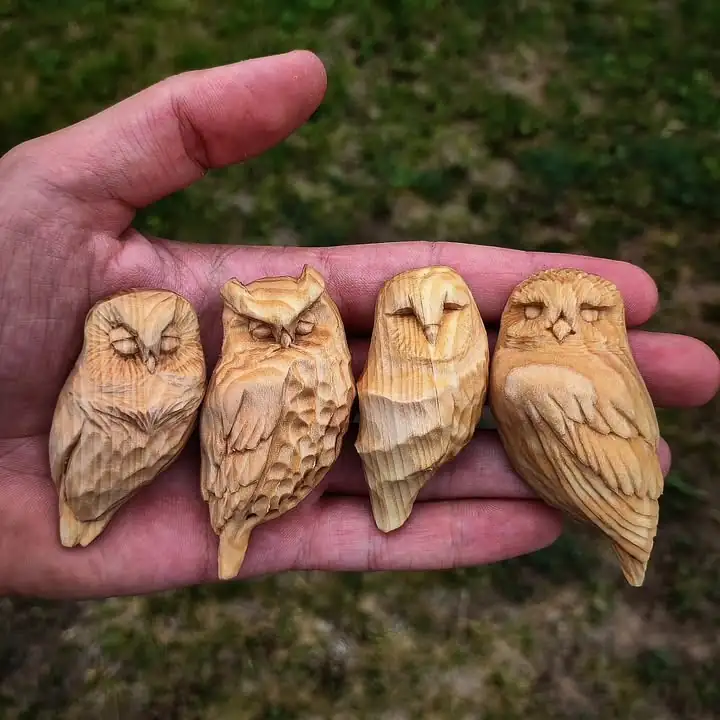
Owls are a Halloween-night classic and one of the most satisfying beginner carvings. Using a 1″ x 1″ x 3″ blank, make a stop cut about a third of the way down to separate the head from the body. Round both sections, then carve two small ear tufts on top.
Big round eyes can be made with shallow gouge cuts or painted on. Use a V-tool to add a few rows of feather marks on the chest and wings. A small owl perched on a real twig looks wonderful in a seasonal display.
Blank: 1″ x 1″ x 3″ basswood · Time: about 2 hours
15. Perched Raven
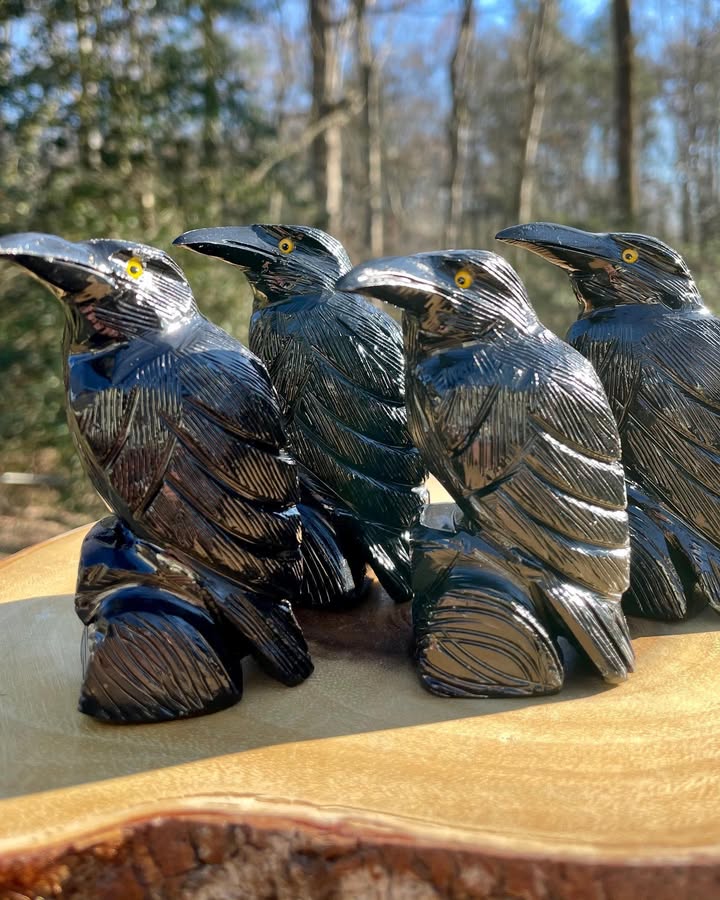
Ravens bring a moody, gothic touch to Halloween decor. Draw a side profile of a sitting bird on your blank, with a sturdy pointed beak and a tail that angles down. Carve away the waste, round the body, and define the wings with a gentle stop cut along each side.
Add a few feather lines with a V-tool, then paint the bird black. A tiny dry-brushed highlight of dark blue or purple over the black gives the feathers a lovely sheen.
Blank: 1″ x 1″ x 3″ basswood · Time: about 2 hours
16. Creepy Spider
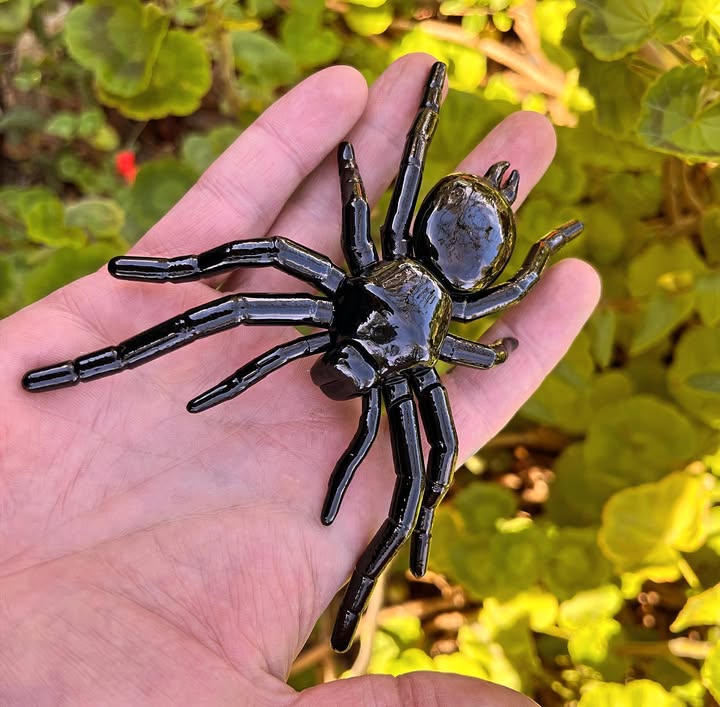
This project is mostly assembly, which makes it a great one to do with kids old enough to handle tools under supervision. Carve two small wooden balls, a larger one for the abdomen and a smaller one for the head, and glue them together.
Drill four small holes on each side of the body, then insert bent pieces of black craft wire or pipe cleaners for legs. Paint the body black, add a red hourglass mark underneath, and hang it from a thread in a doorway.
Blank: two small basswood cubes · Time: about 1 hour
17. Whittled Witch’s Wand
A wand is a great way to practice long, controlled cuts. Use a straight dowel or a dry, straight branch about 12 inches long, and taper it gradually from the handle to the tip. Keep the handle end thicker so it sits comfortably in the hand.
Carve rings, twists, or a simple spiral pattern along the handle, and leave the rest smooth. Finish with a dark stain or an oil finish to bring out the grain, and you’ve got the perfect costume accessory.
Blank: 1/2″ dowel or straight branch · Time: 1 to 2 hours
18. Wood Spirit Face on a Branch
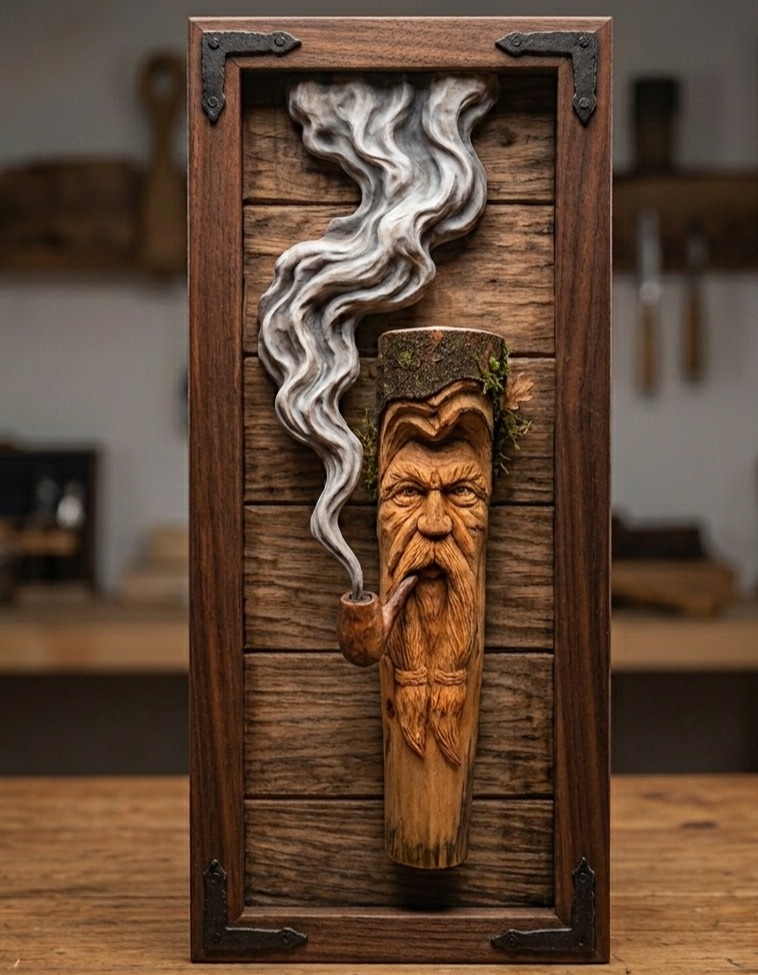
Wood spirits are a traditional carving where a face appears to be emerging from a stick or piece of bark. Carve a simplified version on a thick branch or basswood blank, starting with a heavy brow ridge, then a long nose beneath it.
Add deep-set eyes, a droopy mustache, and long flowing beard lines that trail down the stick. The rough, gnarled look is part of the charm, so don’t worry about making things perfectly symmetrical. For Halloween, a slightly grumpy expression works best.
Blank: 2″ branch or 2″ x 2″ x 6″ basswood · Time: 2 to 3 hours
19. Chip-Carved Spiderweb Coaster
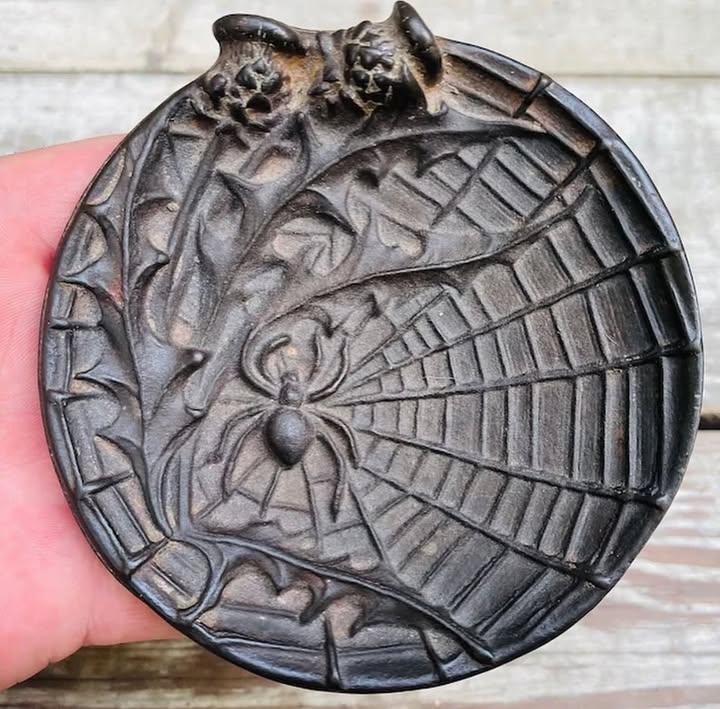
Chip carving creates beautiful geometric patterns by removing small, precise chips of wood, and a spiderweb is a perfect seasonal design. Start with a round basswood disc about 4 inches across and draw straight lines out from the center like the spokes of a wheel.
Connect the spokes with gently curved lines to form the web. Cut each line with two angled knife cuts that meet at the bottom, creating a crisp V-shaped groove. Seal the coaster well with a food-safe finish or wax, and add a tiny carved spider in one corner if you’re feeling ambitious.
Blank: 4″ basswood disc, about 1/2″ thick · Time: 2 to 3 hours
20. Log Pumpkin Porch Decoration
For a bigger statement piece, turn a short section of log into a rustic pumpkin. Choose a log about 6 to 10 inches wide, ideally with a short branch stub on top to serve as the stem. If there’s no stub, glue on a piece of twig instead.
Cut vertical grooves around the log with a gouge, or make shallow saw kerfs and round them over with a knife. You can drill a shallow hole in the top with a Forstner bit to hold a tealight, but use a battery-operated LED candle rather than a real flame for safety. Well-seasoned wood is less likely to crack as it dries, so avoid freshly cut logs if you want it to last.
Blank: seasoned log section · Time: 2 to 3 hours
Tips for Successful Halloween Carving
Always carve with the grain rather than against it. If the wood starts tearing out instead of slicing cleanly, flip your block around and cut from the other direction. Keep your blade sharp by stropping it every 15 to 20 minutes of carving, and always push the knife away from your body with your holding hand safely out of the blade’s path.
When painting, thin your acrylics with water so they soak in like a stain. This lets the wood grain show through and gives your carvings a softer, more handmade look than thick coats of paint. Once the paint is dry, a coat of Danish oil or paste wax will protect the piece and deepen the colors. If you use an oil finish, lay the rags out flat to dry before throwing them away, since oil-soaked rags can heat up and catch fire when bunched together.
Start Carving This October
The best part of Halloween woodcarving is that every piece you make becomes part of a growing collection. Carve a ghost this year, a cat next year, and a whole graveyard the year after, and before long you’ll have a display that’s entirely your own. Grab a basswood block, sharpen your knife, and pick the project on this list that makes you smile the most.
