Fish have a long history in woodcarving, from working fishing decoys lowered through the ice to the varnished trophy trout mounted above fireplaces. Both traditions survive because a fish gives a carver something rare: a shape that’s simple enough to rough out in an hour, yet capable of taking as much detail as you’re willing to put into it.
The basic form is a flattened teardrop, which means you can start almost anywhere. Carve it smooth and let a good piece of walnut do the talking, or spend a week on scales, fin rays, and a lifelike eye. Both approaches produce something people pick up and turn over in their hands, and neither is more correct than the other.
There’s also an enormous range of subjects. A round-bodied sunfish, a lean pike, a curling salmon, a tropical reef fish in colours that look invented. Add the fact that fish are naturally displayed on driftwood, mounted on plaques, hung as mobiles, or set on a rod to look like they’re swimming, and one basic shape opens into dozens of quite different projects.
This collection is about inspiration more than instruction. The ideas below run from beginner-friendly flat cutouts to full trophy mounts, with notes on what makes each one worth carving and how to approach it. If you’re still putting a kit together, our guide to choosing the right whittling kit covers the essentials.
What Makes Fish Worth Carving
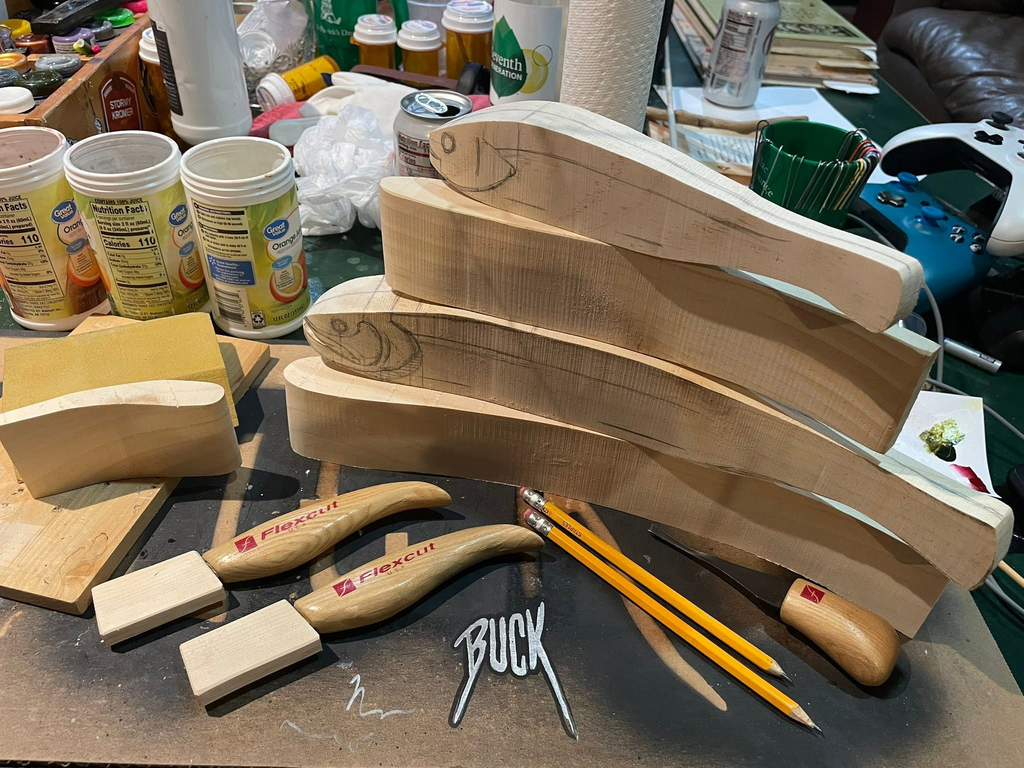
A fish rewards you early. The moment you round the belly and taper the tail, the block stops being a block, which is a good feeling to reach in the first half hour of a project.
Fins are where the craft lives. They’re thin, they run across the grain, and they’re the reason most beginner fish break. Carvers solve this in three ways: keep them thick and stylised, carve them separately from thin stock and set them into slots, or cut them from copper sheet or leather. Knowing which approach you’re taking before you start is most of the battle.
Scales look intimidating and aren’t. A curved gouge pressed in rows, each row overlapping the last, produces a convincing scale pattern faster than almost any other texture in carving. A wood-burning pen does it even more cleanly, and you can stop at any point and call it stylised.
Then there’s the finish. Fish are the one subject where a high-gloss coat is right, since it reads as wet. Anywhere else gloss flattens carved detail, but on a trout it’s exactly what the piece wants.
20 Ideas to Inspire Your Next Fish Carving
1. Fish Hair Slide
A Carving Someone Will Actually Wear
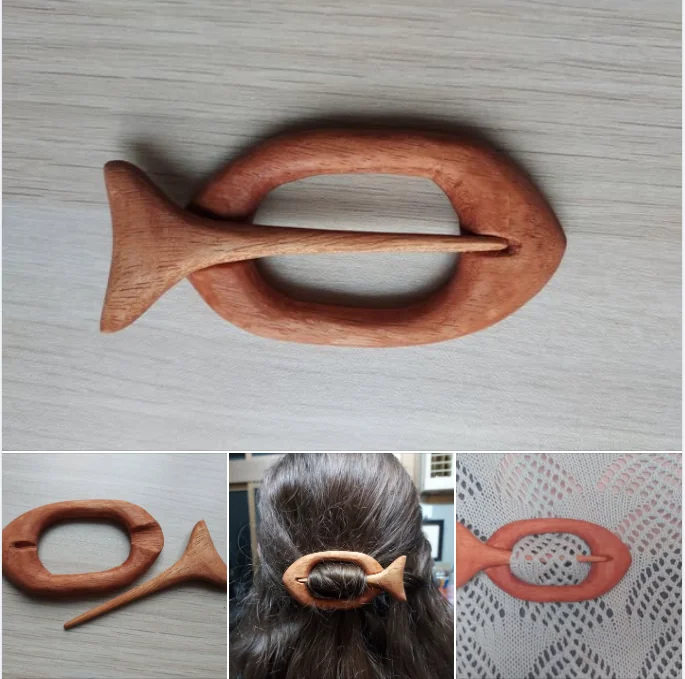
A fish shaped into a flat loop with a long pin slipped through it, working as a hair barrette. The appeal is that this is a carving with a job, which changes how it’s received entirely. It’s also a good lesson in negative space, since the open centre of the loop is as much a part of the design as the wood around it.
Tip: Keep the loop generous and the walls thick so it survives daily use, and sand it properly smooth, since anything left rough will catch hair.
2. Large Scaled Arowana
Row After Row of Scales, and Not One of Them Hard
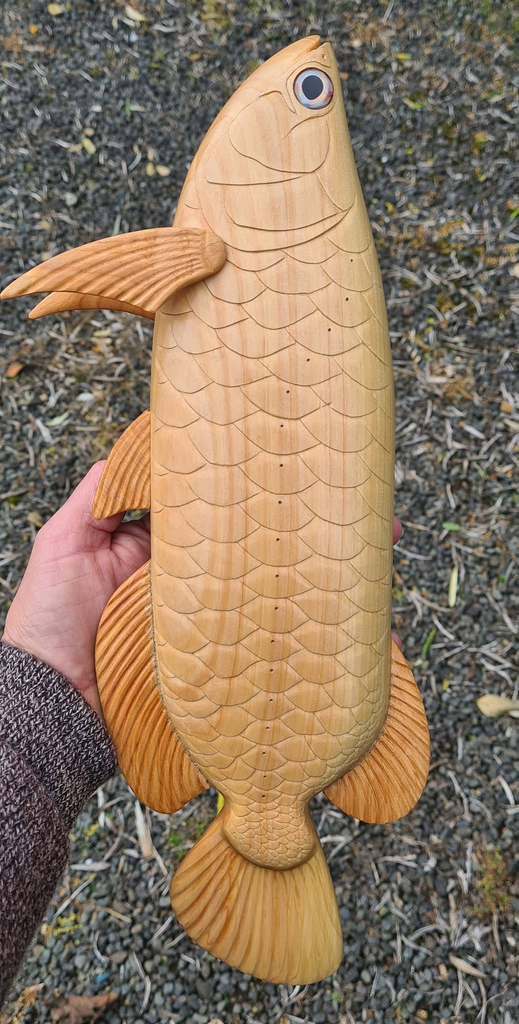
A long-bodied fish filling an outstretched hand, its whole flank covered in big overlapping scales and its fins cut into fine parallel rays. What makes this satisfying is the rhythm of the scale work, each row pressed in with the same curved gouge, each one overlapping the last. It’s repetitive in the best way, and the pattern builds visibly as you go.
Tip: Mark the first row lightly in pencil to keep it straight. After that, every following row lines up off the one above it.
3. Arowana on a Display Base
One Shape, Two Completely Different Pieces
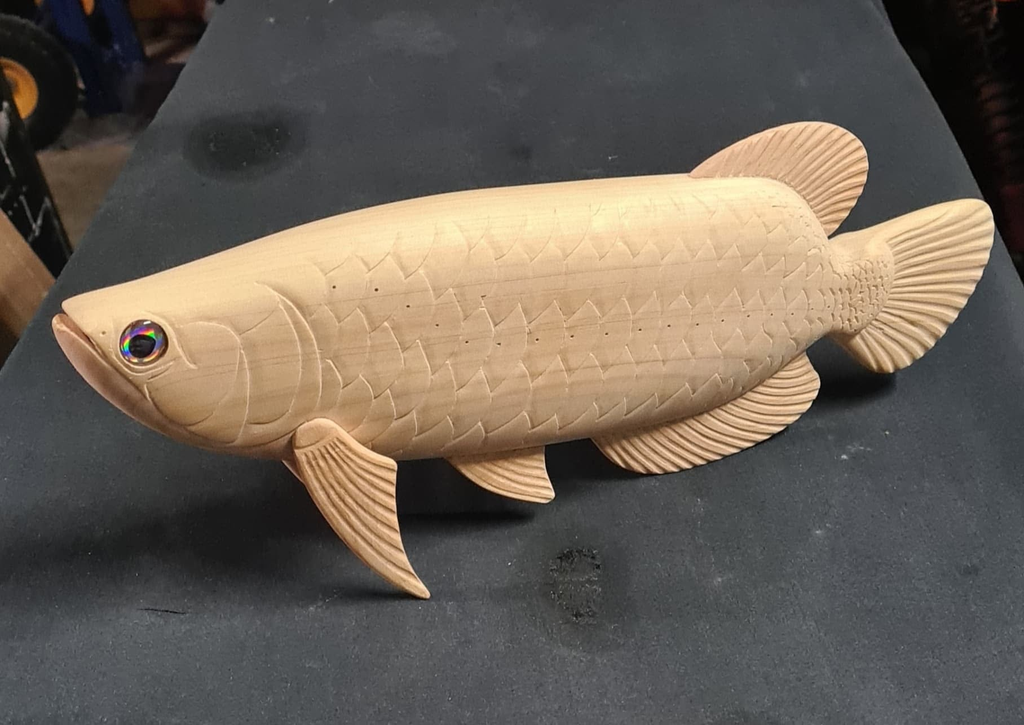
The same long-bodied fish, this time mounted horizontally as though swimming, with a glass eye and fins fanned out from the body. Seeing it presented this way rather than flat shows how much the mount changes a carving. Nothing about the fish itself has altered, yet on a stand it reads as a trophy rather than a plaque.
Tip: Carve the fins separately from thin stock and glue them into slots, so the grain runs along each fin and the thin edges don’t snap.
4. Set of Flat Species Cutouts
Carve Five Fish and Learn Five Silhouettes
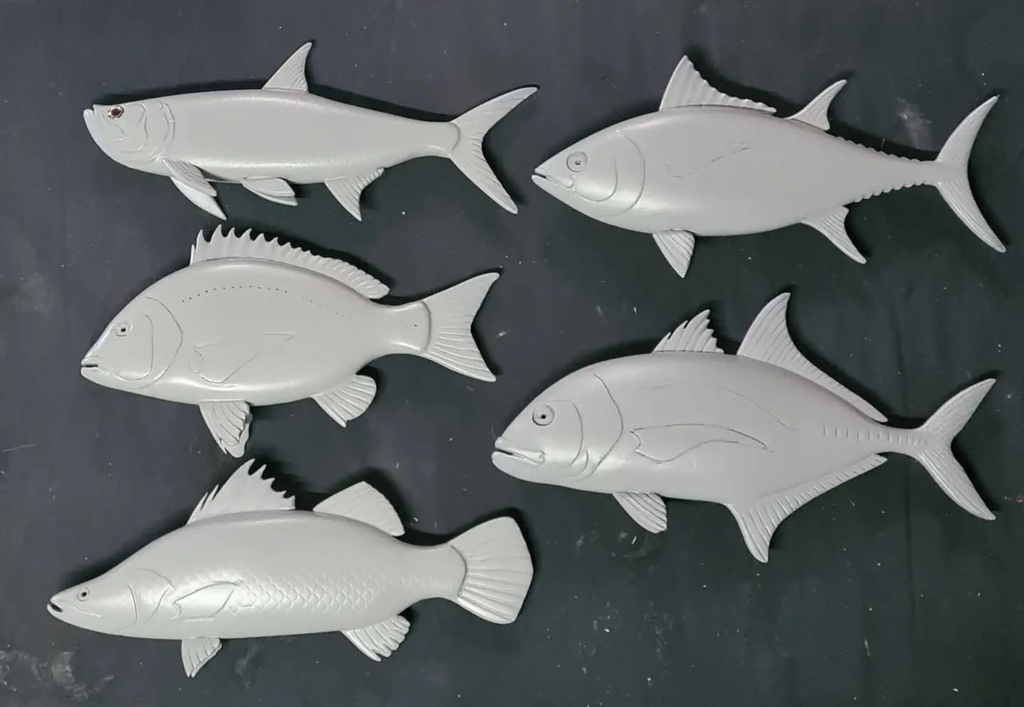
Five different fish in relief, each one a species you could name from its outline alone: a slim barracuda, a deep-bodied snapper, a broad jack. Carving a set like this teaches you more about proportion than any single piece, because you start noticing exactly what makes one fish different from another. Primed white, they’re ready to paint.
Tip: Keep them flat-backed so they hang on a wall, and cut all five outlines in one session before shaping any of them.
5. Rough-Blocked Fish in Progress
The Stage Where It Stops Being a Board
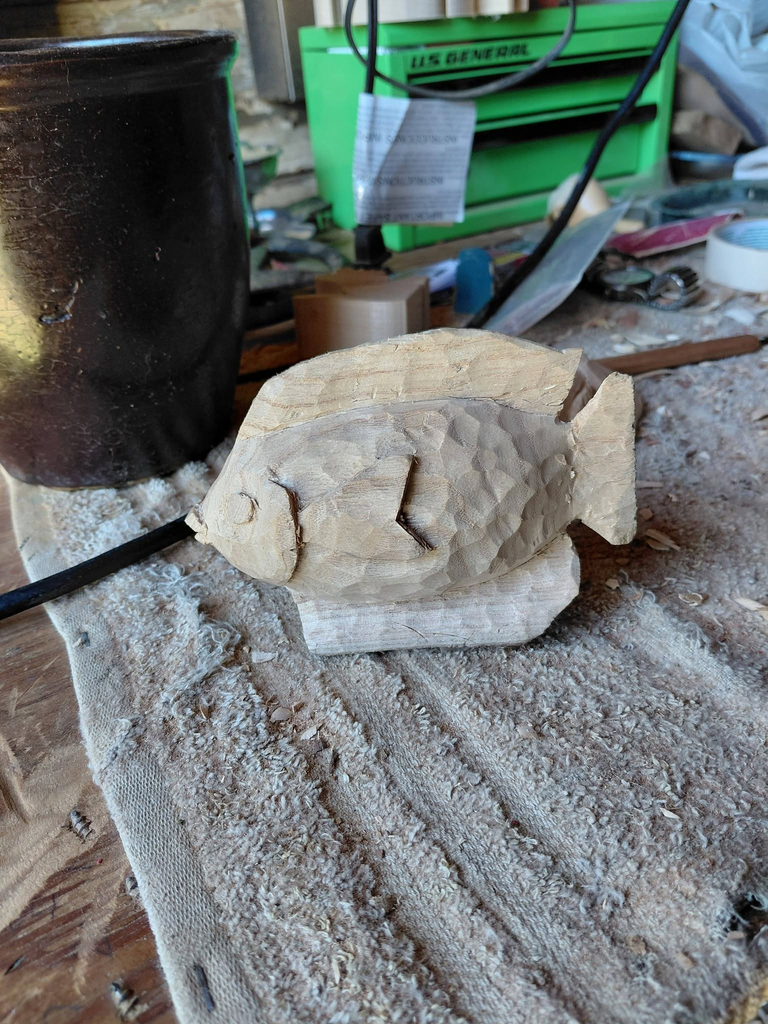
A chunky blank with the outline cut and the body just beginning to round, still sitting in a pile of sawdust. There’s a particular pleasure in this moment, when the flat shape first lifts into three dimensions. Beginners often rush past it, but taking time to get the body right here saves every problem further down the line.
Tip: Round the whole body before touching a single detail. Detail on a lumpy body always looks wrong and ends up being cut away.
6. Trevally with a Raised Fin
One Bold Fin Turns a Fish into a Sculpture
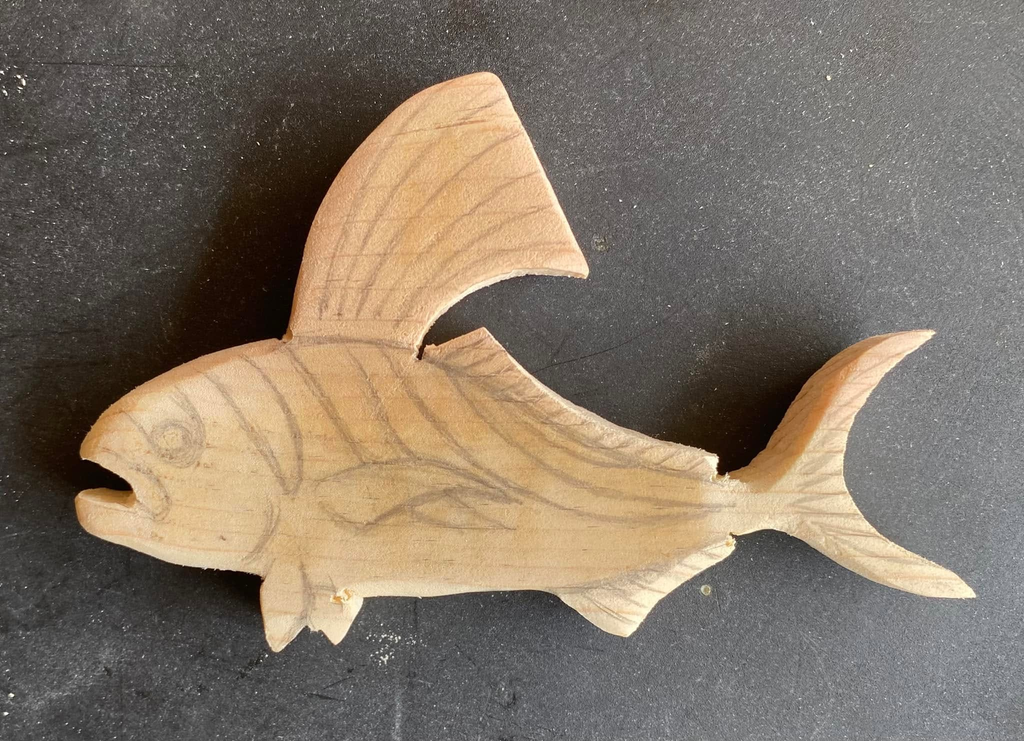
A deep-bodied fish with a tall dorsal fin standing proud of the back and a strongly forked tail, all in warm natural wood. That upright fin is what carries the piece, giving it movement and a silhouette you notice from across the room. It’s also the part most likely to break, which is exactly why it’s worth attempting.
Tip: Orient the blank so the grain runs up through the raised fin, and leave it noticeably thick until every other part of the carving is finished.
7. Cartoon Shark Scene
Build the Reef, Not Just the Fish
A grinning shark hovering over a live-edge base, with a little yellow-and-black reef fish, a starfish, and some greenery arranged below. The fun here is set-building: once you stop carving a single object and start staging a scene, small details like a starfish on a rock become the things people notice first.
Tip: Mount the shark on a hidden rod so it floats above the base. Anything that appears to hang in mid-air instantly looks harder than it was.
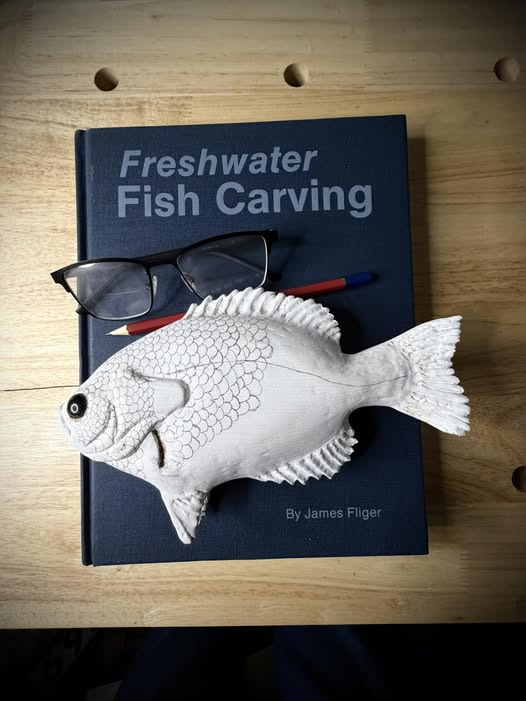
8. Study from a Carving Book
Follow a Pattern and Steal the Thinking
A bluegill carved from a freshwater fish carving book, primed pale and sitting on the open cover. Working from a pattern isn’t a shortcut, it’s how most carvers learn fin placement, body depth, and where a scale line should sit. You get the finished piece and the underlying logic at the same time.
Tip: Carve the pattern as written the first time. Save your own variations for the second attempt, when you know what the instructions were protecting you from.
9. Pair of Koi
Two Small Fish, One Big Curve
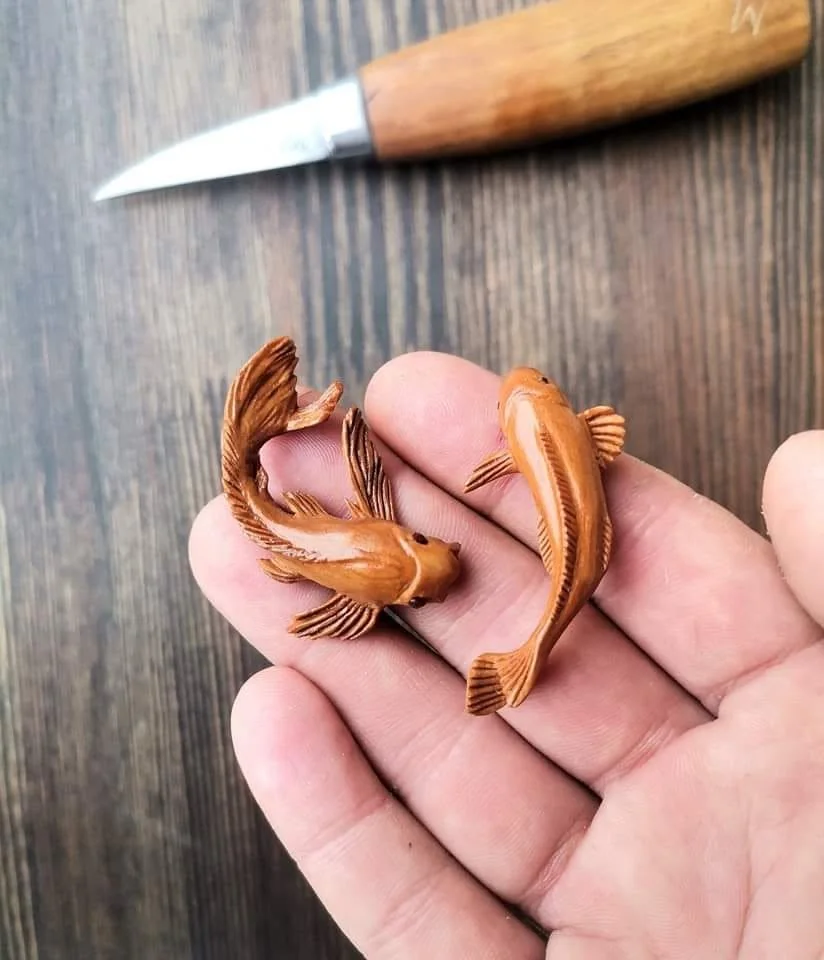
Two koi carved in warm reddish wood, each bent into a gentle S-curve with flowing fins and fine rays running through them. The curve is what sells these, giving them the look of fish mid-turn rather than fish lying still. They’re palm-sized, so the whole pair is an evening’s work.
Tip: Draw the curve on the blank before cutting anything, and keep the tail thick until the end. The grain has to follow the bend or the tail will snap.
10. Burned-Scale Fish in Progress
Swap the Knife for a Hot Pen
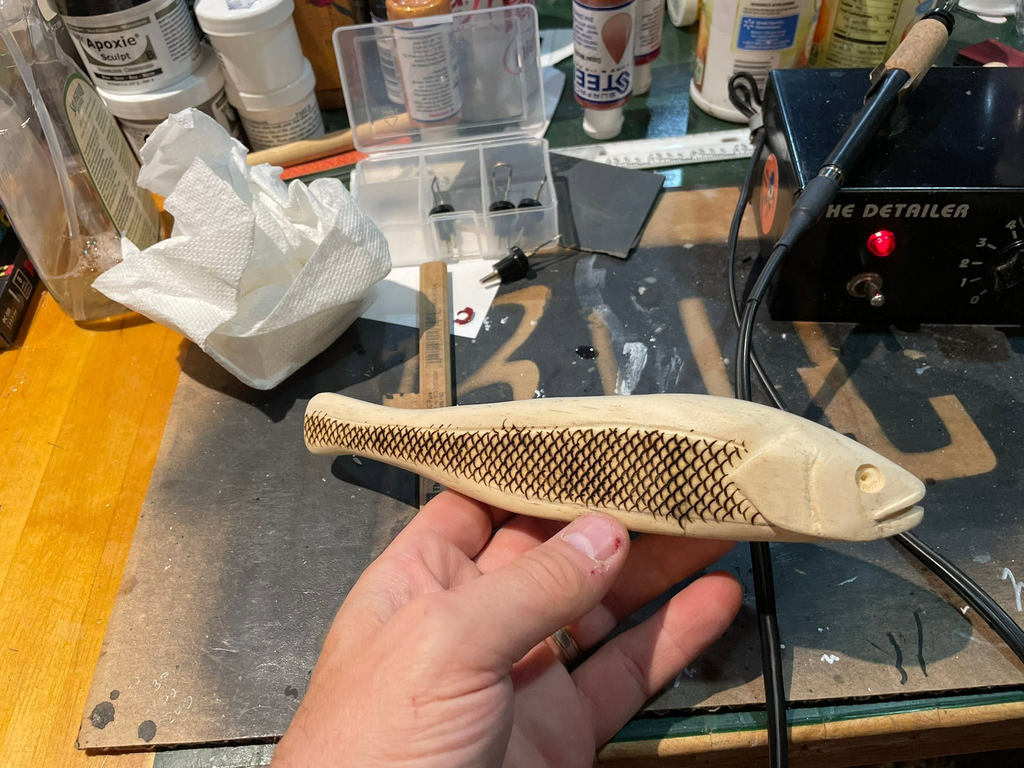
A pale fish held over a workbench with its entire flank covered in fine burned scales, the wood-burning unit still plugged in beside it. Pyrography gives you a level of scale detail that’s slow and risky with a knife, and it’s genuinely absorbing work: rows build up steadily, mistakes are rare, and the contrast appears as you go.
Tip: Set the pen cooler than you think and build tone in passes. Try it on scrap first, since burned lines can’t be undone. Our woodburning ideas cover more techniques worth borrowing.
11. Bass Head Mount, Stage by Stage
Watch a Blank Become a Fish in Four Photos
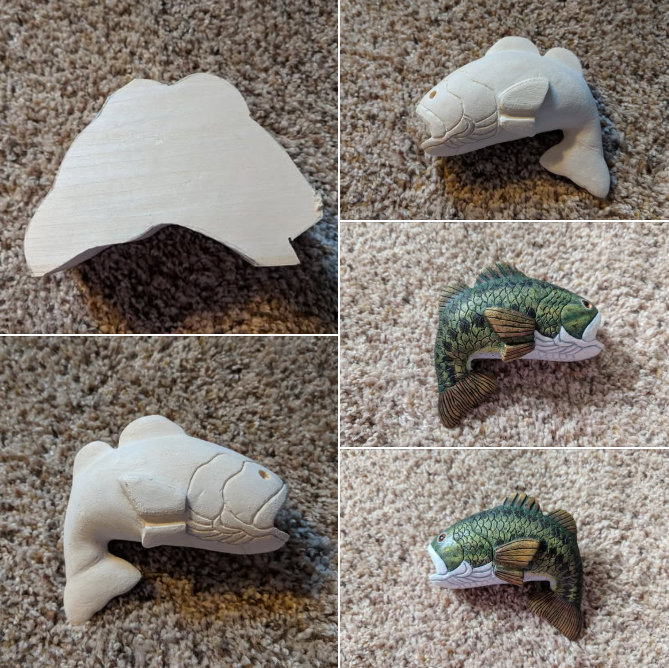
The same largemouth bass head shown from rough blank through carved detail to full paint, mouth open and gills defined. Seeing the stages side by side is the best argument there is for patience, since the piece looks unpromising right up until the moment it doesn’t. Carving just the head also skips the fragile fins entirely.
Tip: Carve the open mouth as a deep hollow rather than separate jaws. It reads the same from any normal viewing distance and is far stronger.
12. Framed Relief Panel
Carve a Fish Into the Board, Not Out of It
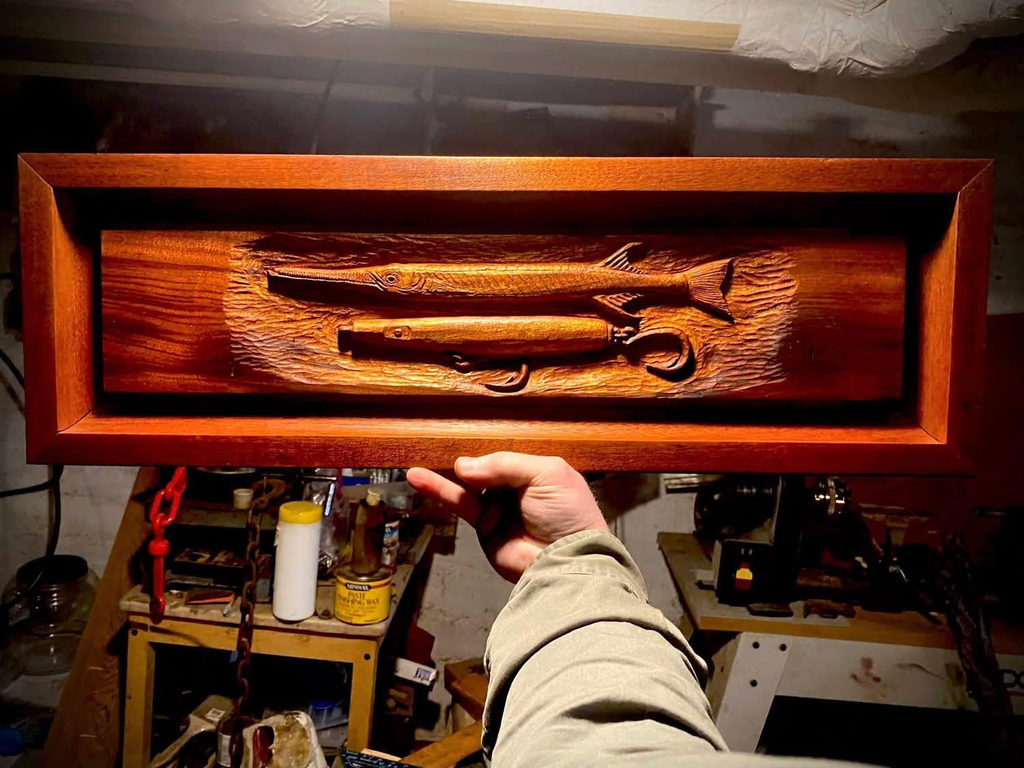
A long fish carved in relief inside a deep wooden frame, the grain of the background running the length of the piece like water. Relief carving stays flat on the bench, nothing can snap off, and the frame turns it into finished wall art the moment you set it in. It’s a quietly satisfying way to work.
Tip: Lower the background evenly before shaping the fish itself, and keep the relief shallow. Depth is much harder to control than it looks.
13. Numbered Fish Pair
Carve the Same Fish Twice and Watch Yourself Improve
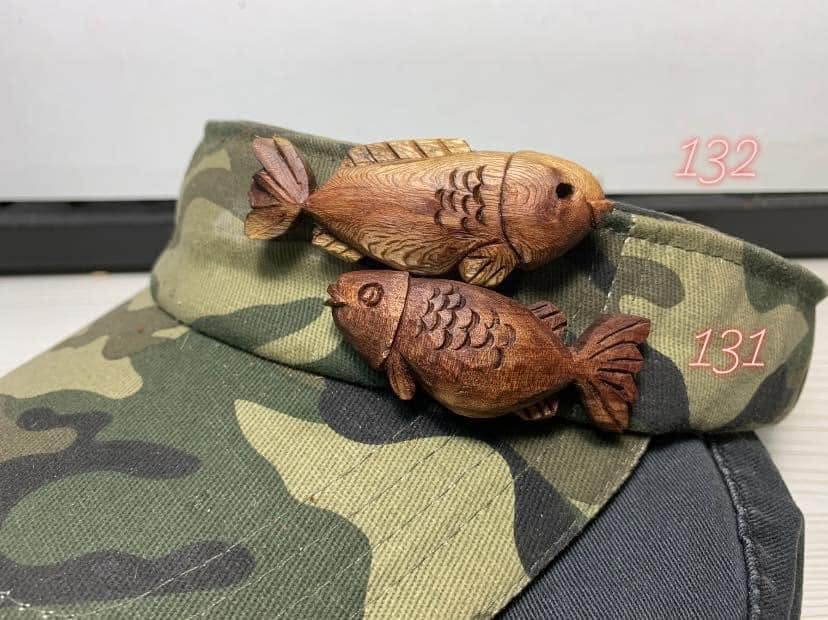
Two small fish resting on a cap, each with textured scales and defined fins, and each marked with a number. Numbering your carvings turns a shelf into a record, and repeating a subject is the fastest way to see progress, because the second one always fixes something you didn’t know was wrong with the first.
Tip: Carve the same design three or four times in a row. The third is usually the one you keep.
14. Hat-Brim Trout
Make Something That Goes Out of the House
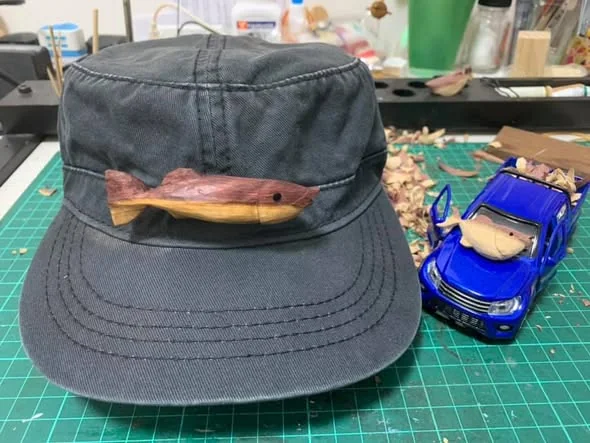
A slim painted trout tucked into the band of a cap, sized to sit along the brim. Carvings that leave the workshop get a different life from the ones on a shelf, and a fish on a hat draws a comment every time. It’s a small, quick piece with an outsized payoff.
Tip: Keep it slim and light, and sand the back flat so it sits snugly against the band rather than sticking out.
15. Fish Among a Carving Collection
Let One Fish Join the Rest of the Shelf
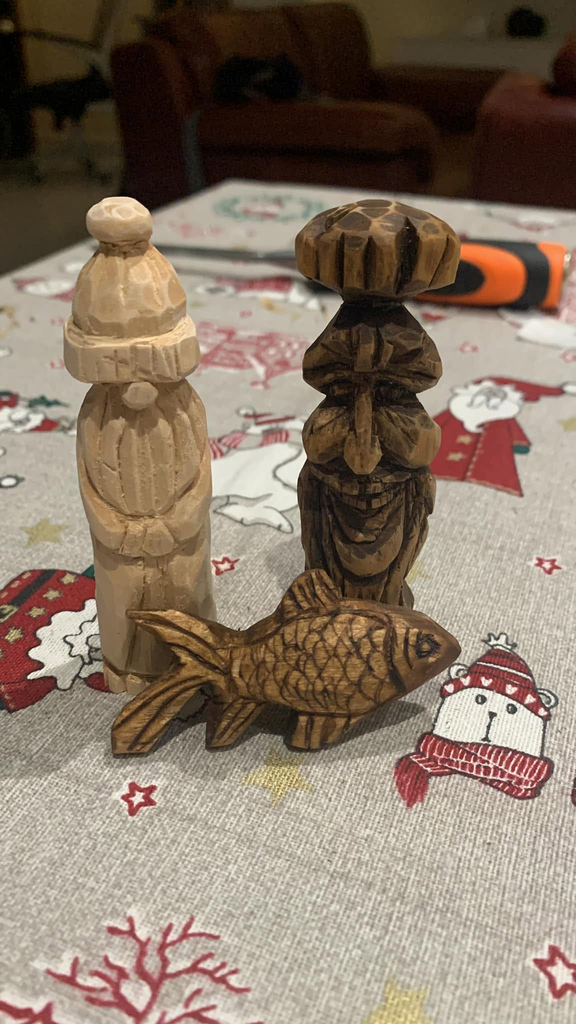
A textured goldfish sitting alongside a gnome, a wood spirit, and a stack of faces on a kitchen table. There’s something satisfying about a fish among the figures, because it breaks the pattern of a shelf full of people and reminds you that a carving collection can wander wherever you like.
Tip: Vary your subjects deliberately. Switching between faces, animals, and fish keeps different skills sharp and stops any one becoming a rut.
16. Spiralling Shoal Panel
One Fish, Repeated Until It Becomes a Pattern
A square panel carved with dozens of small fish swirling in a tight spiral, each one following the curve of the one ahead. The pleasure here is hypnotic rather than technical, since every fish is simple and the effect comes entirely from repetition. Put music on and lose an afternoon to it.
Tip: Draw the spiral first, then space the fish along it. Vary the size slightly so the pattern breathes instead of looking printed.
17. Fish Mounted on a Natural Stump
Let the Found Wood Do Half the Design
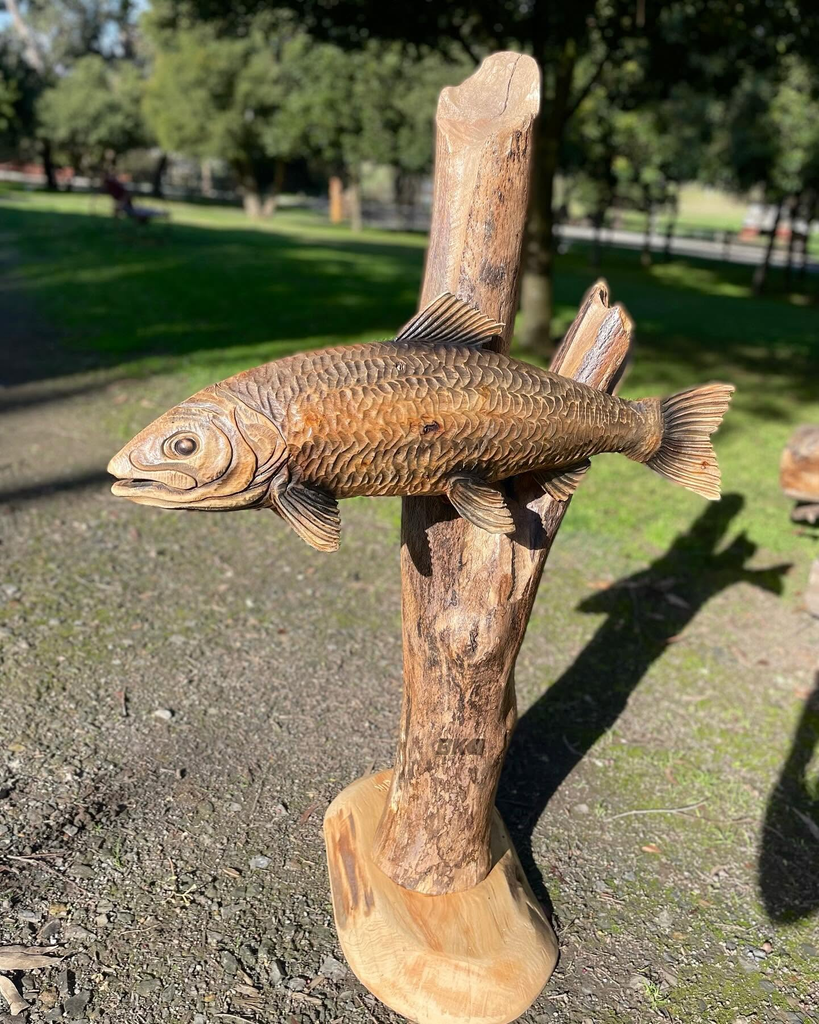
A detailed trout fixed to a rough branch post standing in a park, the fish smooth and finely scaled against the bark-rough timber. The contrast is what makes it work, and the mount costs nothing but a walk. A found branch will always look more alive than a turned base.
Tip: Choose the mount before finishing the fish, so you can angle the body to suit the branch rather than fighting it afterwards.
18. Chainsaw-Carved Garden Fish
Go Big and Carve with Power
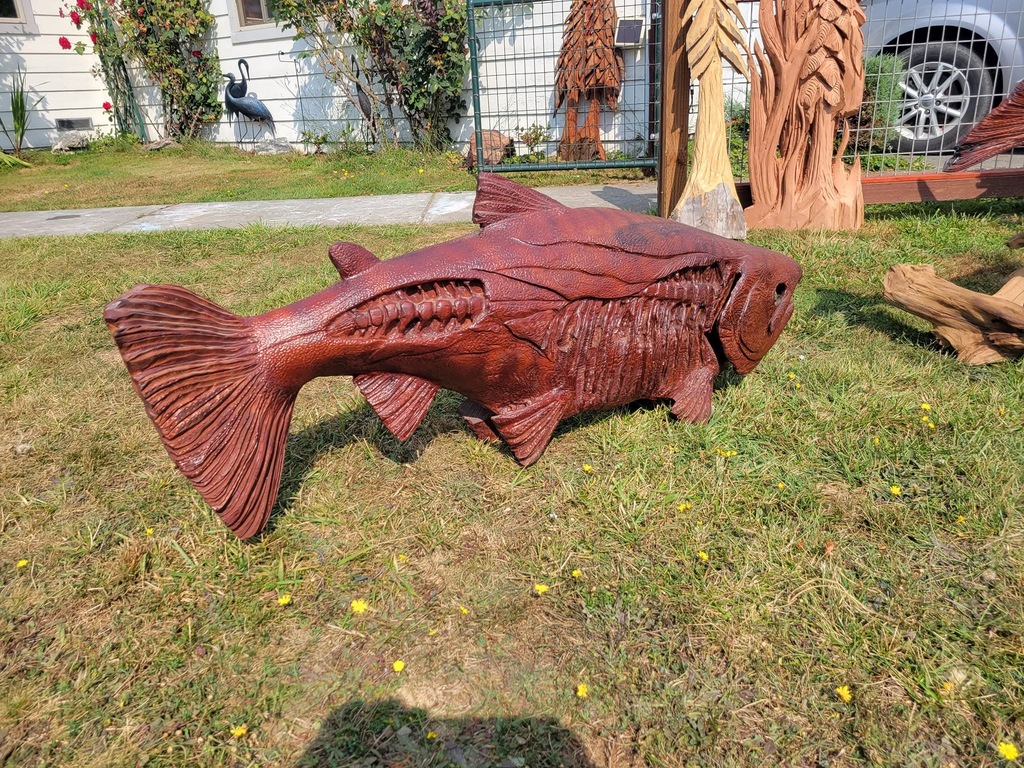
A large fish in deep red wood lying on the grass at a carving event, its fins cut as broad flowing planes. At this scale the work becomes physical, with a chainsaw doing the roughing and a grinder or gouge refining it, and the finished piece changes a garden rather than a shelf.
Tip: Sketch the outline on the log with chalk and cut the silhouette first. Detail comes later, once the shape is there.
19. Bug-Eyed Bubble Fish
Push the Proportions Until It Becomes a Character
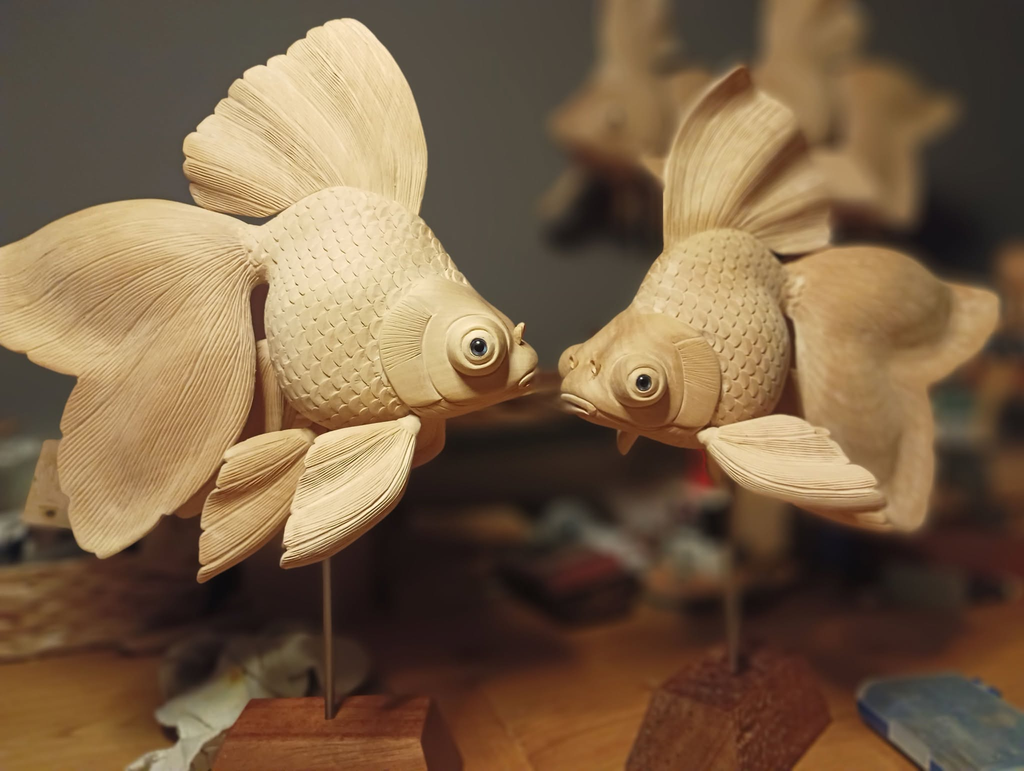
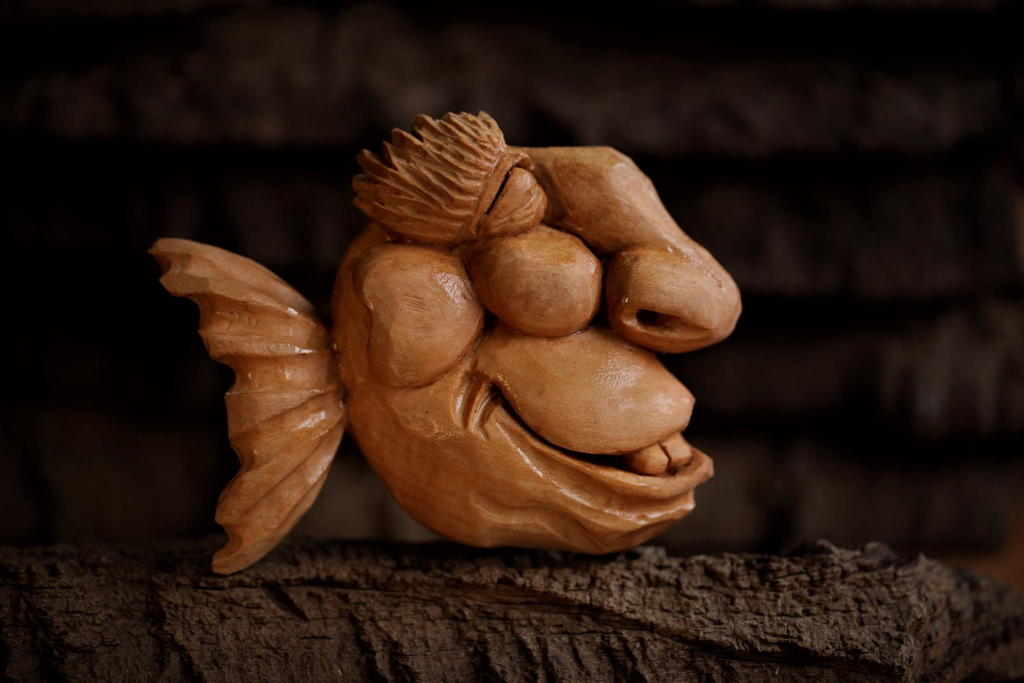
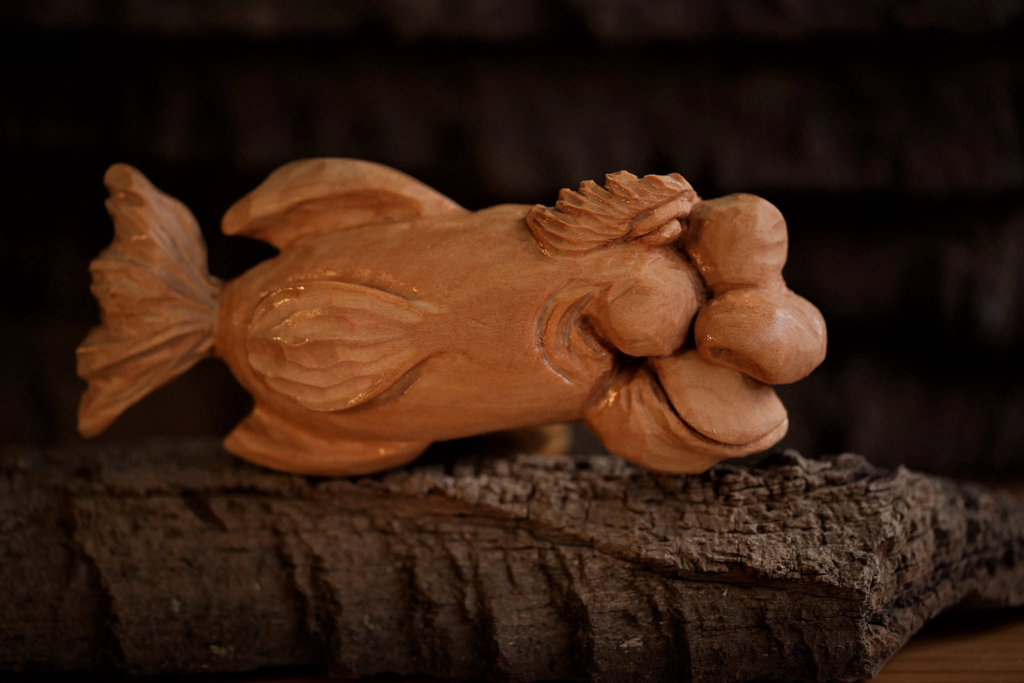
A fat, wide-mouthed fish with enormous bulging eyes standing out from the sides of its head, a ruffled crest running down its back, and a broad fan of a tail. Exaggeration turns a fish into a personality, and nobody can tell you the eyes are too big, because that’s the whole idea. It’s freeing after carving to-scale species.
Tip: Carve the eyes as separate domes glued into shallow sockets. Leaving them proud of the head is what sells the look, and it’s far stronger than undercutting them from the block.
20. The Same Fish from a Second Angle
Carve for Every Side, Not Just the Photo
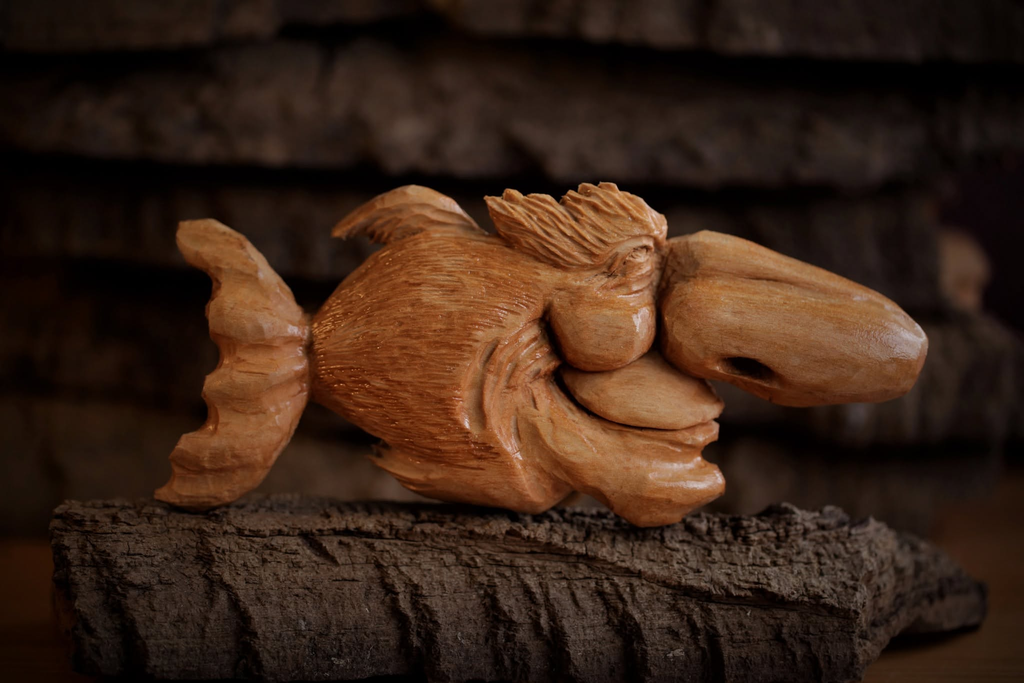
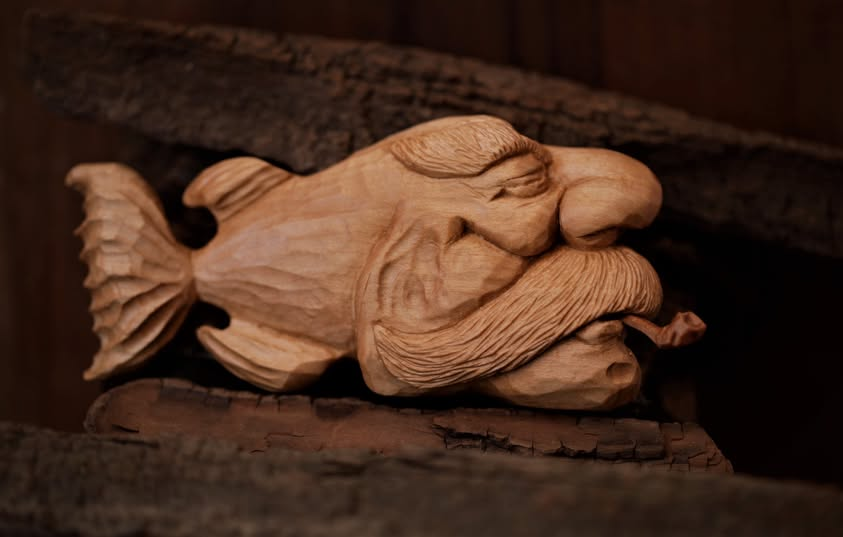
The same character seen from the front, where the wide flat mouth, the stacked lips, and the crest read completely differently from the side view. A carving in the round has no best angle, and turning a piece constantly while you work is the only way to catch the flat spots and lopsided curves you can’t see head-on.
Tip: Set the piece down and walk away from it every twenty minutes. Fresh eyes from across the room catch what your hands have stopped noticing.
Choosing Your First Fish
With twenty ideas on the table, the question is where to start, and the answer depends less on ambition than on which problems you want to take on first.
If you’ve never carved a fish before, begin flat. A relief panel or a wall-hanging cutout keeps the piece on the bench, removes the fins that break, and lets you concentrate on getting the body proportions right. It’s the same logic that makes lying-down poses the safest entry point in the dog carvings, where nothing sticks out to snap.
Once the shape comes easily, the next step is texture. Scales are the friendliest detail in carving, because a curved gouge or a burning pen builds them in rows and you can stop whenever the effect looks right. Fin rays follow the same principle: a few confident lines read better than fifty fussy ones, exactly as suggested feathers do on the bird carvings.
After that, it’s the fins themselves. Decide early whether you’re keeping them thick and stylised, carving them separately from thin stock and slotting them in, or cutting them from copper or leather. All three are legitimate, and choosing before you start saves the frustration of losing a dorsal fin in the last half hour.
Finally, think about the mount as part of the design rather than an afterthought. A found branch, a piece of driftwood, a deep frame, or a hidden rod that leaves the fish apparently swimming will each change how the same carving is read. And when it comes to the finish, gloss is the right answer here even though it’s wrong almost everywhere else, because a wet sheen is what a fish is supposed to have. Our guide to gloss versus satin explains how much difference the sheen alone makes.
Conclusion
Fish carving covers more ground than almost any other subject in the craft. The same basic teardrop can become a hair slide, a hat pin, a framed relief, a shoal spiralling across a panel, or a chainsaw-cut sculpture lying on the lawn, and every one of those asks something different of you.
That range is worth using. Carve a flat one to learn the proportions, a scaled one to learn texture, a curved koi to learn grain, and a bug-eyed character to remind yourself that accuracy was never the point. Whichever idea on this list made you want to pick up a knife is the right place to begin, and the next fish will be better than the one before it.
