There’s a particular kind of satisfaction in starting a carving after dinner and holding a finished piece before bed. No half-shaped block sitting on the bench for a fortnight, no losing the thread of what you were trying to achieve, just one evening, one knife, and something small and complete at the end of it.
Quick projects are also how you actually get better. Carving ten simple pieces teaches you far more about grain, blade angle, and pressure than agonising over one ambitious figure ever will, because every finished piece gives you a fresh start and a new lesson. Mistakes cost you an hour instead of a week, which makes you braver with the knife.
The ideas in this collection are all designed to be finished in a single sitting, typically one to three hours depending on your pace. Most start from a small offcut or a single blank, most need nothing more than a carving knife, and none of them require you to plan ahead or buy anything special. Each comes with a tip to keep you moving quickly. If you’re still assembling your tools, our guide to choosing the right whittling kit covers the essentials without the upsell.
20 Fun carving Ideas to try this weekend
1. Maple Leaf Trinket Dish
Scoop Out a Bowl and Watch It Appear
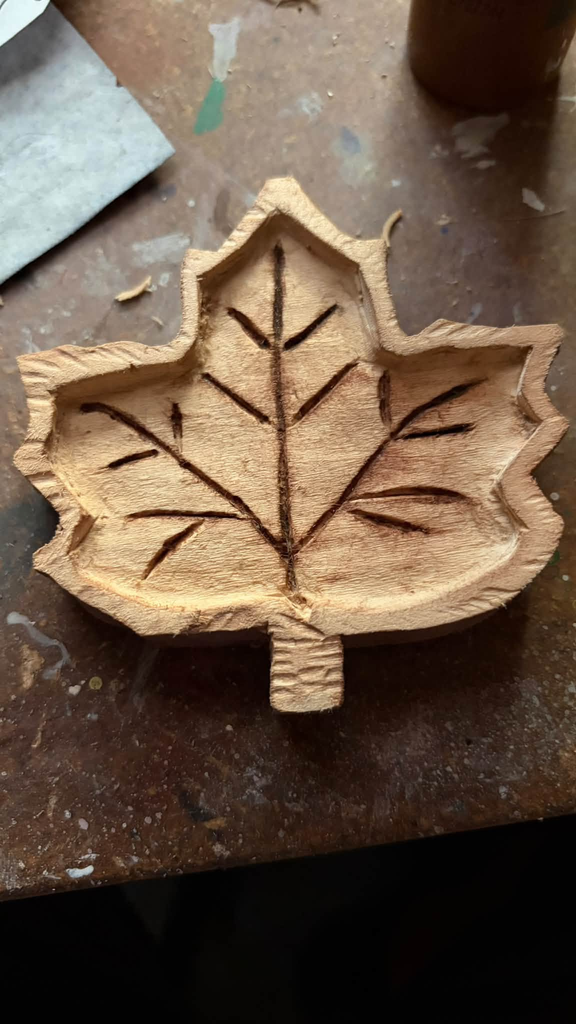
There’s a moment in this one where the flat block stops being a block and becomes a dish, and it happens faster than you’d expect. Hollowing is the most addictive part of carving, since every scoop of the gouge gives you visible progress. Trace a real leaf, saw the outline, then hollow the centre and burn in the veins. By the end of the evening you have something that lives on a shelf holding keys and coins.
Tip: Leave the rim thick so the points don’t split, and use a food-safe finish
2. Caricature Head Busts
The One Project Where Wonky Is the Whole Point
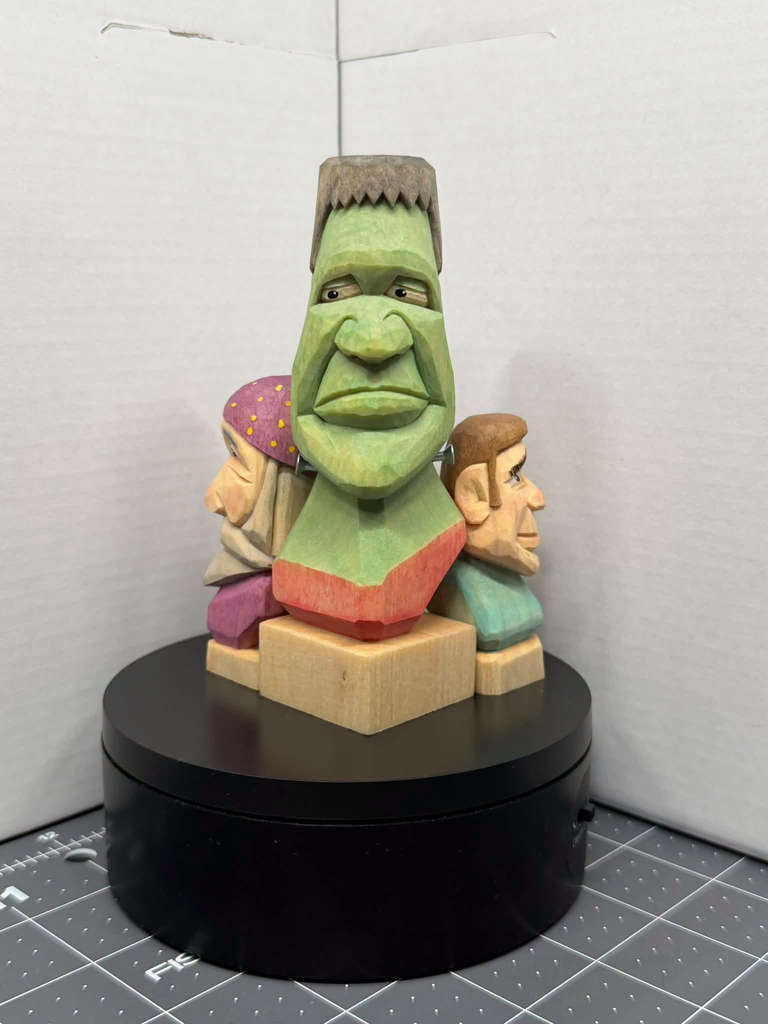
Carve a giant nose. Then a bigger one. Caricature is the most freeing thing you can do with a knife, because there’s no correct answer and the more you exaggerate, the better it gets. Give this one an evening and you’ll finish with a character that makes people laugh, which is a rarer thing to make than a neat carving.
Tip: Leave the bottom of the block square so it becomes the plinth, and cut the nose first, since everything else lines up from it.
3. Tiny Christmas Village
Finish Ten Things in the Time One Usually Takes
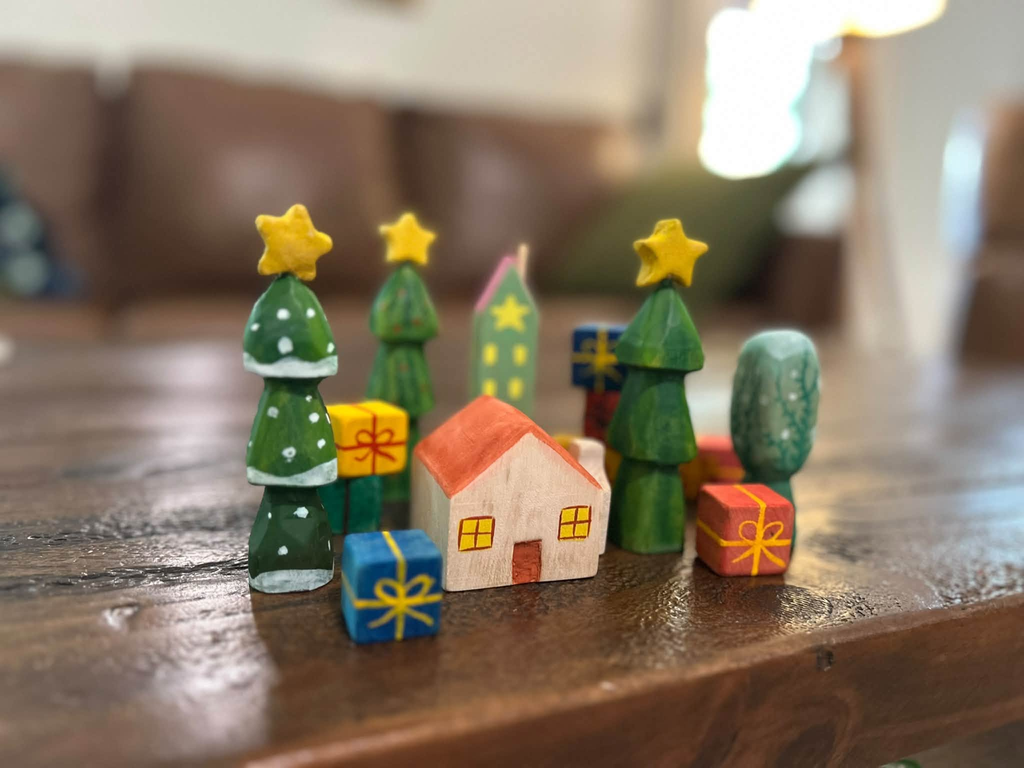
Nothing beats the feeling of a row of finished pieces at the end of a session. The presents are cubes, the houses are blocks with two roof cuts, and the trees are notched sticks, so each takes minutes. Then you paint them all in one go, which is the best part, and suddenly there’s a whole village on the table.
Tip: Carve everything first and paint in a batch at the end. Bright flat colours hide any wobbly cuts.
4. Pocket Gnome
The Carve Everyone Starts With, for Good Reason
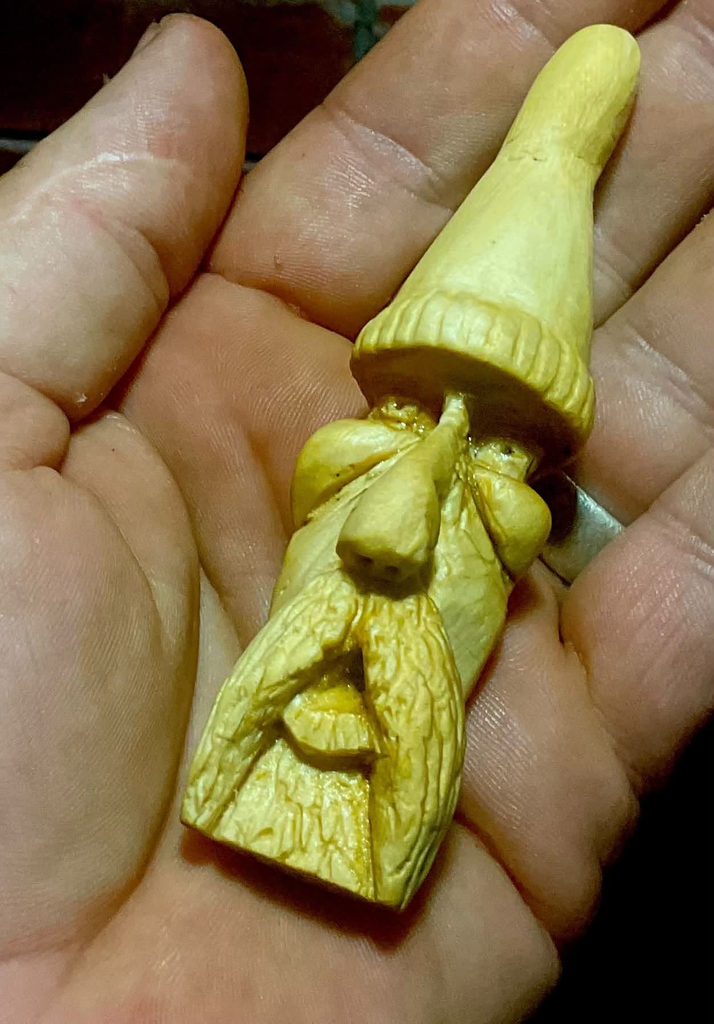
A tall hat, a big nose, and a beard down to the boots. That’s the entire recipe, and it’s the reason gnomes have been the first carve for generations. What makes it fun is how fast the character arrives: three cuts in, the block is already looking back at you. This one’s small enough to disappear into a pocket, which is half the appeal, since a finished gnome tends to get carried around and handed to people.
Tip: Cut the brim of the hat first with a stop cut all the way round. It divides the block into hat and body, and the rest follows from there.
5. Flower-Handled Spoon
Make Something You’ll Actually Use Tonight
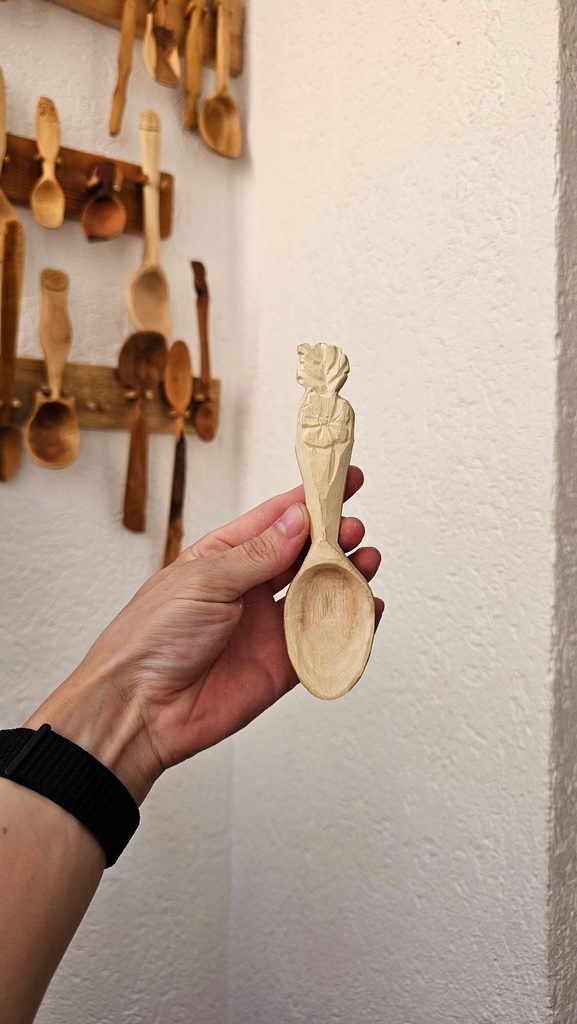
Spoons are the carve that ends with dinner. There’s a real pleasure in hollowing the bowl with a hook knife, feeling the curls come away, and then decorating the handle with whatever you fancy, here a small flower worked into the end. It’s the rare project that’s both practice and a genuinely useful object, and once you’ve made one you’ll want a whole rack of them.
Tip: Hollow the bowl before shaping the outside, while the blank is still chunky and easy to grip. Finish with oil, never varnish.
6. Old Man’s Face
Watch a Grumpy Stranger Appear in Your Hand
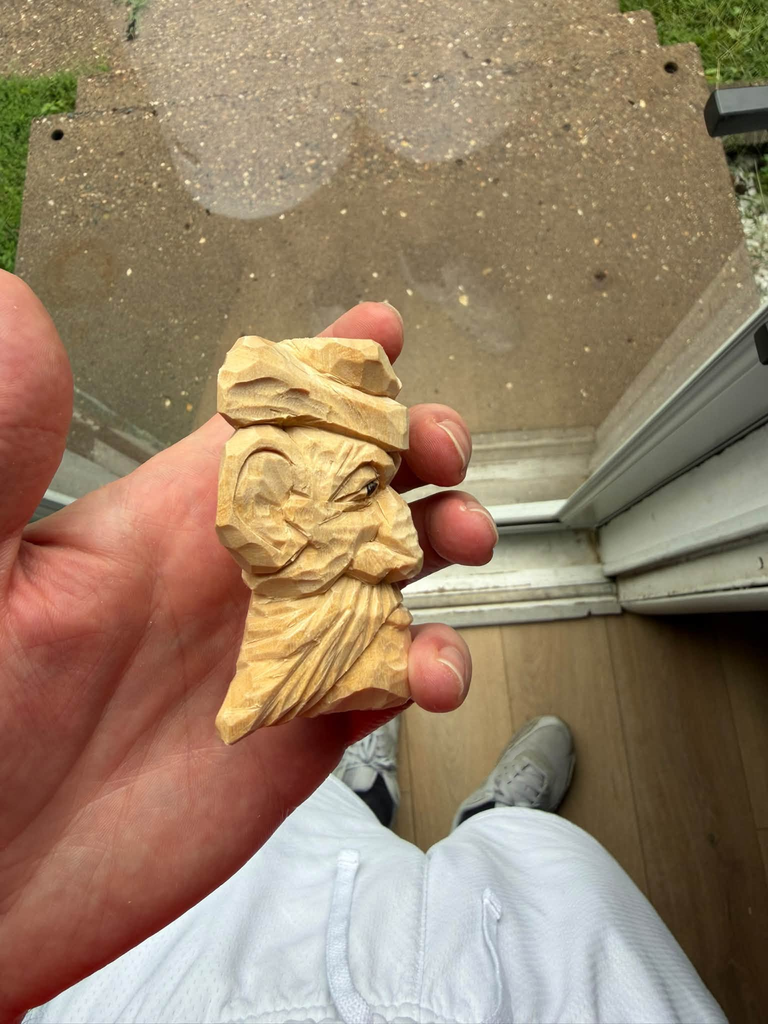
Faces are the carve that surprises people. You cut a wedge for the nose, dig two sockets above it, and suddenly something is squinting back at you with an opinion. This one has a hooked nose, a heavy brow, and a beard flowing down in deep wavy grooves, and the beauty is that wrinkles and messy hair are impossible to get wrong. Every extra cut just adds more character.
Tip: Carve the nose first and everything else finds its place around it. Deep shadows read as age, so cut the brow and cheek lines deeper than feels comfortable.
7. Halloween Ornament Batch
One Evening, a Whole Haunted Shelf
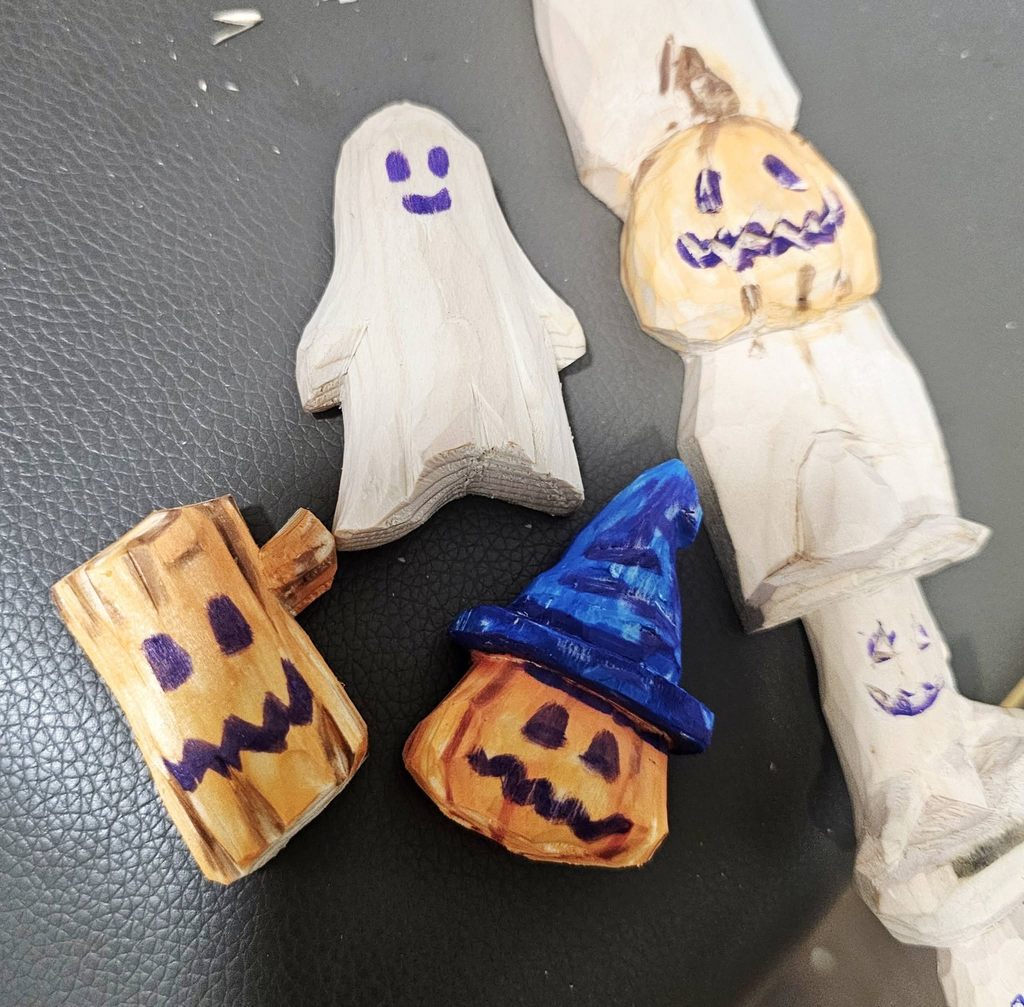
Ghosts, pumpkins, and a little wizard in a blue hat, all small enough to hold in a closed hand. The joy of this one is the production line: ghosts are rounded blobs with wavy hems, pumpkins are ribbed balls, and neither has a single part that can break. Carve five or six while you watch something, then paint them all at once and line them up along the windowsill.
Tip: Faces go on with a pen or a fine brush, not a knife. Two triangles and a grin is all a jack-o’-lantern needs.
8. Painted Rooster
Let the Paintbrush Do the Showing Off
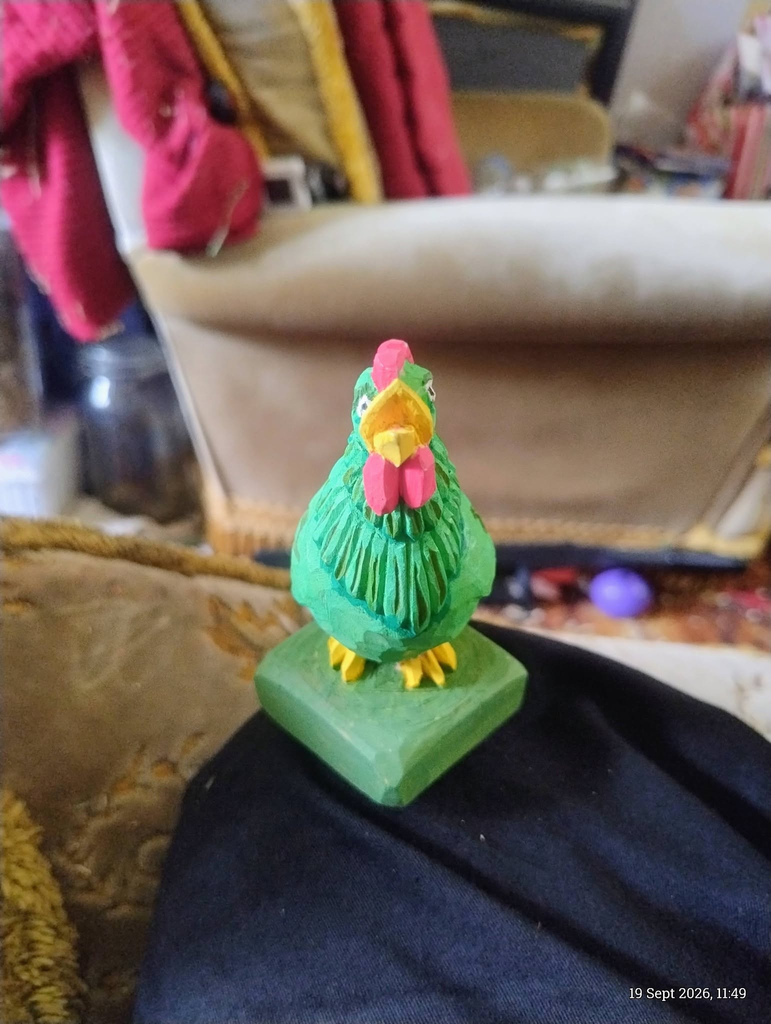
Underneath all that colour, this rooster is a simple rounded body on a square base. What makes it fun is the finishing: a crest of fanned feather cuts, a red comb, a bright yellow breast, and a coat of green that turns a plain shape into something that belongs on a kitchen shelf. It’s the project to reach for when you want a quick win with a big visual payoff.
Tip: Carve the base as part of the same block so it stands on its own. Cut the tail feathers as repeated V-grooves, all sweeping the same direction.
9. Chunky Owl
Round a Block, Add Two Eyes, Done
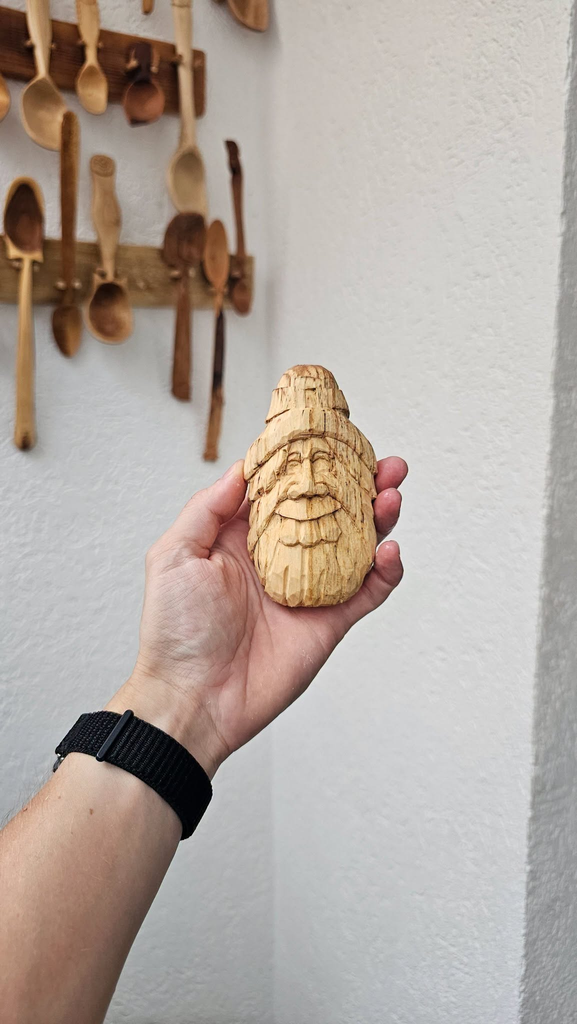
The owl is the fastest satisfying carve there is, because an owl is already an egg with a face. A few sweeping cuts round the body, a shallow line marks the facial disc, and rows of scooped feather marks fill the chest. Twenty minutes in it stops being wood and starts staring at you, which is exactly the moment carvers do this for.
Tip: Keep the wings flat against the body rather than carving them free, the same approach that keeps the beginner bird carvings unbreakable.
10. Miniature Witch’s Broom
The Fun Is All in the Fraying
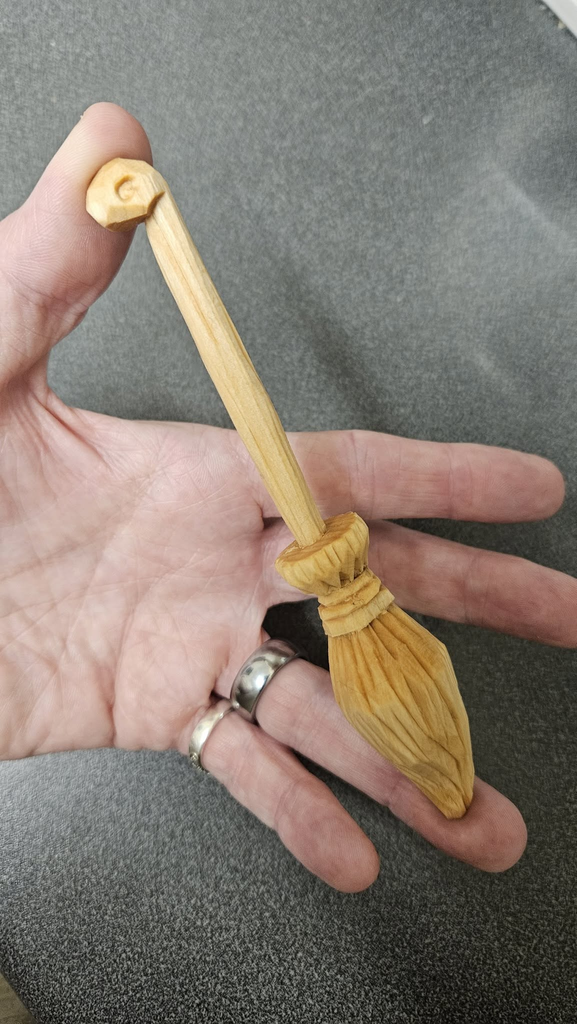
A slim handle, a swollen head of bristles, and a binding where the two meet. What makes this one a joy is the bristles: you take a knife and deliberately split and splay the end into dozens of ragged fibres, which is the opposite of careful carving and enormously satisfying. Messier is better, and it’s done in under an hour.
Tip: Carve the handle smooth first, then work the bristle end last, splitting with the grain and letting the fibres flare naturally.
11. Wood Spirit on Bark
Find a Face Hiding in a Piece of Firewood
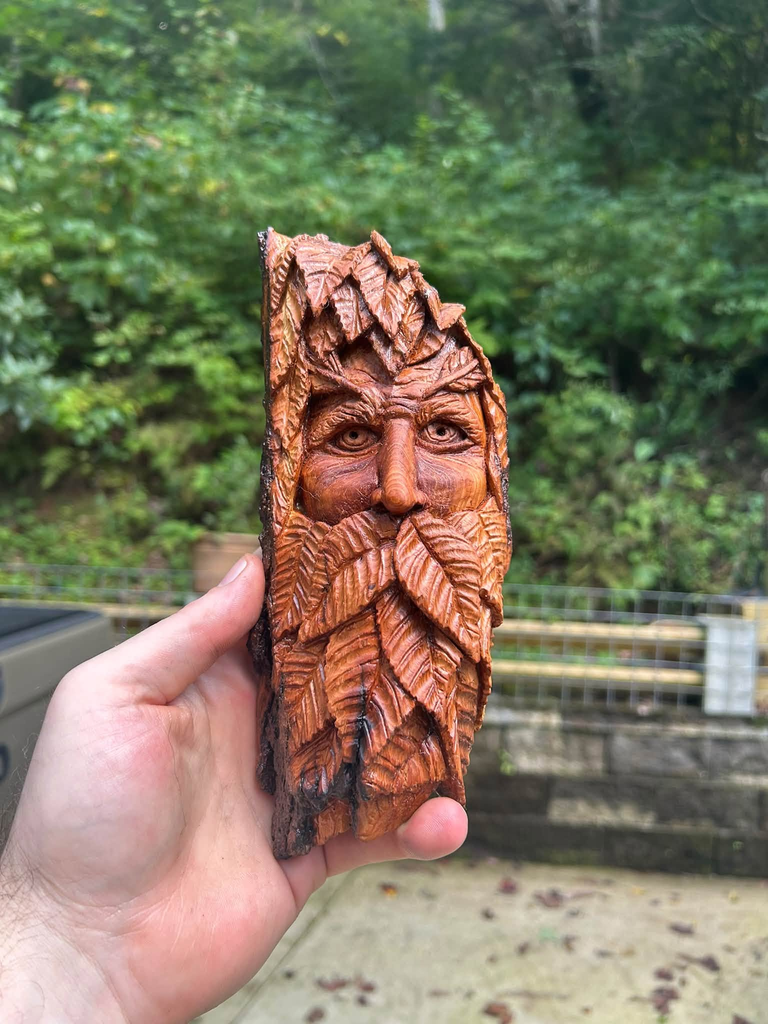
Pick up a chunk of bark-covered branch and carve a face peering out of it, surrounded by leaves. The pleasure here is that the wood does half the work, since the bark edge frames the face and the natural shape decides the composition for you. Cottonwood bark is soft enough to cut like cheese, which makes it a genuinely relaxing evening.
Tip: Rough in the nose, brow, and beard first, then let leaves fill whatever space is left. The design doesn’t need planning.
12. Ghost in a Wizard Hat on a Pumpkin
Stack Two Silly Ideas and Commit
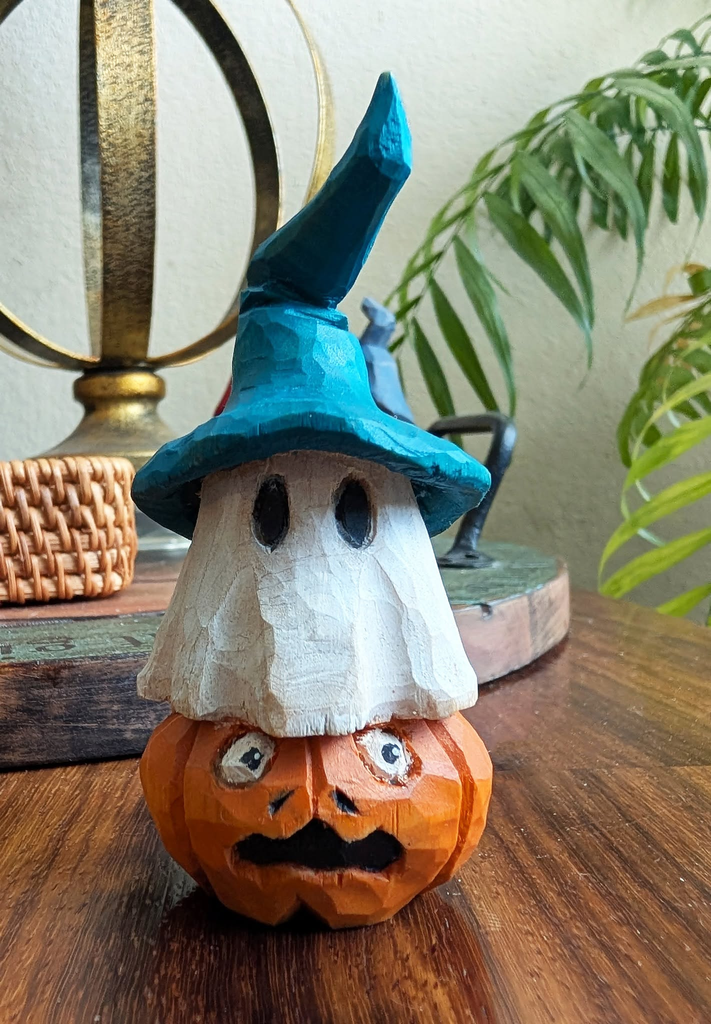
A pumpkin with a startled face, a ghost sitting on top, and a floppy blue wizard hat on the ghost. Nobody needs this, which is precisely the point. Carving something absurd is a completely different pleasure from carving something accurate, and you get to invent the whole thing as you go.
Tip: Carve the pumpkin and ghost as one block and add the hat separately so you can tilt it however you like.
13. Chess Knight
Carve One Piece and You’ll Want the Whole Set
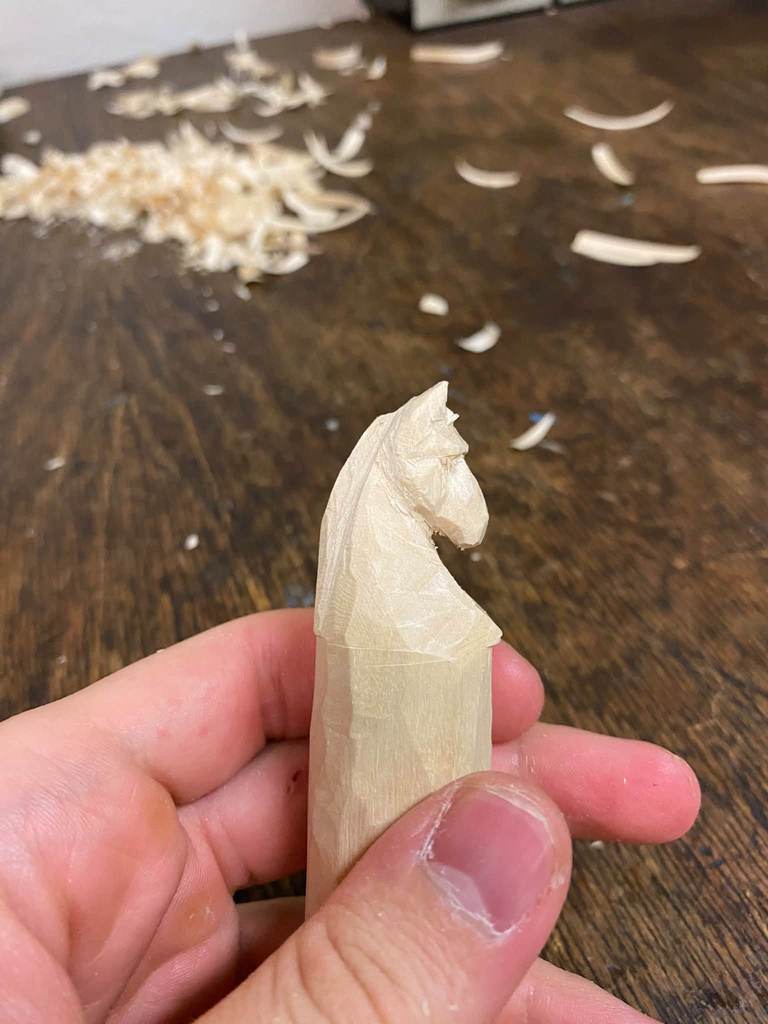
A horse’s head rising out of a plain square column, with an arched neck, a cropped mane, and the block left uncarved below. It’s a brilliant single-sitting project because only the top third needs any work, and the familiar silhouette means you already know what you’re aiming for. Finish one and the itch to carve the other fifteen sets in immediately.
Tip: Leave the base as a plain block. The contrast between rough column and shaped head is the look, and it gives you something to grip.
14. Stepped Pine Tree
Cut the Same Notch Twenty Times and Watch a Forest Grow
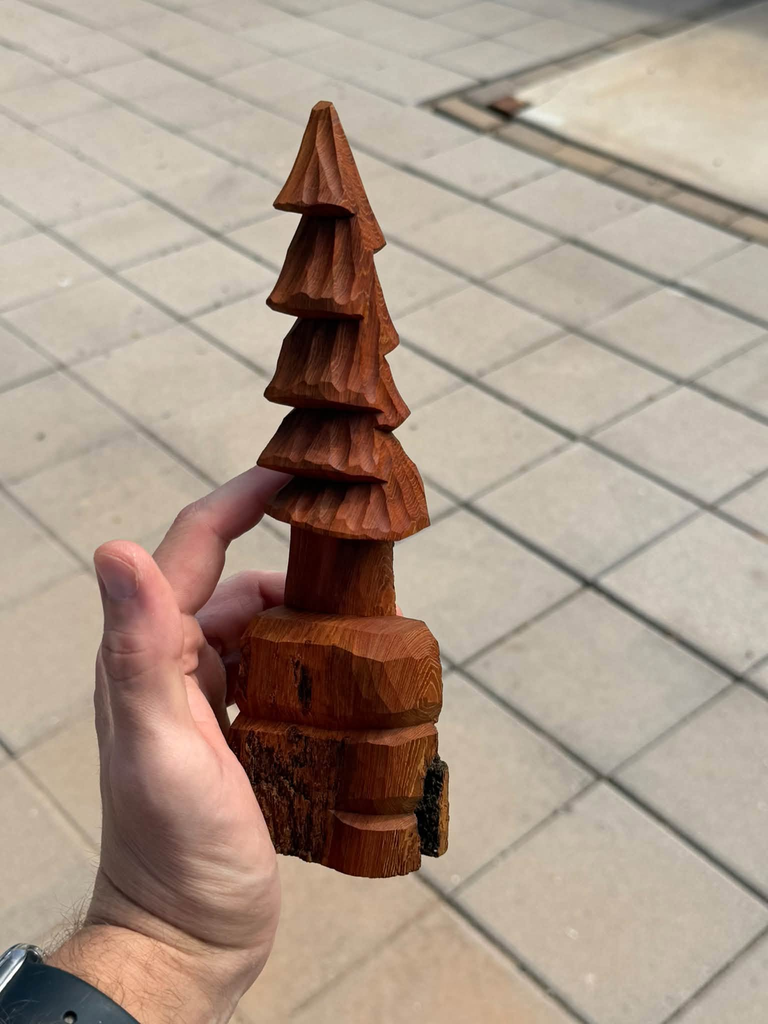
Nothing but a tapered blank and a series of angled notches spiralling up it, each one throwing off a satisfying curl of shaving. The rhythm is the appeal here: once you find the angle, your hands take over and the tree builds itself. Ideal for an evening when you want to carve without having to think.
Tip: Work from the bottom up and keep every notch at the same angle. Slight irregularity looks like a real tree, so don’t measure.
15. Phoenix Pendants
Small, Wearable, and Finished in One Go
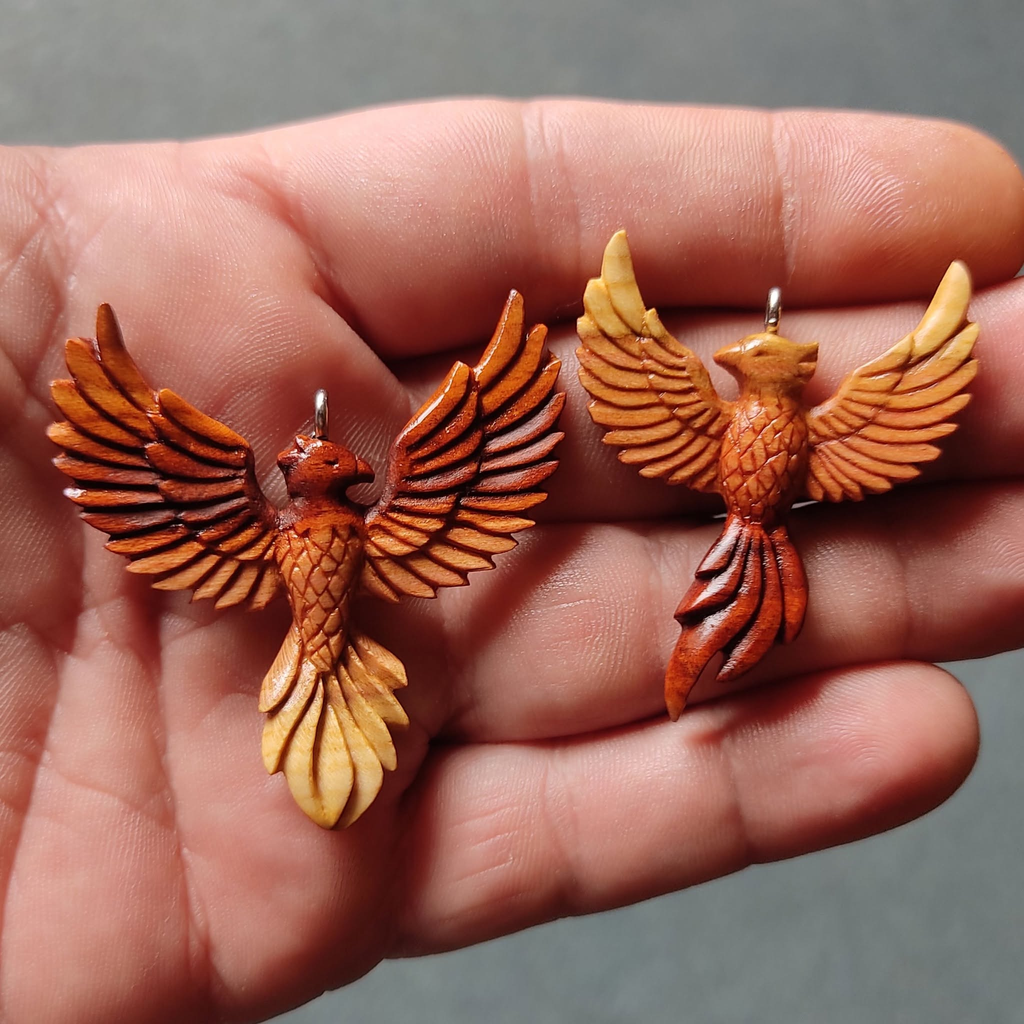
Two tiny birds with wings thrown wide, shaded from deep red into gold, each strung on a cord. Carving something wearable changes the whole exercise, because it ends up on someone’s neck rather than a shelf. The flame colours come from scorching and staining rather than paint, which is quick and dramatic.
Tip: Cut the outline from thin stock so the wings stay flat and strong, then shade from the edges inward. See our carved pendant ideas for more shapes.
16. Trio of Little Ghosts
The Same Shape Three Times, Three Different Moods
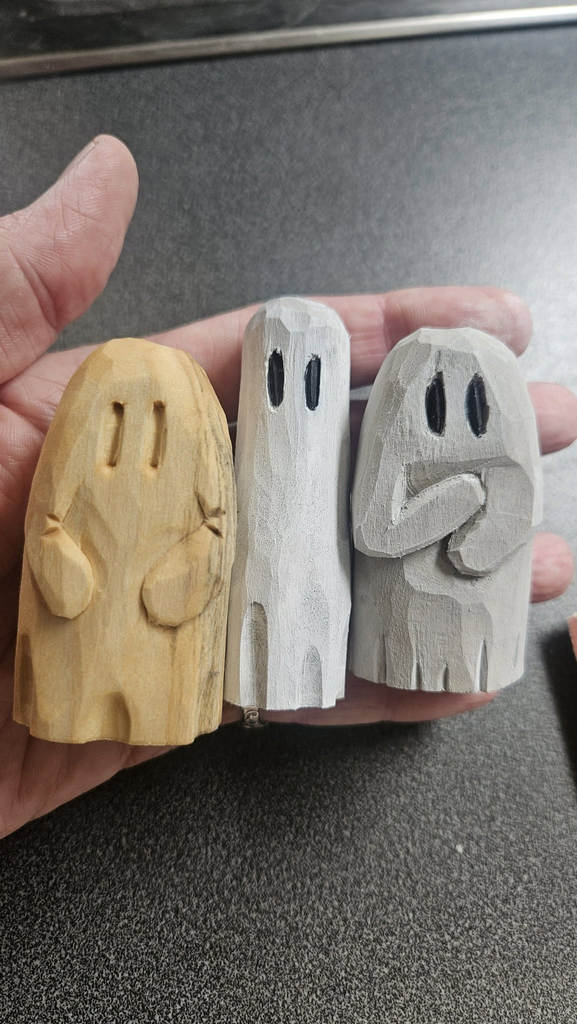
Three flat-bottomed ghosts side by side, one bare wood, one white, one grey, each with a slightly different expression and a pair of stubby arms. The fun is in the repetition: carve the same simple shape three times and give each one a different face, and they immediately become a family. Each takes maybe twenty minutes.
Tip: Keep the base flat and uncarved so they stand on their own, and draw the faces on with a pen once the shape is finished.
17. Palm-Sized Mouse
Round It Until It Feels Good to Hold
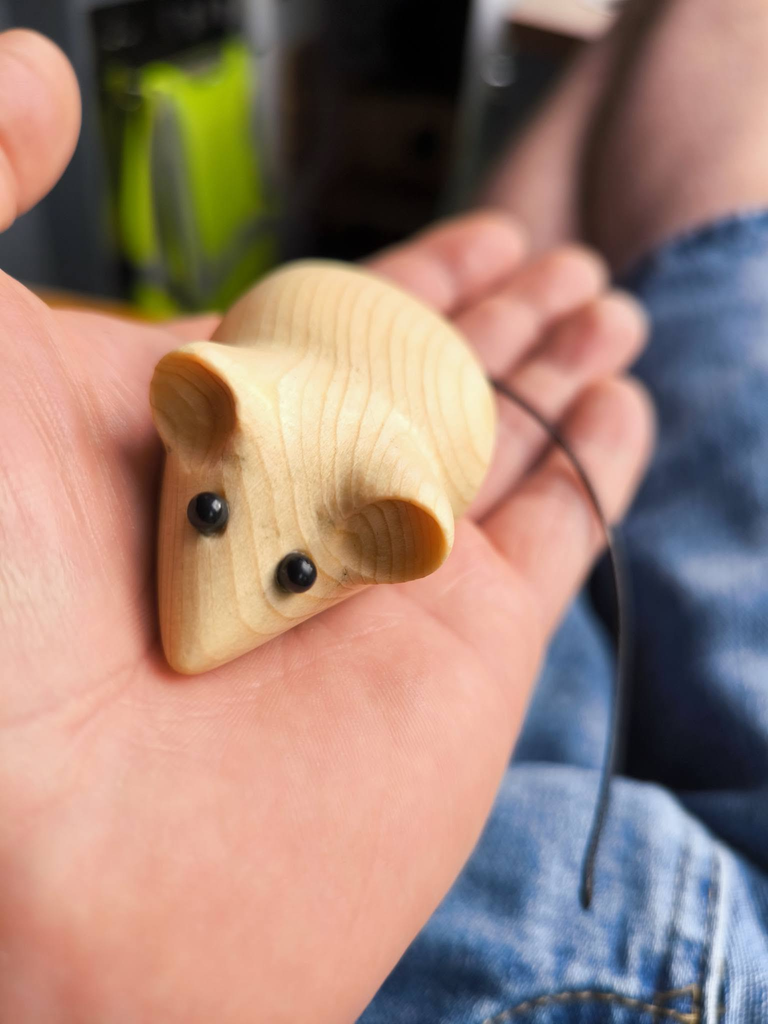
A smooth little mouse with two big ears, a pointed snout, and two glossy black eyes. This one is about touch as much as looks, since the whole pleasure is rounding the body until it sits perfectly in a closed hand. Nothing to break, nothing to paint, and glass eyes turn it from a lump into a creature in two seconds flat.
Tip: Press glass eyes into slightly oversized holes with a dab of filler, and set them further back on the head than instinct suggests.
18. Blocky Jack-o’-Lantern
Let the Square Corners Stay Square
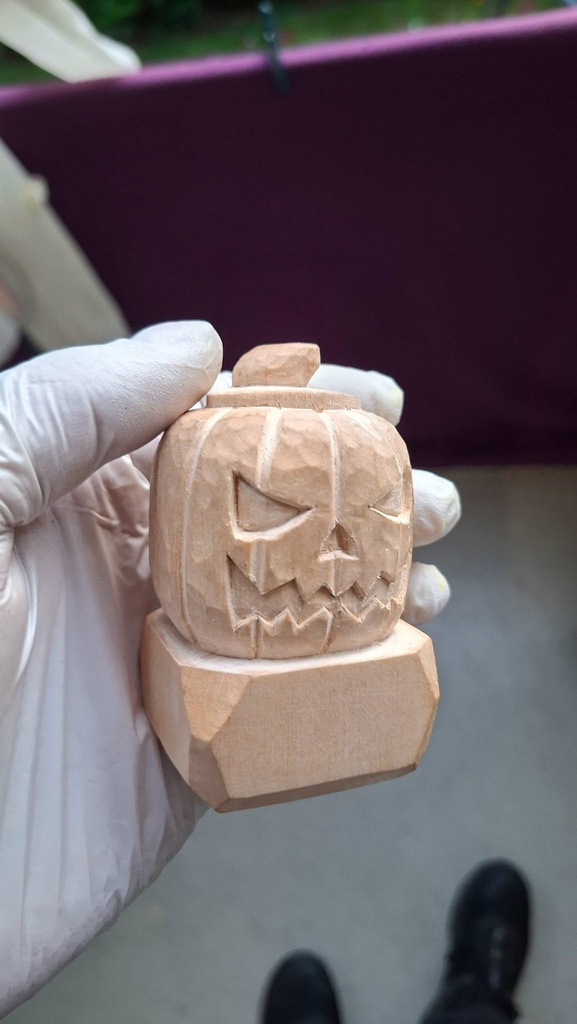
A pumpkin carved with deliberate flat planes instead of smooth curves, sitting on an uncarved block base with a cut-out grin and triangle eyes. It’s freeing to carve something where the tool marks are the finish, so there’s no sanding, no blending, and no chasing perfection. Start after dinner, done before the kettle’s cold.
Tip: Cut the ribs as straight V-grooves from stem to base. Straight lines are faster and look better here than curved ones.
19. Unimpressed Frog
Give It an Attitude and It Writes Its Own Story
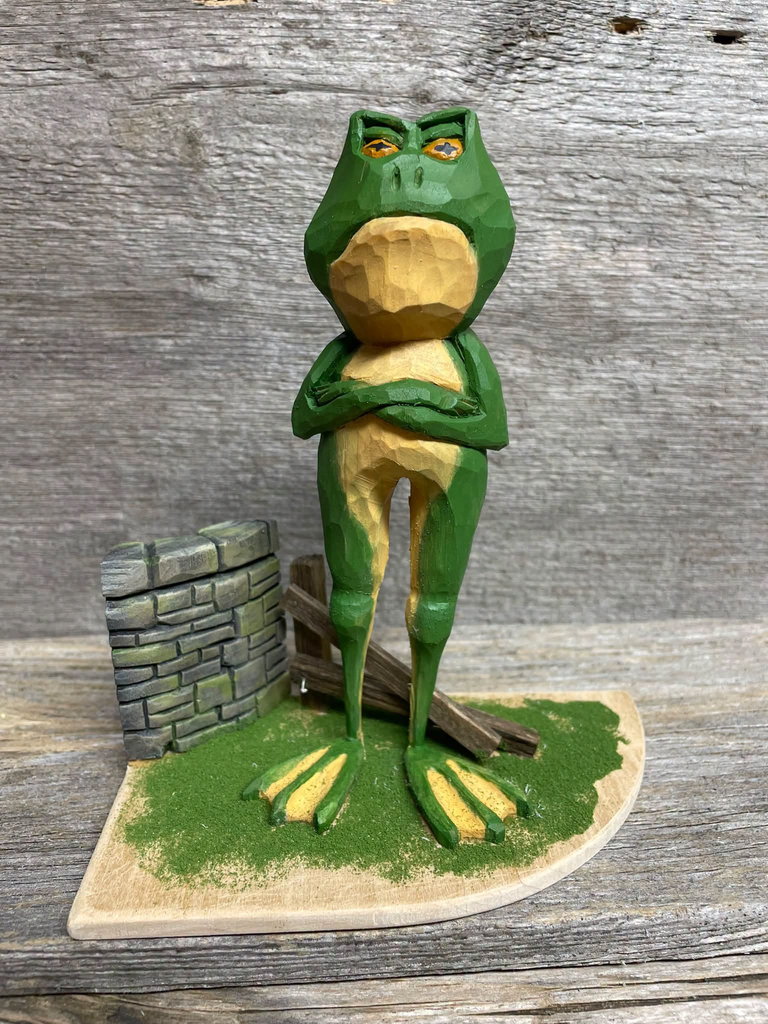
A green frog standing upright with its arms folded and a thoroughly fed-up expression, leaning against a little stone wall. Posture is the whole joke here, and it costs nothing to carve, since crossed arms are two shallow bands across the chest. Add a scrap base with some green flock and you’ve built a tiny scene with a character in a mood.
Tip: Carve the body as a simple column with a flat front, then cut the arms as two crossing bands. The eyebrows do all the grumpiness.
20. Flopped-Out Cat
The Pose That Does All the Work
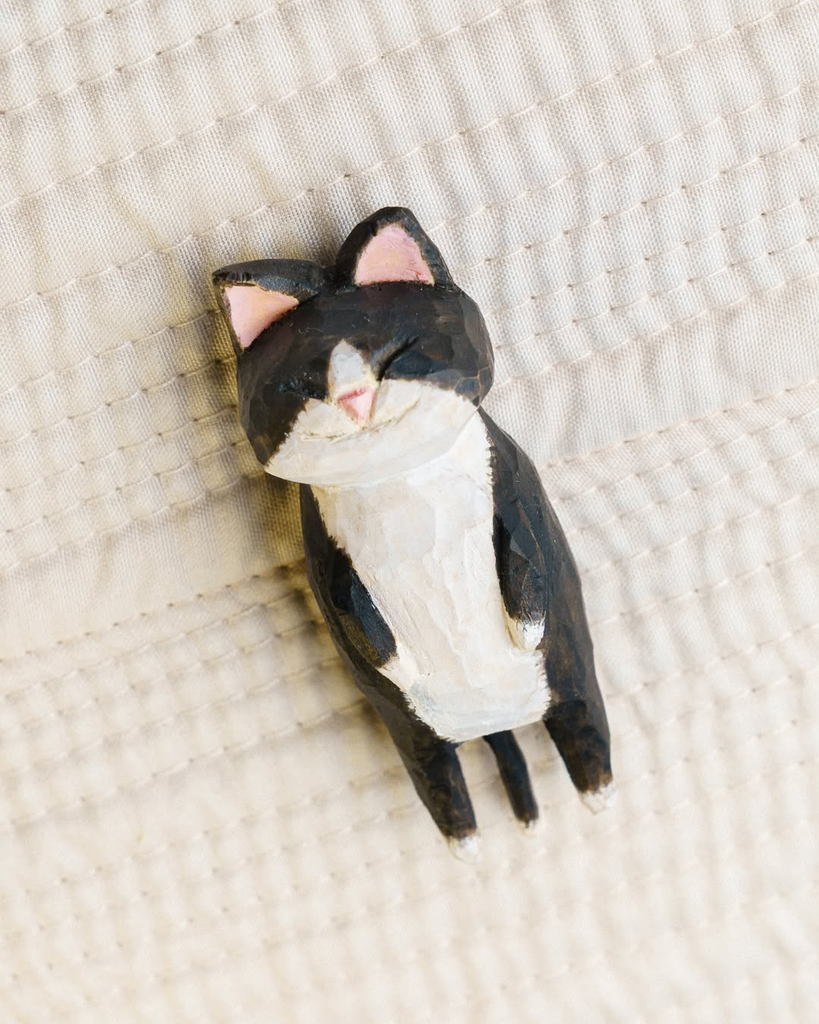
A tuxedo cat lying on its back with its paws in the air, painted in black and white with pink ears. Belly-up is the most relaxing carve on this list, because the piece lies flat on the bench the whole time and nothing sticks out to snap. It’s also instantly recognisable to anyone who owns a cat, which makes it a favourite to hand over as a gift.
Tip: Keep the paws as short chunky bumps rather than slim toes. For more poses in this vein, see our easy cat woodcarving ideas.
How to Actually Finish in One Sitting
The difference between a carving you finish tonight and one that joins the pile of half-done blocks usually comes down to a few decisions made before you pick up the knife.
Pick your project by the clock, not by ambition. If you’ve got two hours, choose something from the simpler end of this list rather than starting a piece you know needs five. A finished ghost beats an abandoned eagle every time, and the finished piece is the one that teaches you something, because you carried it all the way through to the last cut.
Get everything ready first. Blanks cut to size, knife stropped, a bin bag or newspaper under your chair, and good light. Ten minutes of setup saves you the mid-session interruption that turns a one-sitting carve into a two-week project. A dull blade is the single biggest time thief here, so strop before you start and again whenever the wood stops slicing cleanly.
Decide up front how detailed you’re going. Most of the pieces in this collection work because the carver stopped early. Flat facets left showing, faces drawn on with a pen, texture suggested with a handful of V-cuts rather than a hundred. Fussing is what eats the evening, so choose your level of finish before you begin and hold to it.
Work in the right order. Rough out the whole shape before adding any detail, since detail on a lumpy body always looks wrong and you’ll end up cutting it off. Leave fragile parts, like beaks, ears, arms, and tails, thick until the very end. Save painting for the last twenty minutes, and if you’re making several pieces, paint them all in one batch.
Finally, keep a box of offcuts and blanks ready to go. Half of finishing in one sitting is simply being able to start on impulse, without a trip to the shop or a search through the workshop for something the right size.
Conclusion
Quick carves are where the real progress happens. Every finished piece teaches you something about grain, pressure, and when to stop, and the lessons stack up far faster when you’re completing a project a week rather than labouring over one for a month. There’s also something worth protecting in the simple pleasure of making a small thing in an evening, with a knife, a block, and nothing else demanding your attention.
Pick whichever idea on this list made you want to reach for a blade, clear a couple of hours, and see what you end up with. Then do it again next week with something slightly harder. Before long you’ll have a shelf of little carvings, each one a record of an evening well spent, and the block that once looked intimidating will just look like the next thing you’re about to finish.

20 Inspiring Beginner-Friendly Gnome Wood Carving Ideas - 2026
Wednesday 23rd of September 2026
[…] woodcarving ideas and easy dog woodcarving ideas make good companions on the same shelf, and these fun woodcarving ideas you can finish in one sitting will fill the evenings in […]