Introduction
Birds have been the bread and butter of woodcarvers for centuries, and there’s a good reason for it. A bird’s body is essentially one smooth, teardrop-shaped mass, which means that once you’ve learned to round a block cleanly, you’re already most of the way to a finished carving. Add a beak, a hint of a tail, and two dark eyes, and the wood does the rest.
Birds are also endlessly forgiving as a subject. Nobody can tell you that your songbird is the wrong shape, because a stylised bird reads as a bird whether it’s plump and rounded or sleek and angular. That freedom makes them ideal for amateurs who want a piece that looks finished rather than a half-abandoned attempt at realism. Many carvers never move past birds at all, and their shelves are all the better for it.
The 20 ideas below range from palm-sized songbirds and simple owls to spoon handles, flat ornaments, and mounted display pieces. Each comes with a tip aimed squarely at newer carvers, and a few more ambitious designs appear along the way as something to aim for. If you’re not sure where to begin, our guide to choosing a project that matches your skill level will help you pick sensibly.
What You’ll Need
Basswood is the standard choice for bird carving, being soft, tight-grained, and happy to hold a crisp beak without crumbling. Blanks around 2″ x 2″ x 4″ suit most small songbirds, while 3″ x 3″ x 5″ gives you room for an owl or a duck. Butternut and white pine work too, and tupelo is worth knowing about if you ever move on to feather detail, since it holds fine texture beautifully.
A sharp carving knife handles the bulk of the shaping, and our guide to choosing the right whittling kit covers what to look for in a first set. A small round gouge is useful for hollowing under the tail and around the wings, and a V-tool makes quick work of feather lines and wing edges. A coping saw speeds up removing waste from the blank. Glass taxidermy eyes in 4mm to 6mm sizes are inexpensive, come on wires, and instantly lift a carving, though painted or burned eyes work perfectly well too.
For finishing, acrylics thinned with water let the grain show through, while an oil or wax finish suits birds left natural. Our guide on how to seal and paint basswood explains how to get an even result without the paint going blotchy. A short length of dowel or a slice of branch makes a simple mount for any bird you want to stand.
How to Carve Your First Bird
Draw the side profile on your blank with the grain running from beak to tail, which keeps the beak and tail strong and prevents short-grain breaks. Sketch the top view as well, since birds are narrower across the back than most beginners expect. Cut away the obvious waste with a coping saw before you pick up your knife.
Round the body first and resist the urge to add detail. Work the block into a smooth teardrop with the widest point at the chest, tapering back toward the tail, and check it from every angle as you go. Once the body feels right, make a stop cut where the head meets the shoulders to define the neck, then narrow the head and shape the beak as a small wedge rather than a fine point.
Mark the wings as shallow raised shapes lying flat against the sides rather than carving them free, and undercut the tail slightly so it appears to lift away from the body. Set the eyes last, positioned further back and higher on the head than instinct suggests. Finish with paint, a light stain, or simply oil, depending on whether you want a lifelike bird or a sculptural one.
20 Easy Bird Woodcarving Ideas
1. Long-Billed Woodcock
One Rounded Body, One Very Long Beak
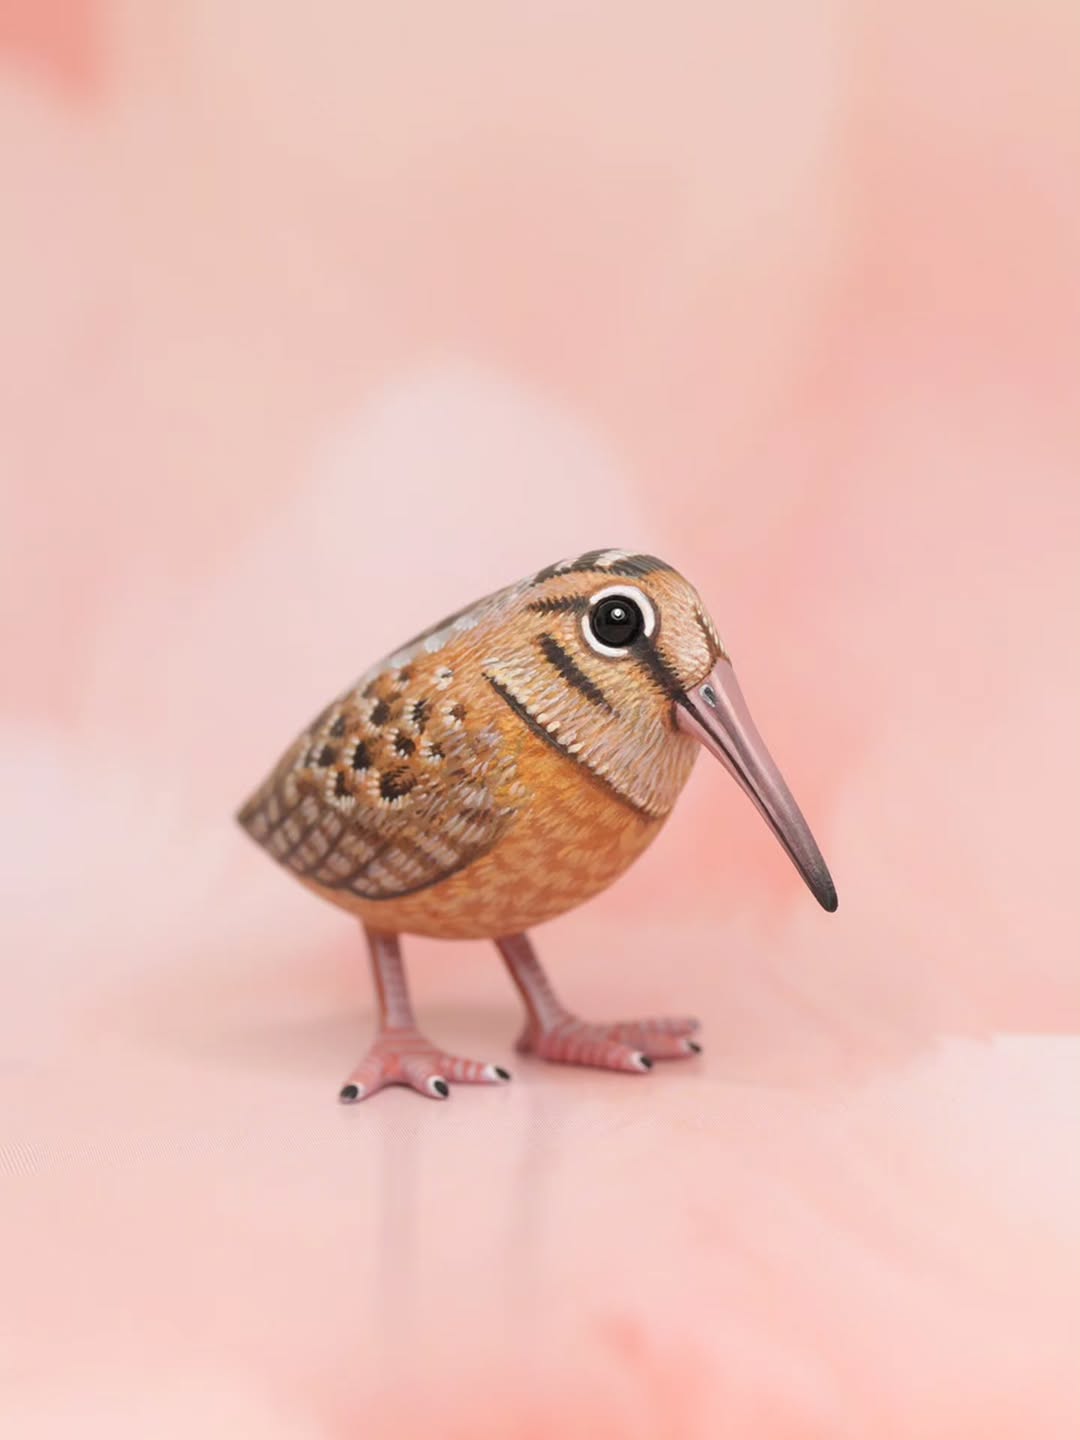
Amateur tip: The body here is the simplest shape in bird carving, a smooth rounded mass with no wings carved free and no tail fanned out, so almost all your effort goes into getting the curve clean. Carve the bill noticeably thicker than the finished piece needs, then reduce it gradually at the very end, always cutting toward the tip so you don’t snap it off. Keep the grain running the length of the bird so the bill has long fibres supporting it. The thin legs are wire rather than wood, which is the standard solution for any bird that needs to stand, and it’s far easier than carving legs that will hold weight. If you’d rather avoid legs altogether on your first attempt, carve the bird resting flat on its belly, the same way the compact cat poses sit stable on their own base.
2. Cardinal on a Carved Post
Let a Bold Colour Carry the Whole Piece
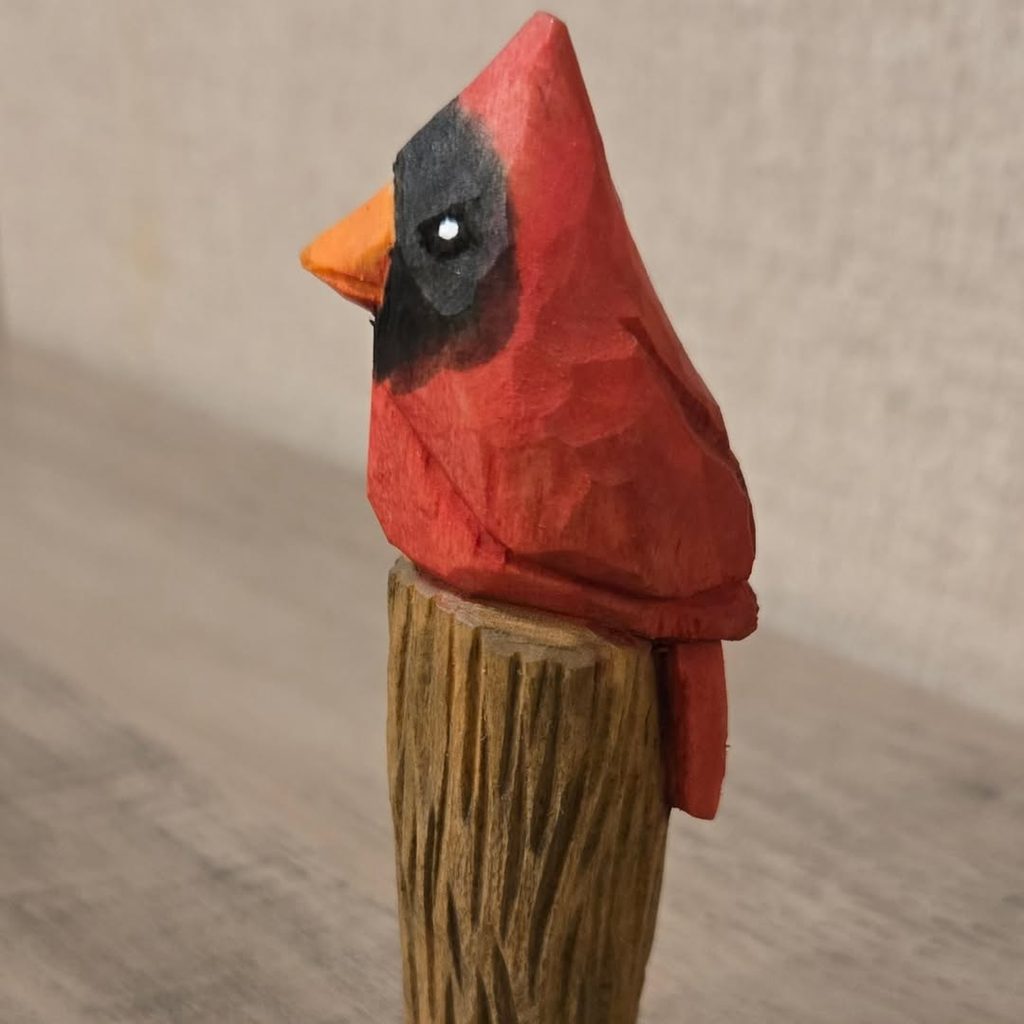
Amateur tip: Carving the bird and its perch from one blank removes the hardest part of any standing bird project, which is working out how to attach it to something. Draw the whole silhouette, post included, on your blank and cut away the waste around it. The crest looks impressive but it’s simply the top corner of the block left uncarved, so plan for it before you start rounding. Choose a bird with a strong, recognisable colour like a cardinal, a bluebird, or a goldfinch, because the paint does most of the identifying work and you can keep the carving itself blocky and simple.
3. Round Baby Owl
An Egg Shape with Two Big Eyes
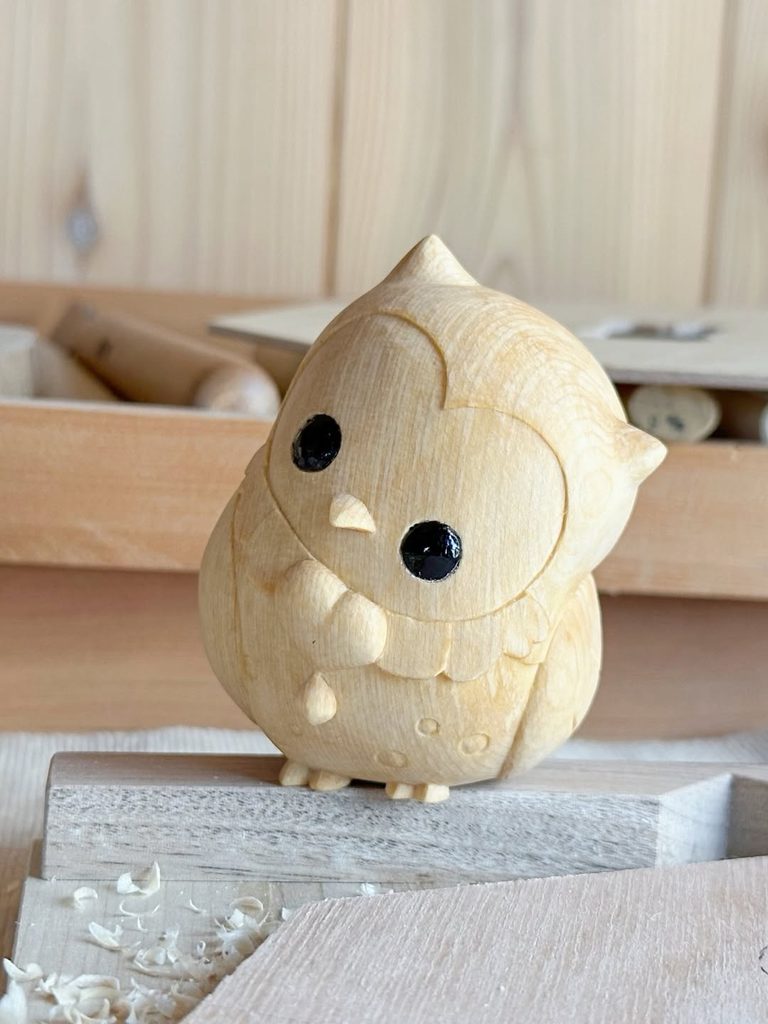
Amateur tip: Owls are the friendliest bird for amateurs because their natural shape is already a rounded lump, and the face sits flat at the front where it’s easy to reach. Round your blank into a smooth egg first and don’t move on until the curve is even from every angle. The feather pattern here is made from repeated shallow gouge scoops laid out in overlapping rows, which is forgiving work since slight irregularity looks organic rather than wrong. Set the eyes wide apart and low on the face, since owls look forward rather than sideways, and use glossy black glass eyes or a drop of gloss varnish over black paint to get that wet, lifelike shine.
4. Curlew on Driftwood
A Sleek Silhouette with a Curved Bill
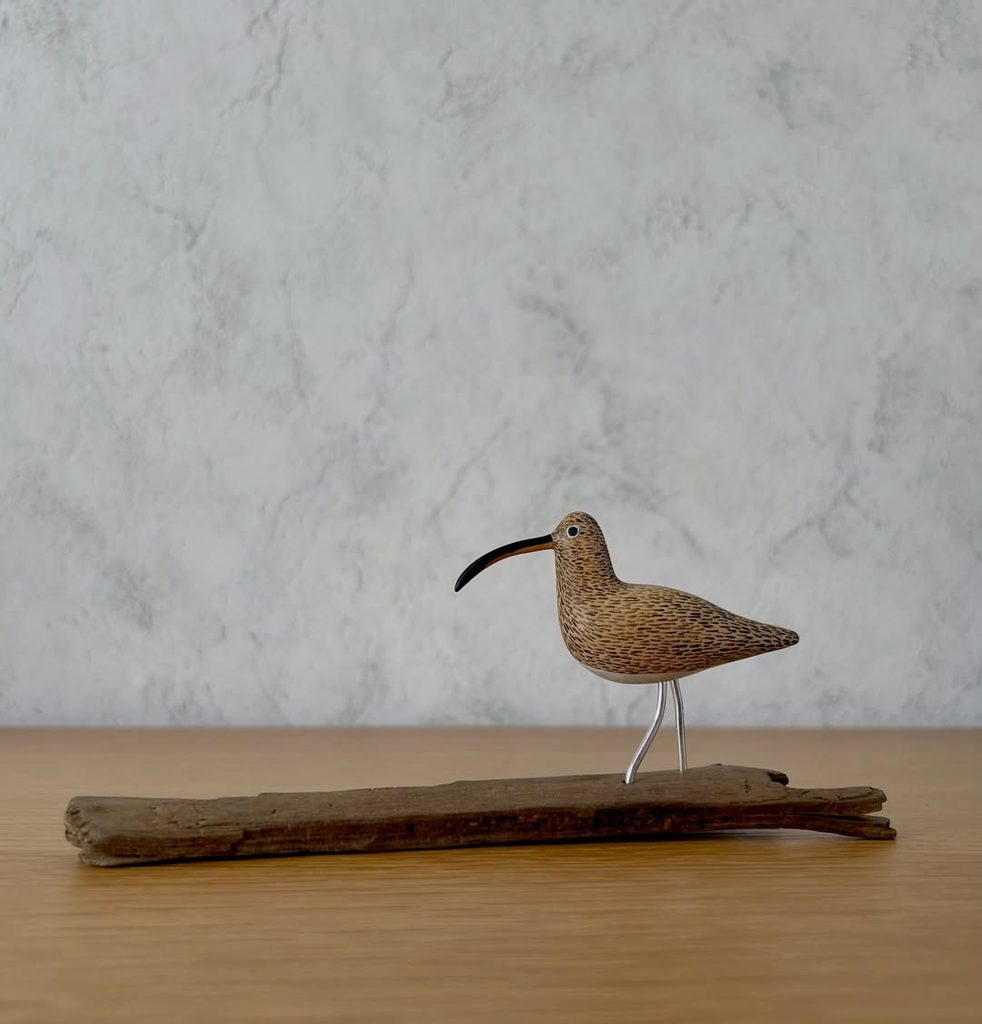
Amateur tip: The curved bill is the only genuinely tricky element here, and there’s a simple workaround. Rather than carving it from the same blank, where the curve would run across the grain and snap easily, carve the bill separately from a hardwood offcut and glue it into a drilled hole, or shape it from a piece of dowel. Keep the body smooth and skip feather carving entirely, since the speckled paint supplies all the texture. Mounting on found driftwood is the easiest way to make a small carving look like a finished display piece, and it costs nothing.
5. Minimalist Kingfisher in Dark Hardwood
Pure Shape, No Detail, All Elegance
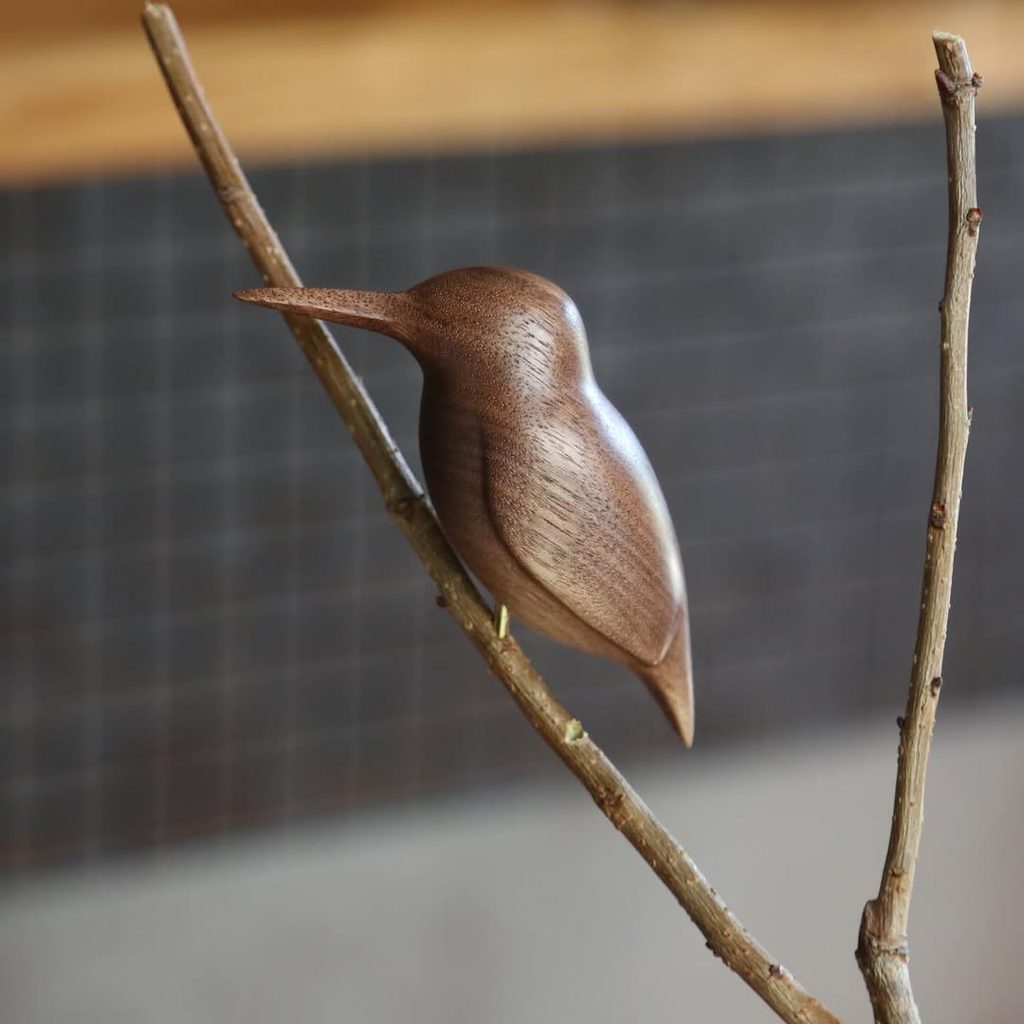
Amateur tip: A piece like this is a brilliant exercise because it exposes exactly how good your shaping is, with nothing to hide behind. Spend all your time on the curve, sighting down the body from the front, the top, and the tail to catch any flat spots or asymmetry. The beak must run with the grain or it will snap, so orient the blank carefully before you cut. Choose a wood with attractive figure, like walnut, cherry, or a nicely grained offcut, since the grain is the only decoration. When you’re ready to sand, work up through the grits patiently so you refine the shape rather than rounding off the edges you worked to create, as our guide to sanding wood explains. Mounting it on a real twig completes the effect for almost no extra work.
6. Faceted Pocket Songbird
The Classic First Carve, Finished in an Evening
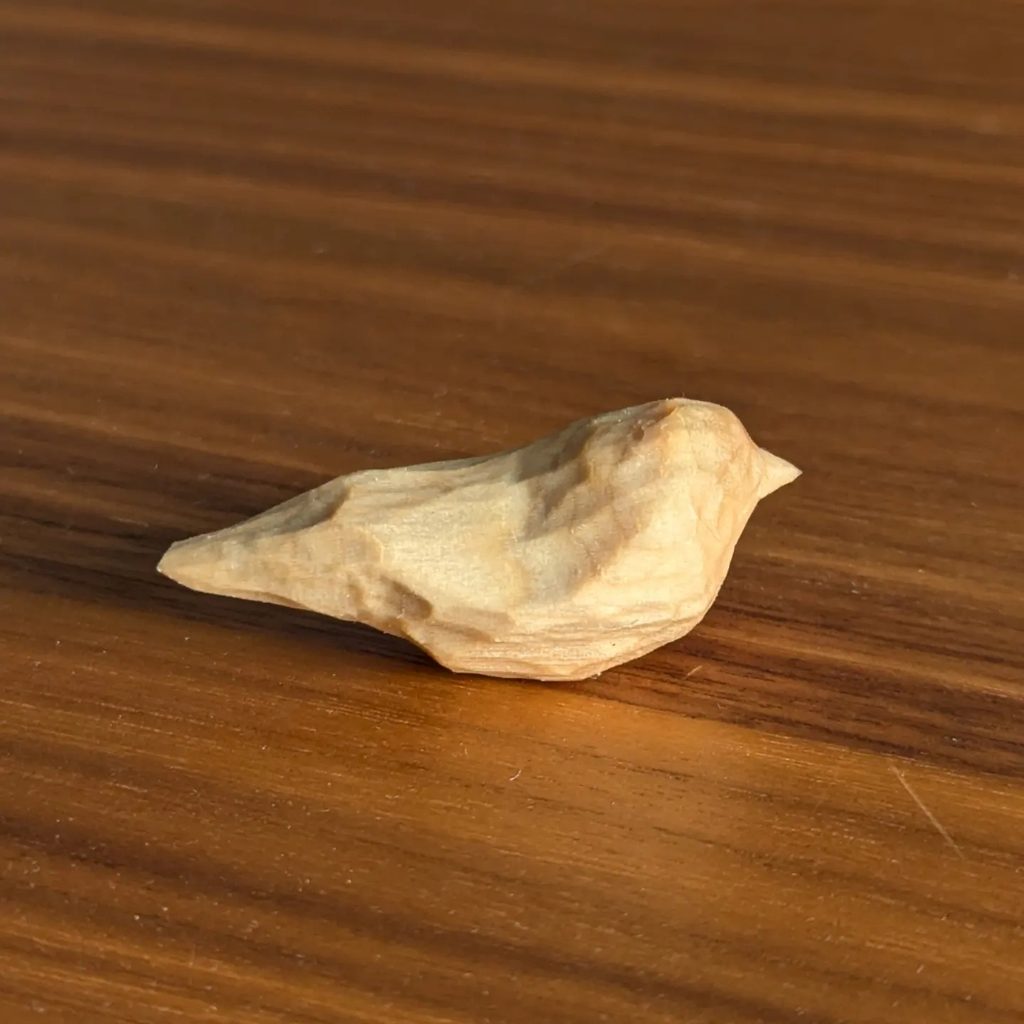
Amateur tip: This is the bird to carve first. There are no legs to break, no eyes to place, and no feathers to texture, so the whole project comes down to shaping one clean wedge and one pointed beak. Because it sits flat on its belly it needs no base, no mount, and no wire. Draw the side profile on a small blank, saw away the corners, then round the chest and taper back to the tail. Leave the facets showing rather than sanding them smooth, the same flat-plane approach used on the faceted dog carvings, where the tool marks are the finish. Carve five of these in an evening and your knife control will improve more than it would from one careful piece.
7. Painted Peacock
Let the Brush Do What the Knife Can’t
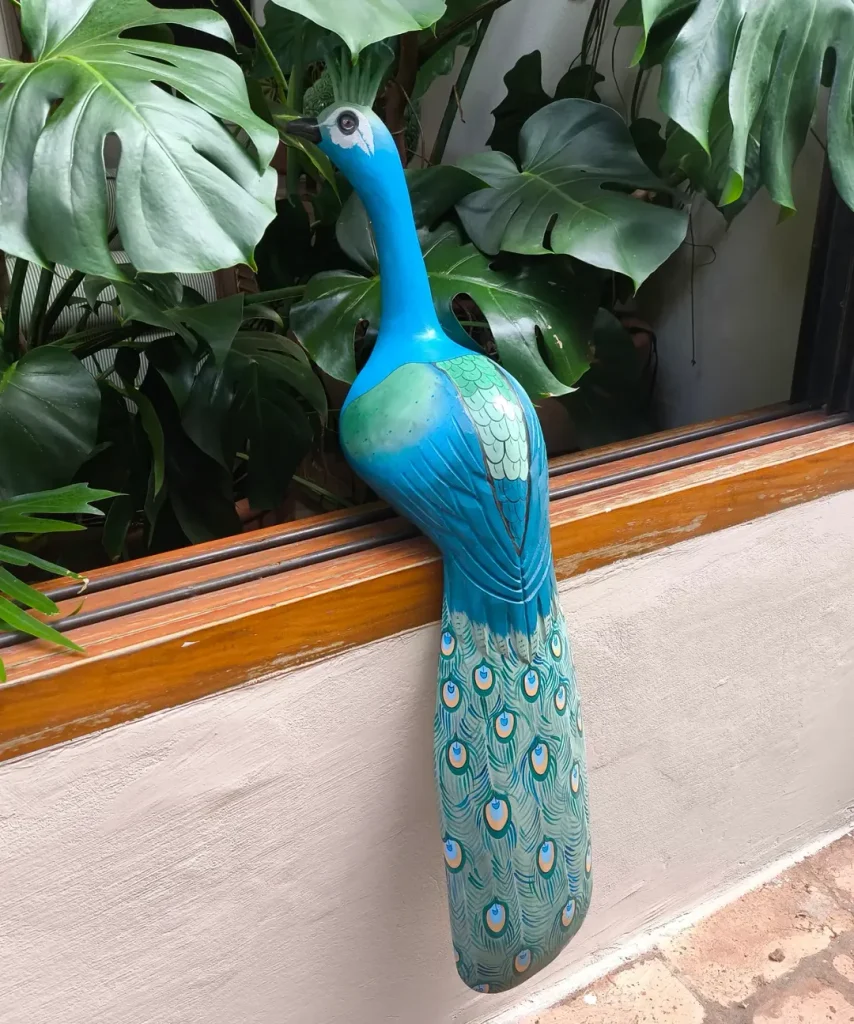
Amateur tip: This is the clearest example on the list of paint doing the heavy lifting. The carving underneath is a simple elongated shape with a curved neck and a few wing ridges, and every one of those iridescent eye feathers is painted rather than cut. If you can shape a long tapered form, you can carve this bird; whether it dazzles depends on your brushwork. Keep the neck thicker than looks right while roughing out, since a slim S-curve is the weak point in the grain. Work the paint in layers, laying down the base colour first and adding the eye feathers last in a regular grid so they read as a pattern.
8. Goose in Flight
Assemble the Wings Rather Than Carving Them
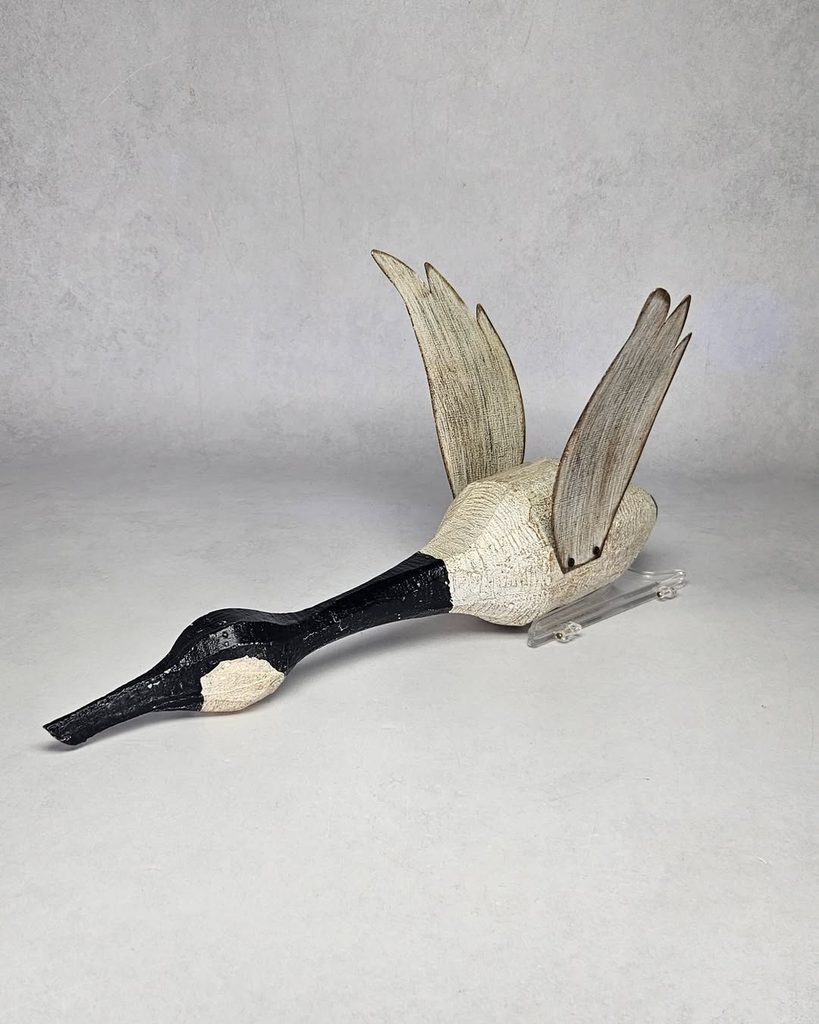
Amateur tip: Flying poses look far beyond a beginner’s reach, but the trick is that the wings are not carved from the body blank at all. Each is shaped from a separate thin board, where the grain can run the length of the wing and support those slim feather tips, then fitted into a slot cut in the body. Carving in parts like this is standard practice for bird carvers, and it lets you remake a single wing if it splits rather than losing the whole piece. Start with the body and neck as one blank, keeping the neck chunky throughout, then make the wings once the body is finished. A clear acrylic stand or a brass rod turns any flying bird into a display piece without distracting from it.
9. Crested Kingfisher on a Turned Base
Contrasting Woods Instead of Paint
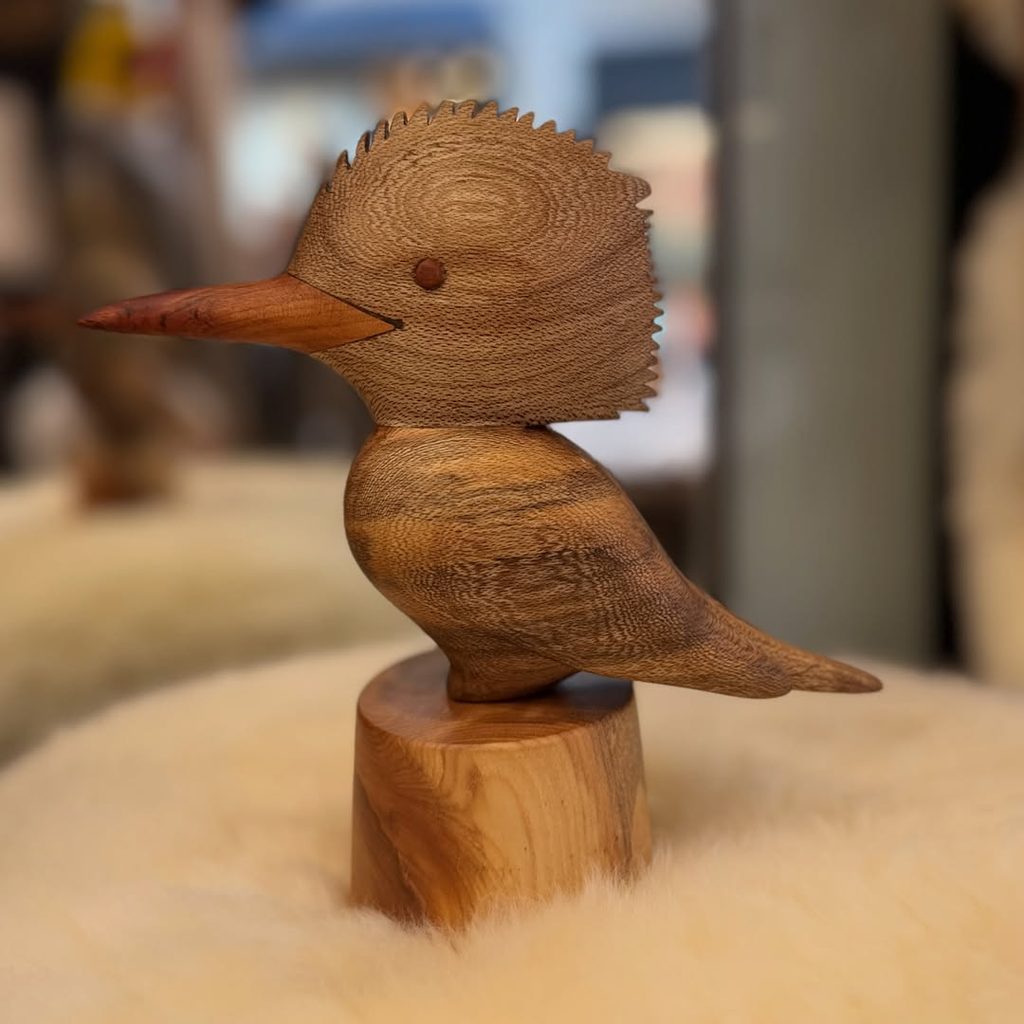
Amateur tip: Using several woods instead of paint is a great option if you prefer working with grain to working with a brush. Here a rich brown body, a reddish bill, and a pale base give the piece all its definition, with a single dark peg supplying the eye. Carving the bill separately also removes the short-grain problem that snaps so many beginner beaks. The notched crest edge looks intricate but it’s just a series of evenly spaced V-cuts along the rim, which is worth practising on a scrap strip first. Cutting a crest as a flat plate rather than a rounded form is far easier and still reads instantly as a kingfisher.
10. Stylised Spiral-Wing Bird
Abandon Realism and Carve a Shape You Like
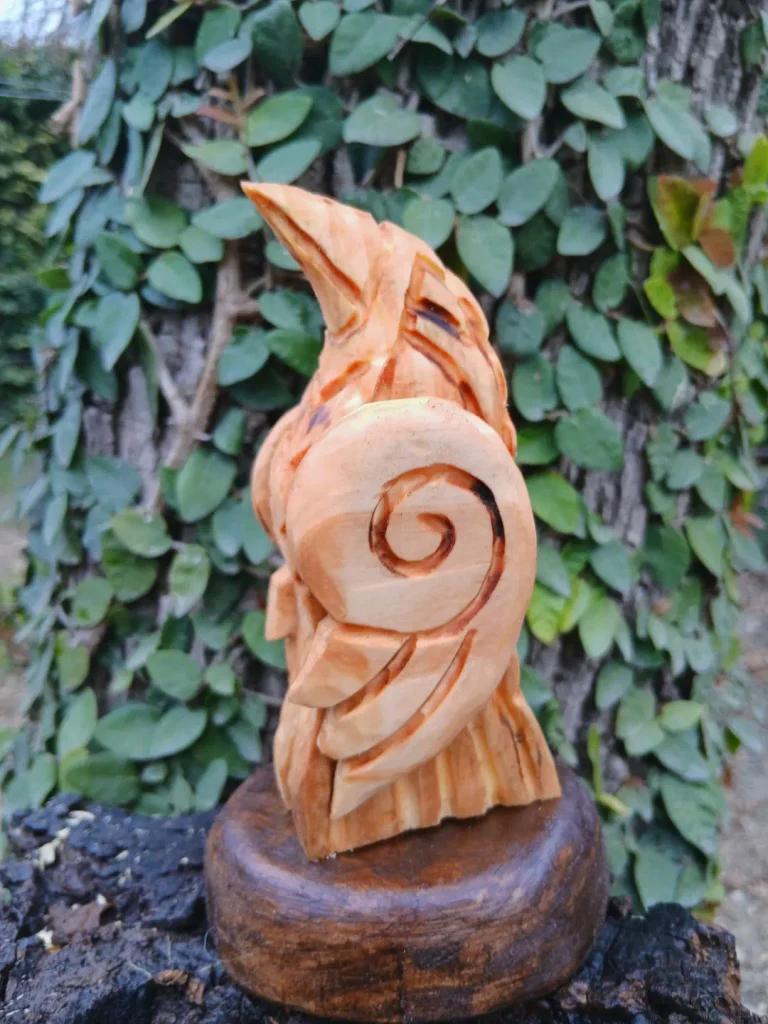
Amateur tip: Stylised carving frees you from the pressure of getting proportions right, because there is no real bird to be compared against. Draw a shape that pleases you, keep the lines flowing in one direction, and let repetition do the work: the spiral, the sweeping curves, and the fanned feather lines are all made with the same V-cuts at different scales. Cut the main outlines first and deepen them in stages rather than trying to reach full depth in one pass. The warm toning in the grooves comes from a light scorch or a dark wash wiped back, both easy ways to make carved lines pop. Mounting on a contrasting dark base finishes the piece properly.
11. Tall Wading Bird on a Plinth
One Continuous Curve from Beak to Tail
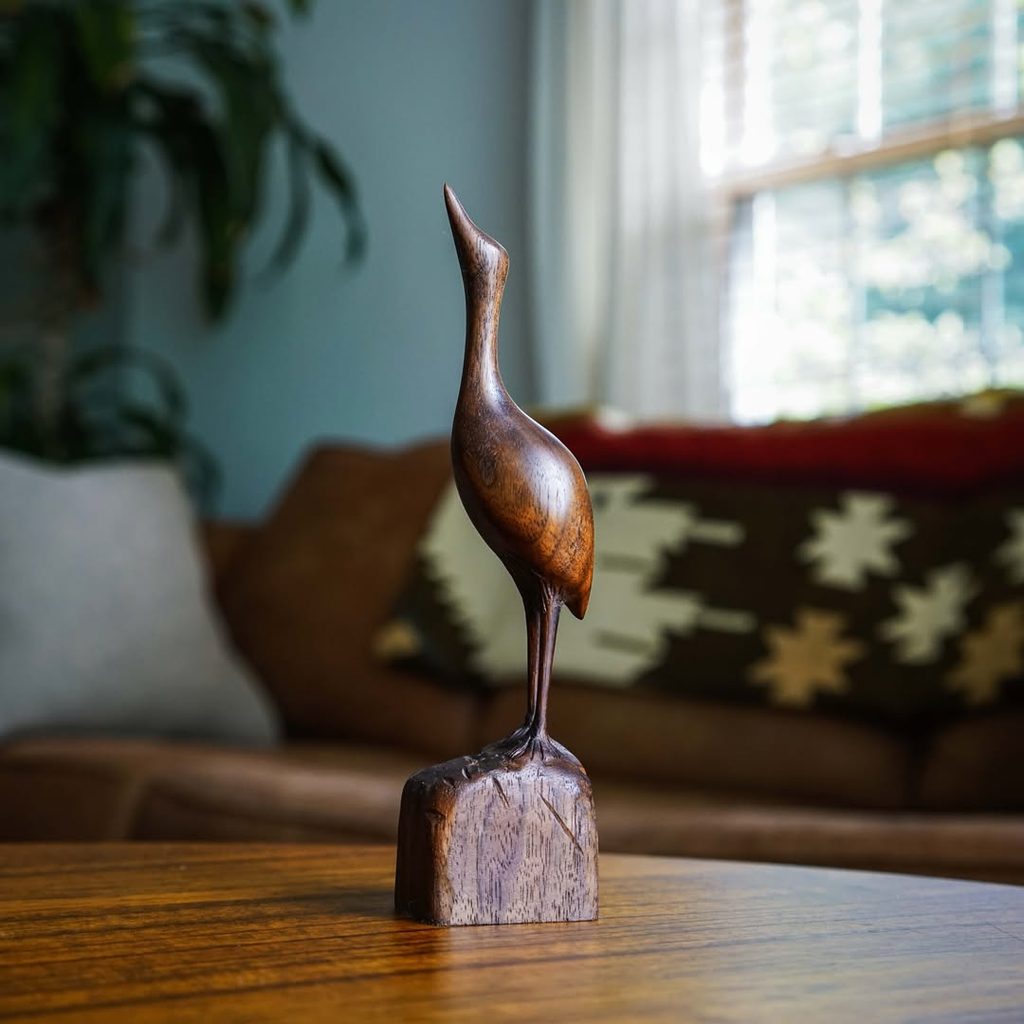
Amateur tip: A single-leg pose looks impossible until you realise the leg is almost certainly a metal rod or a hardwood dowel rather than carved wood, drilled into both the body and the base. That approach is standard for wading birds and it removes any risk of the leg snapping under the weight. Concentrate your effort on the S-curve of the neck, roughing it out thick and refining it only once the body is settled, and always carve toward the head so you’re working with the grain. Leaving the base rough while the bird is polished smooth is a simple trick for making a plain carving look considered.
12. Folk-Art Flying Goose
Bold, Flat, and Deliberately Unrealistic
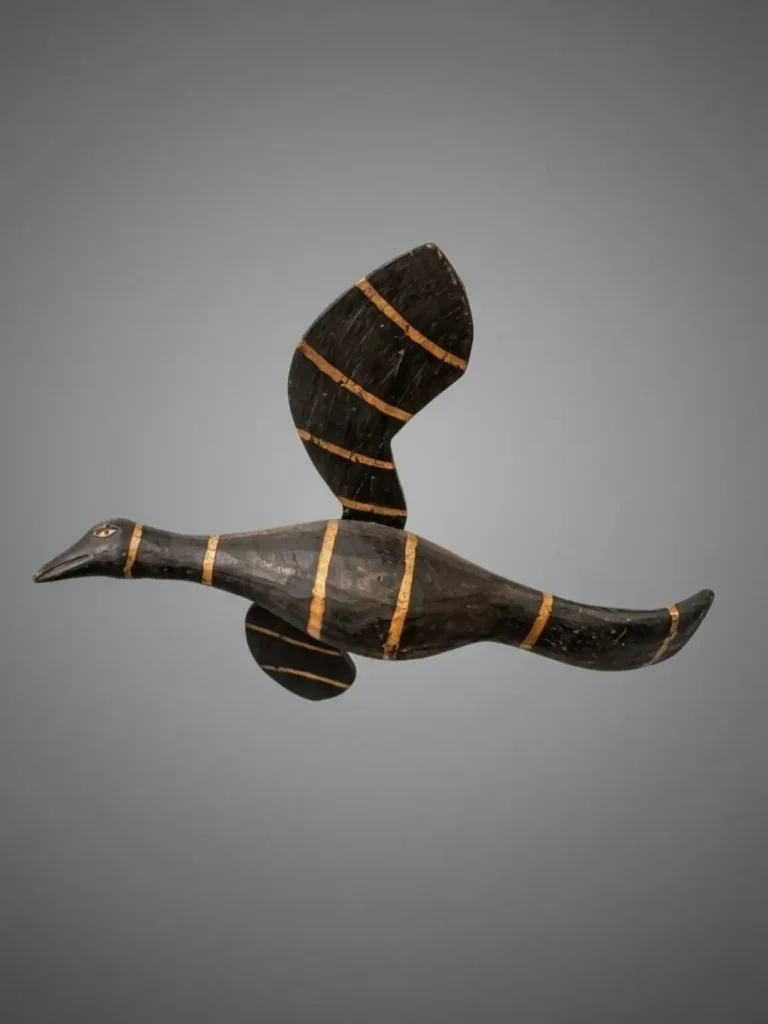
Amateur tip: Folk art gives you permission to stop chasing realism, which is liberating when your carving skills are still developing. Angular wings, a flat slab profile, and obvious tool marks are all part of the style here, so nothing needs sanding smooth or blending. Cut the wings from thin board and slot them into the body, which is both easier and stronger than carving them integrally. The painted gold bands are worth noting as a technique: bold graphic stripes over a dark base disguise an uneven surface entirely while giving the piece a strong, deliberate identity. This is a good project to try if a previous carving came out rougher than you hoped.
13. Raven Head and Shoulders
Carve the Top Half and Skip the Rest
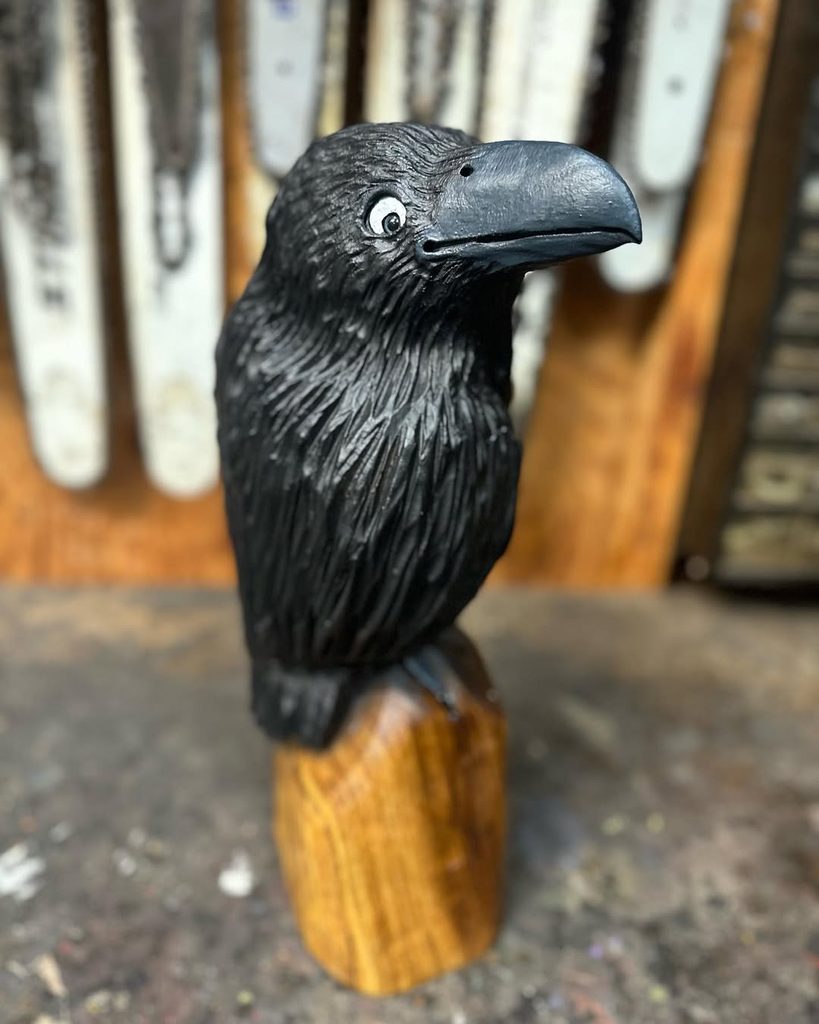
Amateur tip: Carving a bust is the bird equivalent of the head-only dog carvings, and it’s a smart way to attempt an ambitious subject without the parts most likely to defeat you. No legs, no wings, no balance problems, and the broad base gives your holding hand something solid to grip. Get the bill right first, since it defines the whole species, and keep it chunky until the final passes. The feather texture is made with long parallel V-cuts following the direction the feathers lie, and it’s worth practising on a scrap before committing. Matte black paint over a well-textured surface reads far better than gloss, which flattens carved detail under reflections.
14. Mixed-Media Kingfisher
Build a Bird from Separate Blocks of Colour
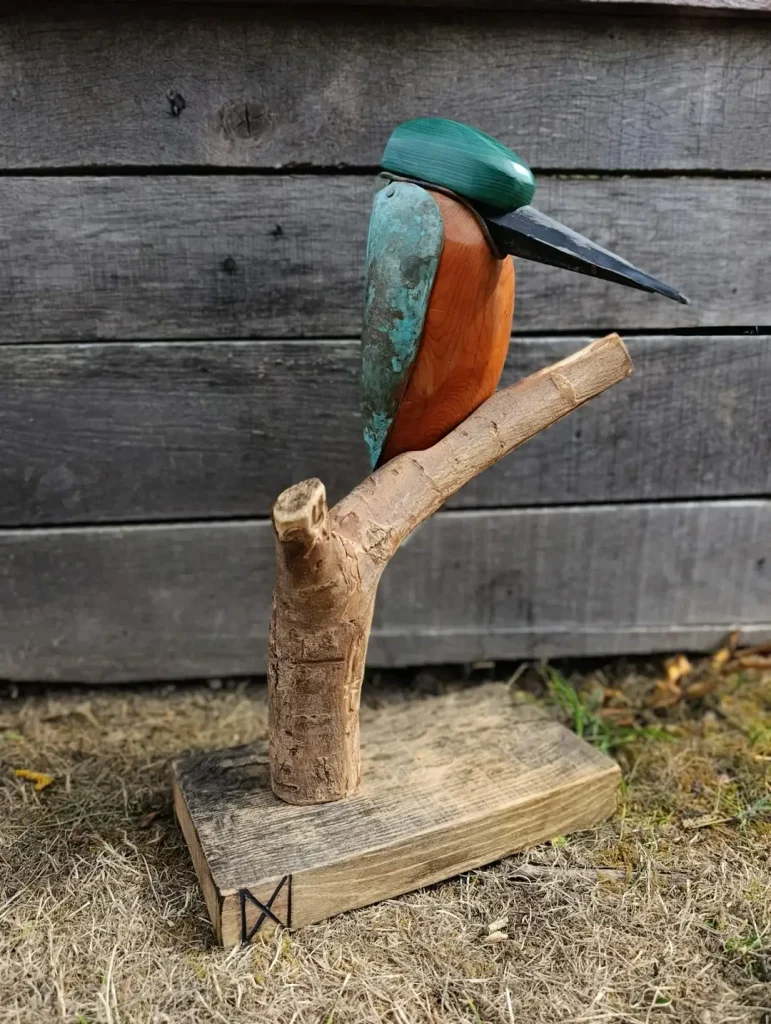
Amateur tip: Building a bird from separate pieces is easier than it looks and solves several problems at once. Each block can be a different wood, or painted before assembly when the surfaces are still flat and accessible, which is far simpler than painting crisp colour boundaries onto a finished carving. It also lets you redo one section without starting over. Join the parts with dowels or a good wood glue and clamp them properly. The rest of the appeal here comes from materials rather than skill: a forked branch, a scrap plank, and a blade-like bill turn three simple blocks into a striking piece.
15. Bittern Head Keyring
A Whole Bird’s Character in One Small Charm
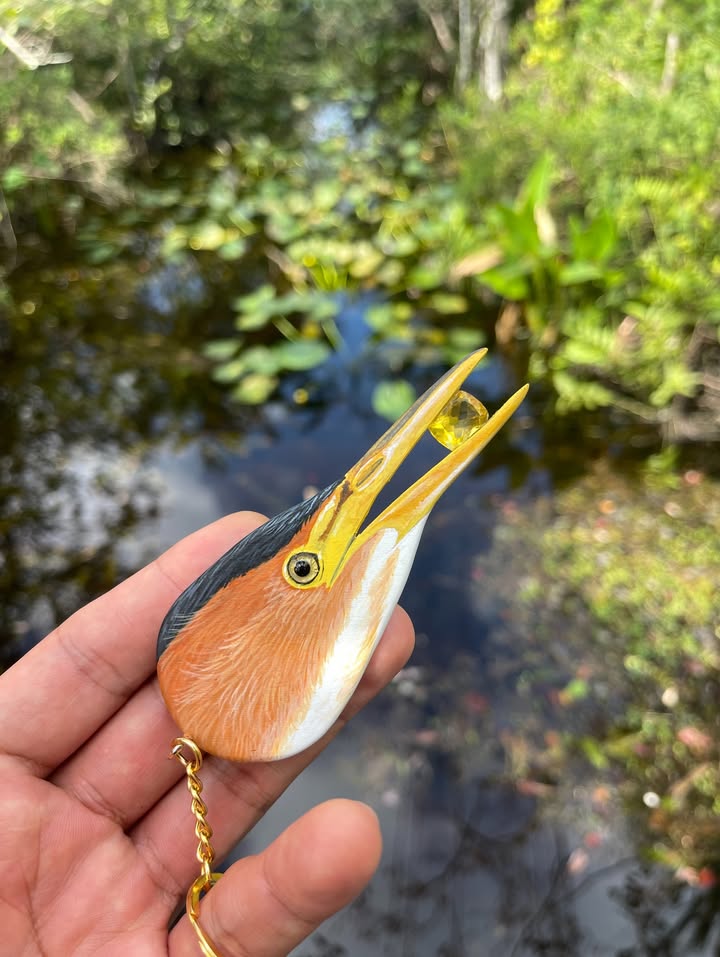
Amateur tip: Turning a carving into something usable changes how it’s received, and a keyring is the simplest way in. Work at a size that fits comfortably in the palm, drill a hole at the base for a screw eye, and keep the form smooth so it survives a pocket. The open bill is the one advanced element here, so for a first attempt carve it closed, which is stronger and much easier to shape. Fine painted feather streaks over a solid base colour give far more detail than carving at this scale ever could, and a glass eye finishes the face in seconds. If you enjoy small wearable pieces, our carved pendant ideas work on exactly the same principles.
16. Leaf-Winged Songbird
Swap a Wing for a Leaf
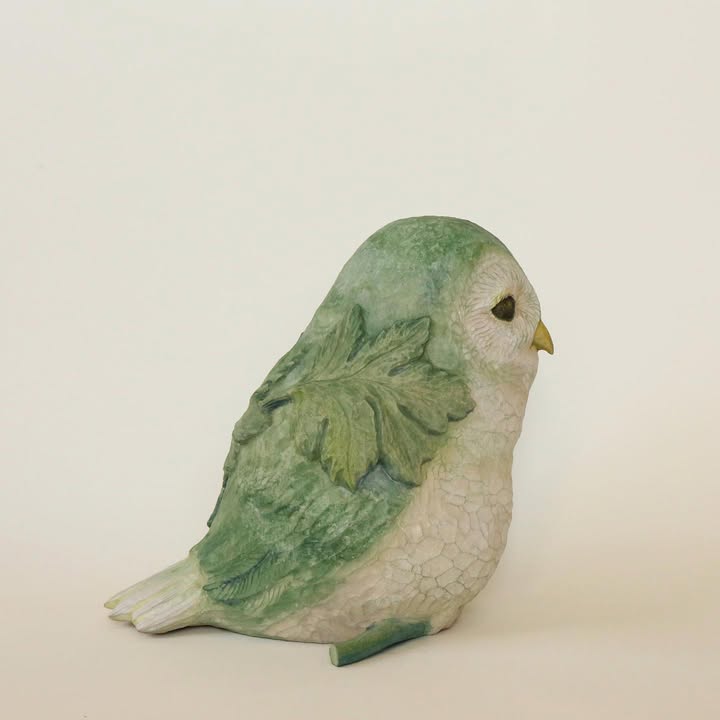
Amateur tip: Substituting one natural form for another is a simple idea that instantly makes a carving look thoughtful. A leaf works especially well as a wing, because both sit flat against the body and both are essentially a shape with lines radiating through it. Carve the bird’s body smooth first, then draw the leaf onto the side, make a stop cut around its outline, and lower the surface around it slightly so the leaf stands proud. The veins are shallow V-cuts. A muted, hazy paint scheme like this one forgives an uneven surface far more than flat solid colour does.
17. Bird in a Hooded Coat
Dress Your Bird and Let the Clothes Do the Talking
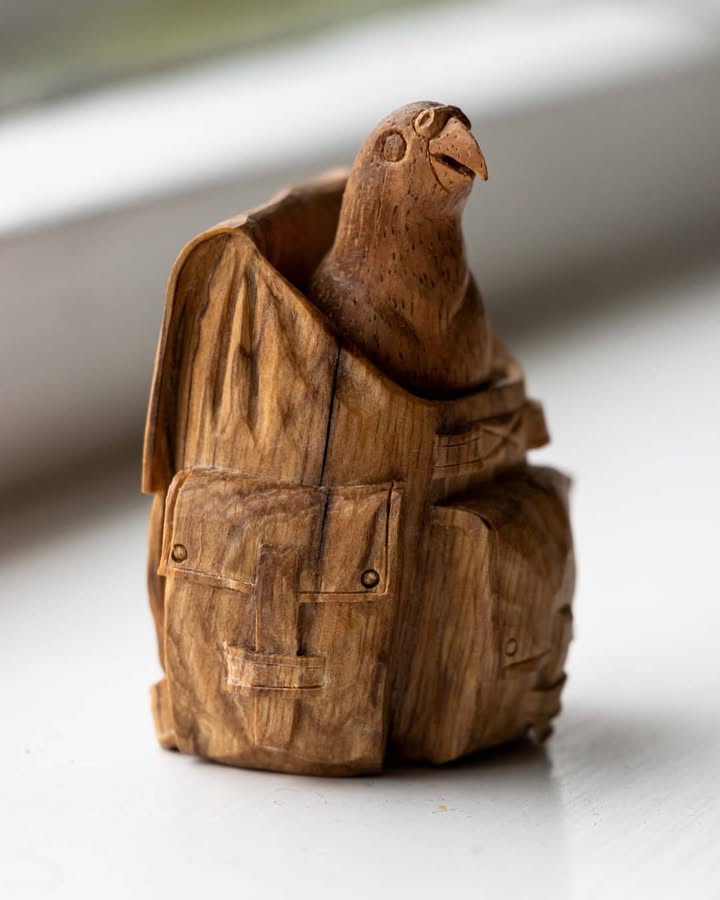
Amateur tip: Clothing is surprisingly forgiving to carve, because fabric is meant to look irregular. Deep folds, sagging hems, and uneven pockets all read as convincing rather than sloppy, which makes this a gentler project than it first appears. Carve the coat as a simple tapering column, cut the fold lines with a V-tool running from the shoulders downward, then add pockets as shallow raised rectangles with a stop cut along the top. Buttons are single drilled dots. Leaving the surface unpainted works well here, since every tool mark adds to the worn, textile feel, and a coat of oil finish will deepen the grain without hiding any of it.
18. Textured Dove on an Integral Base
Carve the Bird and Its Perch from One Block
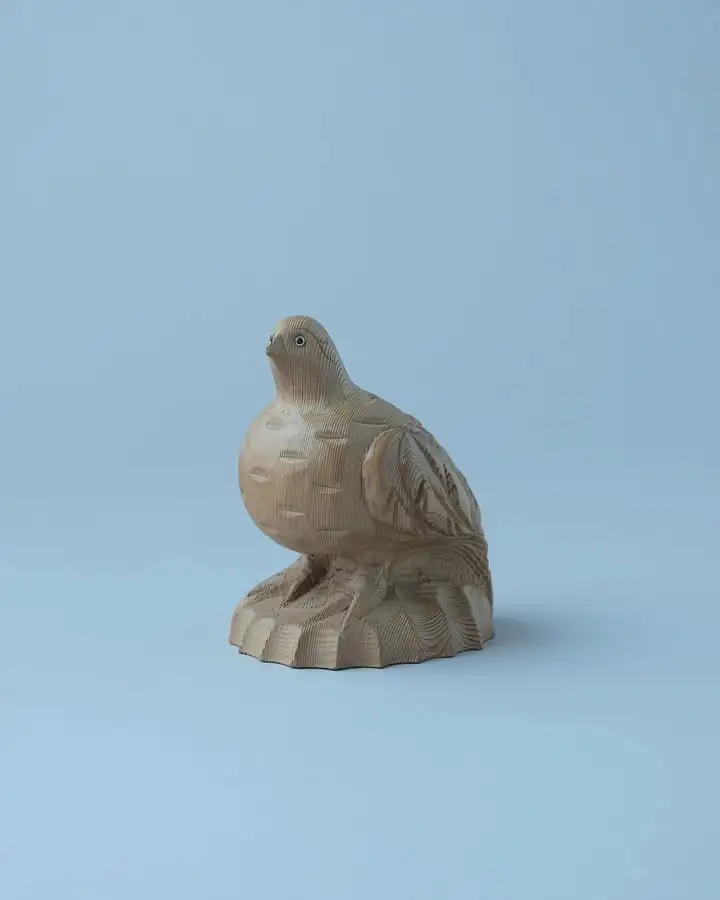
Amateur tip: Carving the bird and its base from one blank means no dowels, no glue joints, and no wondering whether the piece will topple. Plan for it from the start by choosing a blank tall enough to include both, and rough out the base before refining the bird, so you always have solid wood to hold. The texture here is built from three simple repeated marks: fine parallel lines pulled with a V-tool, shallow scoops from a round gouge, and a few larger layered feather shapes on the wing. None of them is difficult on its own, and the effect comes from doing them consistently. Work the texture only once the shape is fully settled, because it’s the last thing you should add.
19. Singing Songbird in Progress
The Detail Work Comes Before the Paint
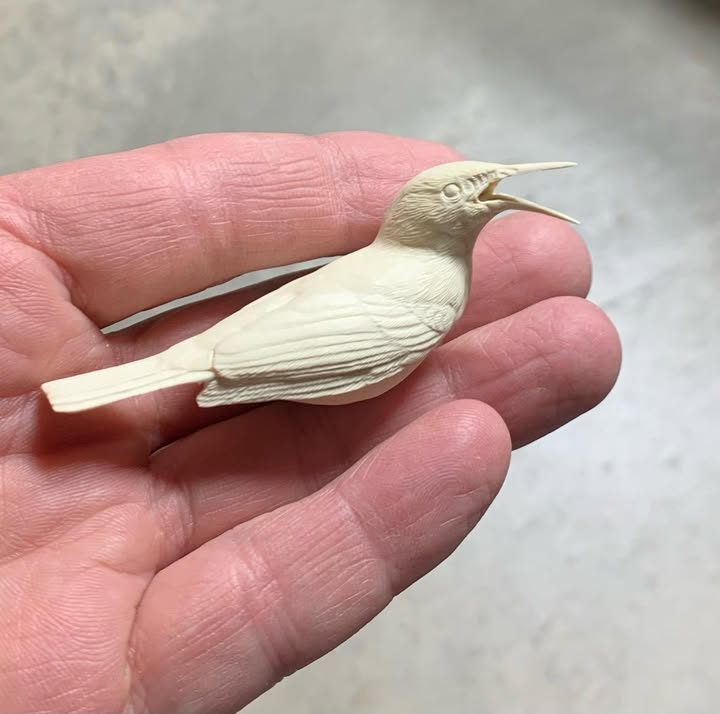
Amateur tip: This is the point where a bird carving is genuinely finished, and it’s worth studying because the texture is doing work that paint alone never could. Notice the hierarchy: soft, fine strokes on the breast, bolder defined lines on the wing, and stippling on the head. Varying the mark by body area is what makes texture look natural rather than uniform. Both the open bill and the slim protruding tail are fragile, so leave them thick throughout and refine them last, with the grain running lengthwise. If you’d rather practise texture without the risk, carve a simple closed-bill bird first and spend your time entirely on the feather work.
20. Duck Decoy Blank
Two Simple Volumes, Joined at the Neck
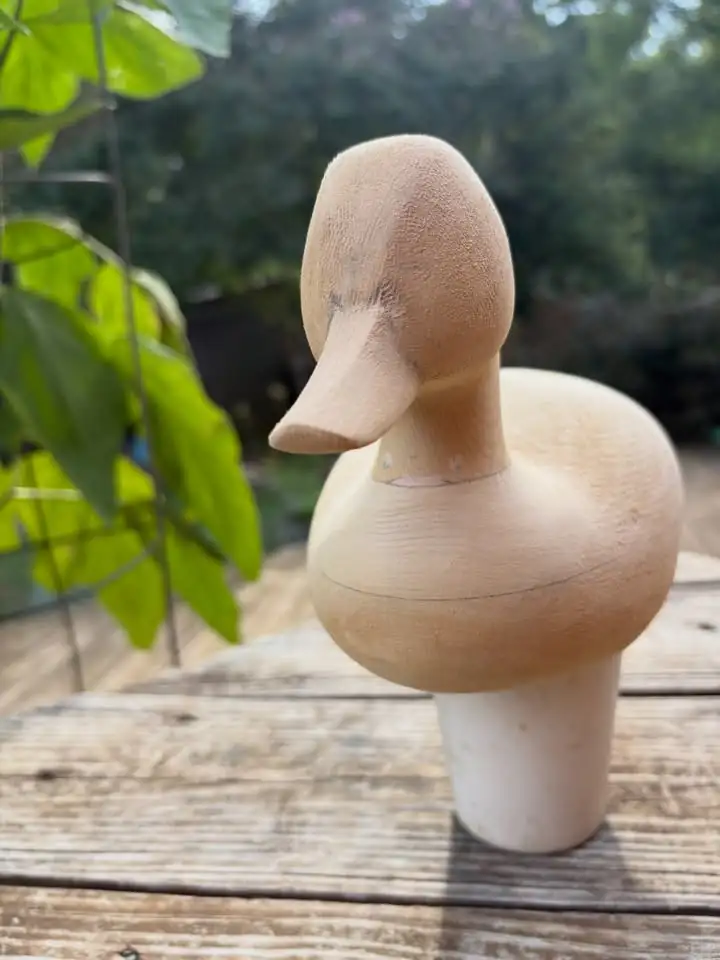
Amateur tip: Duck decoys have been the training ground for bird carvers for generations, and this photograph shows why. The whole design is two simple volumes, an oval body and a rounded head, so all your practice goes into achieving clean, symmetrical curves. Carve the head separately and dowel it on, which lets you change its angle for a different attitude and saves the body if the head goes wrong. The flat bill is the only tricky part, so keep it thick and only thin it once the head is shaped, working with the grain toward the tip. A blank like this is a perfect base for glass eyes and a painted finish once you’re happy with the form.
Tips for Carving Better Birds
Grain direction matters more with birds than almost any other subject, because the beak and tail are both thin projections. Always orient the blank so the grain runs the length of the bird, and carve toward the tip of the beak rather than away from it, so you’re never levering against unsupported short grain.
Get the body right before you touch anything else. Beginners tend to rush to the beak and eyes, but a lumpy body with a beautiful beak still looks wrong, whereas a perfectly smooth body with no features at all looks intentional and modern. Keep turning the piece in your hand and sighting down it from the front and the top to catch flat spots.
Eye placement will make or break the face. Set them too far forward and your bird looks like a mammal, so keep them high and well back on the skull, and make sure both sit level when viewed head-on. Press glass eyes into slightly oversized holes with a dab of wood filler or epoxy so you can adjust them before they set. For painted eyes, a dark base dot with a tiny white highlight off to one side brings the whole face alive.
Finally, wings and feathers are best suggested rather than reproduced. A few confident V-cuts along the wing edge and a handful of shallow scoops on the back will read as feathers from arm’s length, while a hundred fussy lines often just look busy. If you want to go further with texture, a wood-burning tool gives finer, more controlled feather detail than a knife ever will.
Frequently Asked Questions
What is the best wood for carving birds?
Basswood is the top choice for beginners, being soft and even-grained. Tupelo is prized for detailed feather work because it holds fine texture without fuzzing, while butternut and white pine are good middle-ground options.
How long does it take to carve a simple bird?
A small, smooth songbird typically takes two to four hours, or a couple of evenings at a relaxed pace. Adding feather texture, glass eyes, and a painted finish can easily double that.
Should I use glass eyes or paint them on?
Both work well. Glass eyes give instant realism for very little effort and cost, while painted or wood-burned eyes suit stylised and flat-plane birds better. Try both and see which you prefer.
Do I need to carve every feather?
Not at all. Many of the most appealing bird carvings are completely smooth, relying on shape alone. Suggested feathers with a few V-cuts sit comfortably between the two, and they’re far easier to pull off than full texture.
Conclusion
Birds reward beginners more generously than almost any other subject, because the shape that’s easiest to carve, a smooth rounded body, is also the shape that looks best. Start with a simple songbird, get comfortable with rounding and beak work, then branch out into owls, ducks, spoons, and mounted display pieces as your confidence grows. Before long you’ll have a small flock on the shelf, and each one will be noticeably better than the last. If you’d like more small projects to fill the gaps between birds, these simple wood carvings will keep your knife busy.
