There’s a reason so many carvers end up with a shelf full of wooden dogs. A dog carving doesn’t need to be an exact likeness to work, because the shape of the ears, the tilt of the head, and the angle of the tail carry all the personality you need. Get those three right and even a chunky, simplified figure reads instantly as a beagle, a terrier, or somebody’s beloved mutt.
Dogs are also a genuinely beginner-friendly subject, particularly in sitting, lying, and curled-up poses where the body rests as one solid mass. The tricky parts, like slim legs and upright ears, can be kept thick or avoided entirely while you’re learning, and many of the pieces below proudly show their flat, faceted knife cuts rather than being sanded smooth. That’s a style choice, not a shortcut.
The 20 ideas in this collection range from palm-sized sleeping pups to dog-topped spoons, wearable pendants, and keyring charms. Each one comes with a beginner tip, and a few more ambitious designs are included along the way as goals to work toward once you’ve found your feet. If you’re not sure which to pick, our guide to choosing a project that matches your skill level can help you start in the right place.
What You’ll Need
Most of these dogs start from a small block of basswood, the standard choice for beginners because it’s soft, has a tight, even grain, and holds detail without splitting. Pre-cut blanks in sizes like 1″ x 1″ x 3″ and 2″ x 2″ x 4″ are inexpensive and save you from cutting your own. Butternut, aspen, and white pine are decent alternatives if basswood is hard to find locally.
For tools, a sharp carving knife will handle nearly every project here, and our guide to choosing the right whittling kit will help you pick one without overspending. A small detail knife is useful for muzzles, eyes, and ears, a V-tool makes quick work of fur texture, and a hook knife is needed for any spoon or bowl project. A coping saw speeds up removing waste before you start carving. Keep a leather strop and honing compound within reach, and always wear a cut-resistant glove on the hand holding the wood.
For finishing, a set of acrylic paints, a fine-tip pen or wood-burning tool for small details, and a coat of Danish oil or paste wax will cover almost everything here. Our guide on how to seal and paint basswood walks through getting a clean, even result. For spoons or anything that touches food, skip the paint on the working end and use a food-safe finish instead.
How to Carve Your First Dog
Start with a blank whose grain runs the length of the block, and draw the dog’s side profile on one face and the front view on another. Working from two views keeps your proportions honest and shows you exactly where the waste wood is. Keep the drawing simple and blocky, since detail comes later.
Remove the bulk of the waste with a coping saw or by making stop cuts along your lines and slicing toward them. Once you have a rough, angular dog, begin rounding the corners, thinking of the head as a rounded box, the muzzle as a smaller box stuck to the front of it, and the body as a chunky loaf. That muzzle block is the single most important shape in dog carving, because it’s what separates a dog from a bear or a cat.
Make a shallow stop cut where the head meets the shoulders, then shape the ears, keeping them thick and flat against the head until you’re confident. Carve the tail as a raised band curling against the body rather than standing free. Leave the face until last, and keep it simple: a small triangular nose, two shallow eye sockets, and a light line for the mouth are plenty. Finish with paint, a pen, or a coat of oil to bring out the grain.
20 Easy Dog Woodcarving Ideas for Beginners
1. Sitting Dog with a Lifted Muzzle
Let the Grain Do the Decorating
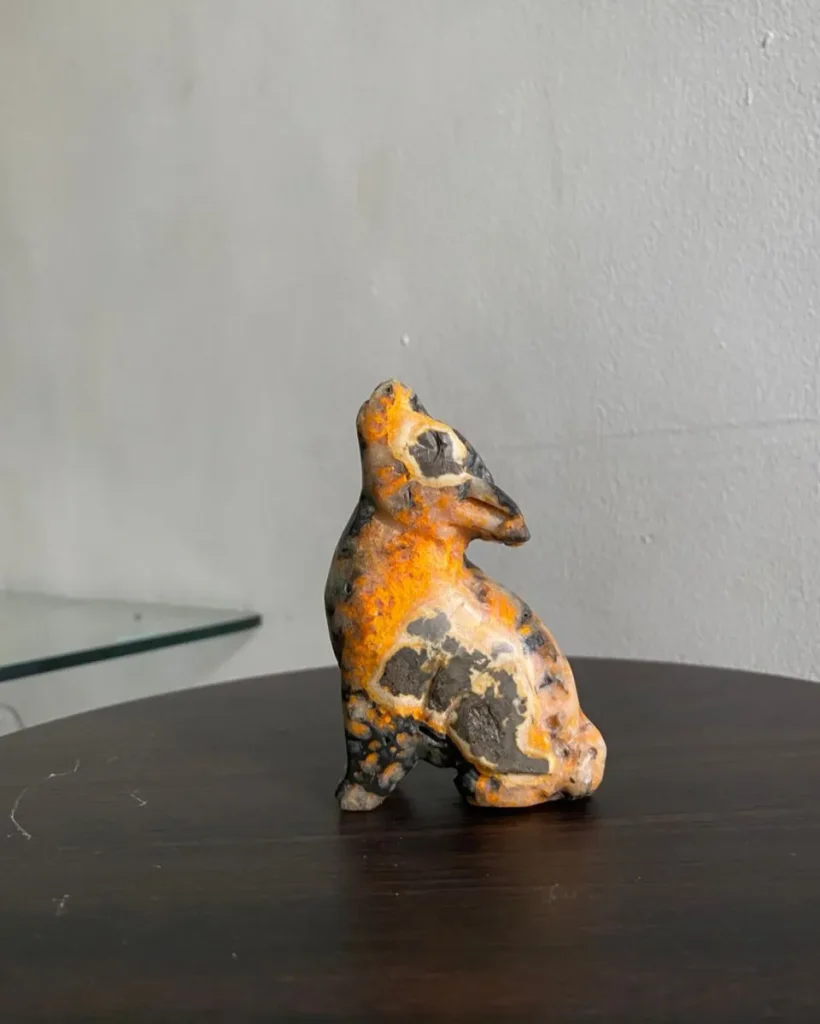
Beginner tip: Start with a compact sitting pose like this one, because the body rests on a broad, stable base and there are no slim legs to snap. Keep the ear laid flat against the head rather than standing upright, since a thin raised ear is one of the easiest parts to break. To get a similar finish on plain basswood, try a mottled wash of orange and black acrylic, or explore a figured offcut such as spalted or burled wood and let the grain supply all the pattern for you.
2. Pair of Scruffy Terriers
Two Tails Up, One Simple Silhouette
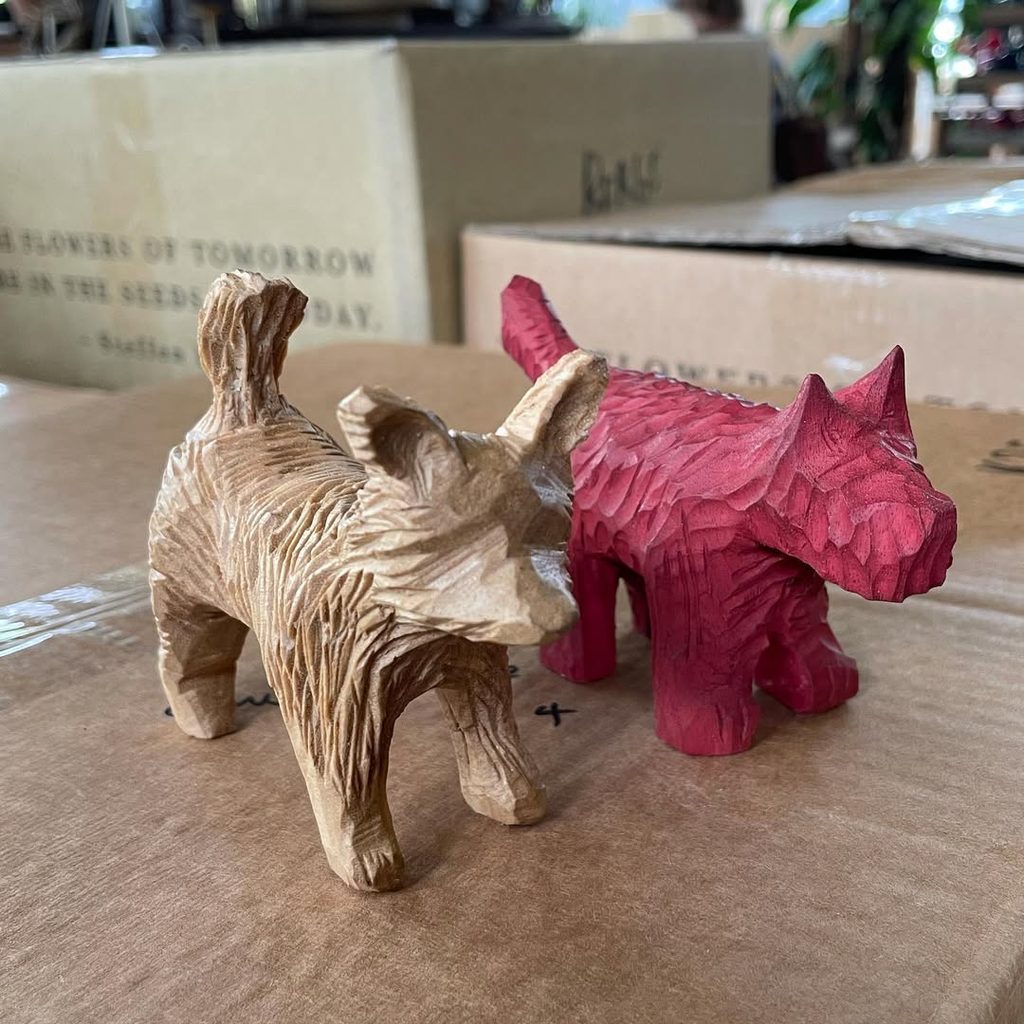
Beginner tip: The terrier is one of the friendliest breeds to carve because the body is essentially a box on four blocks, with no slender waist or delicate pose to balance. Rough out the shape first and leave the legs thick, since short chunky legs are far stronger than realistic slim ones. Save the fur texture for last, and practise your V-cuts on a scrap piece before committing, always pulling the tool in the direction the coat would naturally fall. A bold color like this red is also a clever choice for beginners, because a thin stain lets the carved texture show through while distracting from any uneven cuts.
3. Row of Faceted Standing Dogs
Flat Planes, Bold Shapes, Zero Sanding
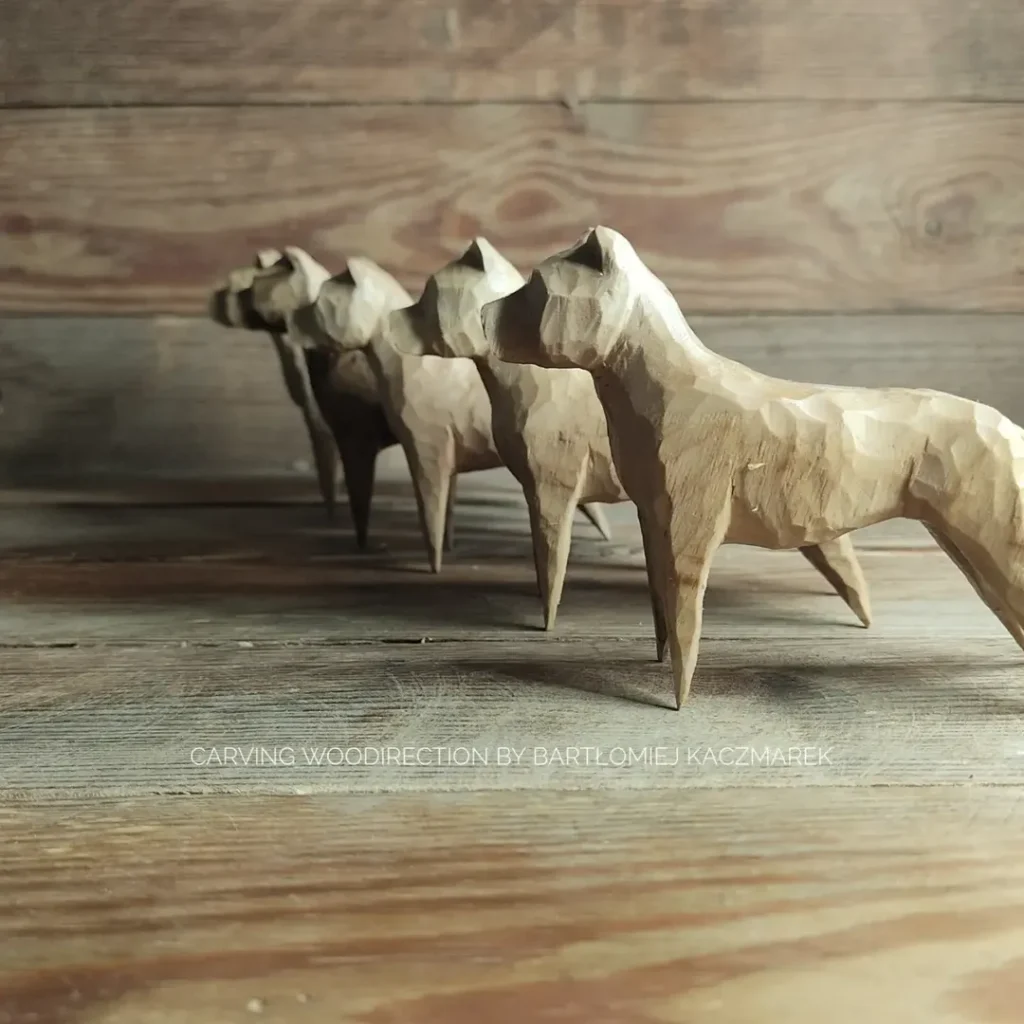
Beginner tip: Flat-plane carving is wonderfully suited to beginners because the goal is confident, clean cuts rather than smooth, blended surfaces. Every facet you leave is part of the design, so there’s no sanding to worry about and no need to hide your tool marks. That said, this particular pose is a step up in difficulty because the thin standing legs run across the grain and break easily. For your first attempt, orient the blank so the grain runs down through the legs, keep them noticeably thicker than these, and consider carving the dog lying down or sitting until your knife control improves. Carving a small set like this is also excellent practice, since each repeat teaches you something the last one didn’t.
4. Sniffing Hound with Its Nose to the Ground
One Simple Curve Tells the Whole Story
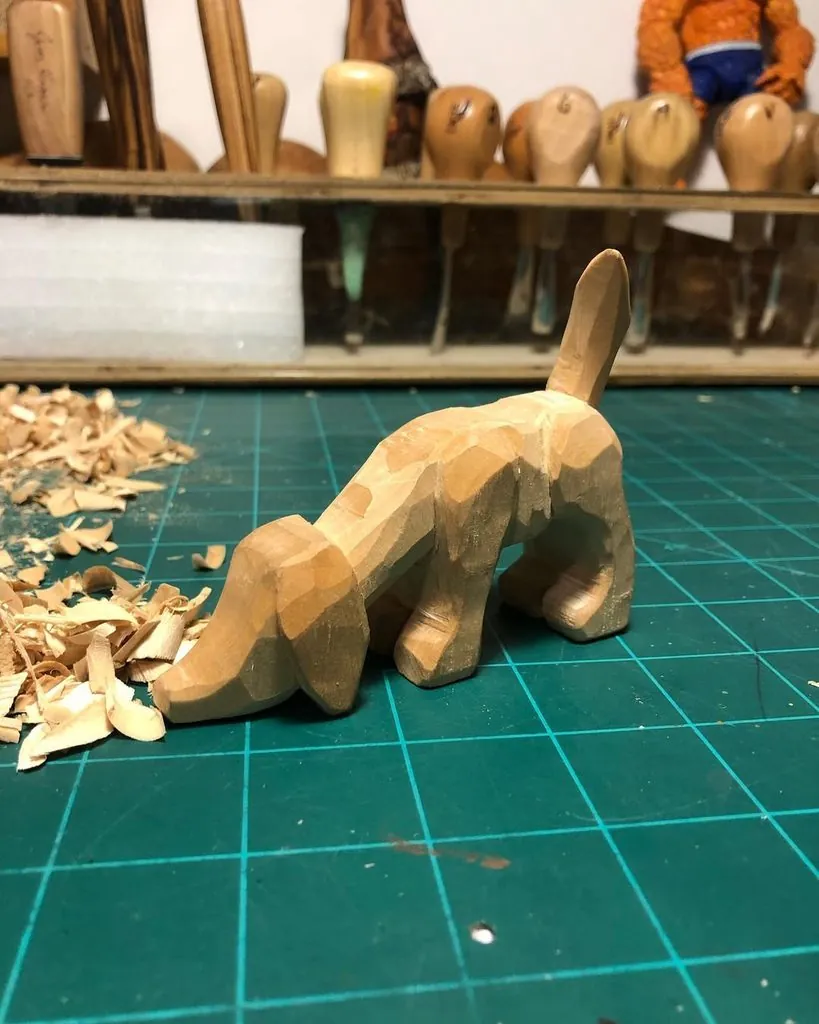
Beginner tip: This pose is a gift for beginners because the nose and front legs all rest on the ground, which means the carving is supported at both ends and nothing is left hanging in mid-air. The lowered head also hides the face almost entirely, so you can skip carving eyes and a mouth altogether and still end up with a dog full of character. Draw the sloping side profile on your blank first, since that diagonal line is the whole design. Keep the upright tail short and thick, as a tall thin one running across the grain is the most likely part to snap.
5. Chubby Little Fluff Ball
Round, Simple, and Impossible Not to Smile At
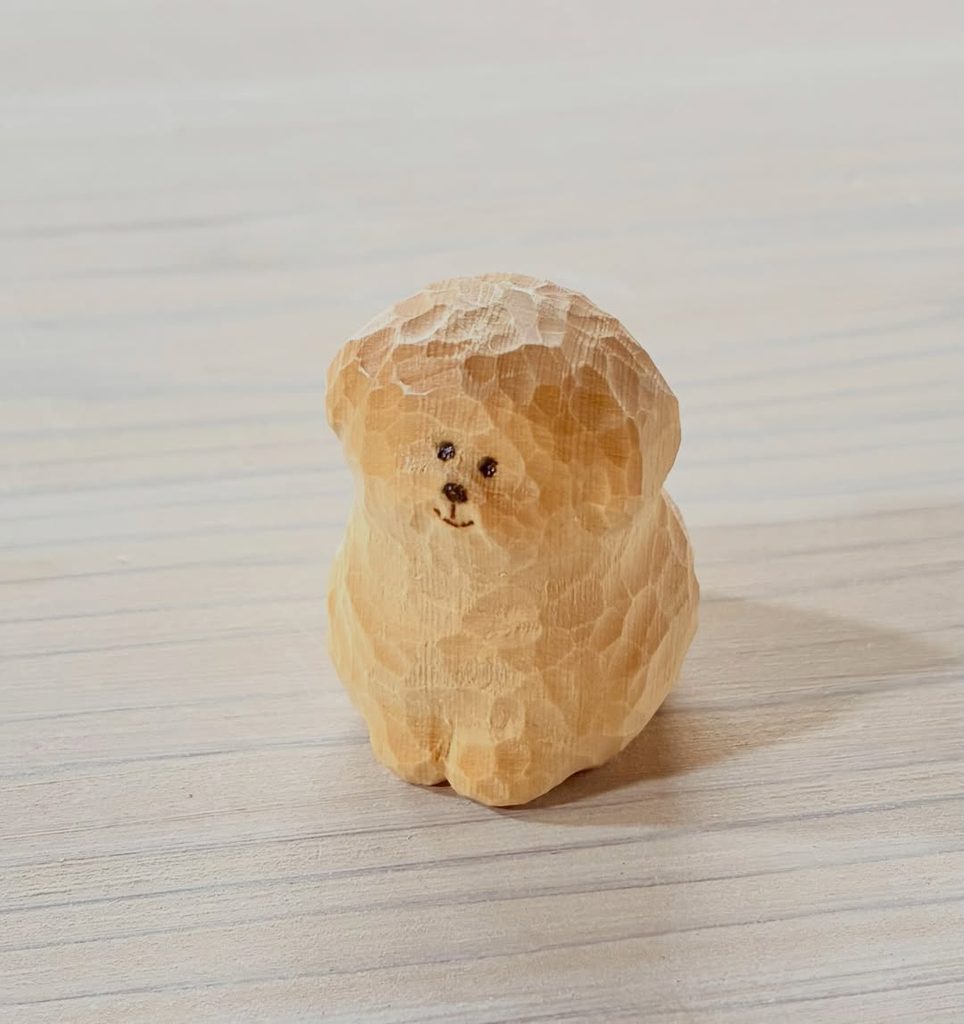
Beginner tip: This is possibly the most beginner-friendly design in the whole collection, because there are no legs, no tail, no muzzle, and nothing that can break. Round your blank into a plump egg shape, add two small ear bumps, and you’re most of the way there. The dimpled coat is made with repeated shallow scoops from a small round gouge, and because the marks are meant to look random, an uneven hand actually helps. Add the face last with a wood-burning pen or a fine-tip marker rather than carving it, since tiny burned dots are far easier to control than tiny cuts.
6. Retriever Head Bust
Skip the Body and Carve the Bit That Matters
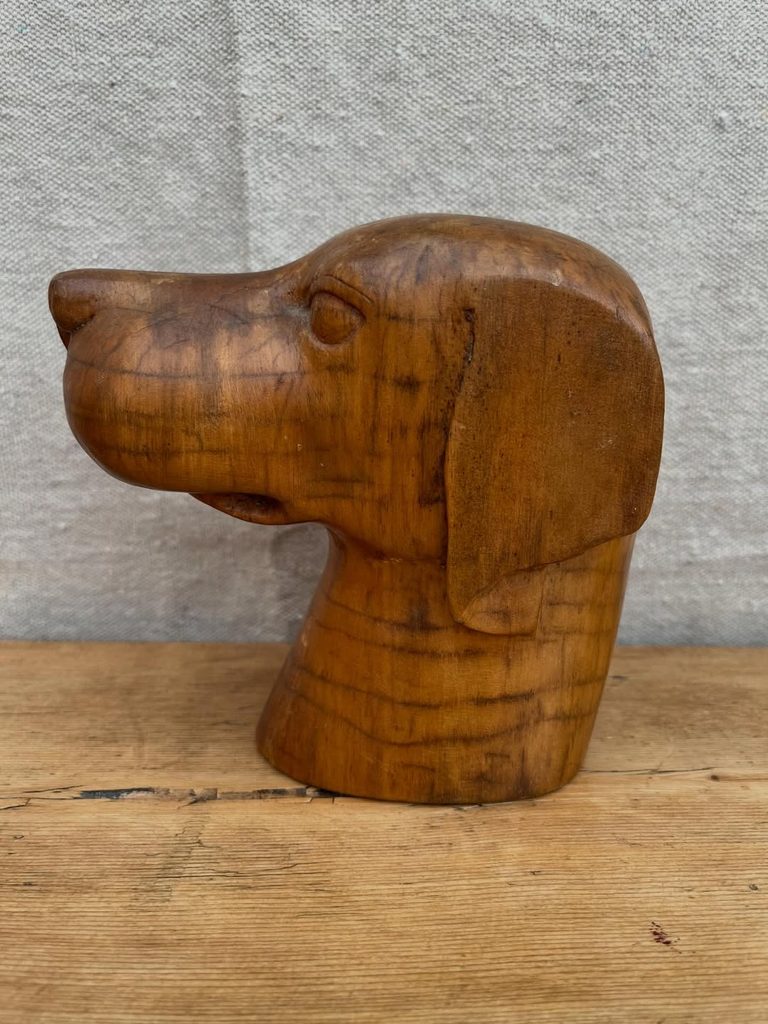
Beginner tip: Carving just the head is a smart move for anyone who finds full-body poses intimidating, because it removes legs, tails, and balance problems entirely while letting you focus on the features that make a dog recognisable. The generous base means the piece stands on its own without a mount. Keep the long ear thick and firmly attached along its whole length rather than carving it free of the head, as a floating ear is fragile and much harder to shape. Work the muzzle first, since it sets the proportions for everything else, then add the eye last as a simple almond with a small gouge cut underneath to give it that soft, sleepy look.
7. Tiny Shiba with a Curled Tail
A Pocket-Sized Pup with a Tail Like a Question Mark
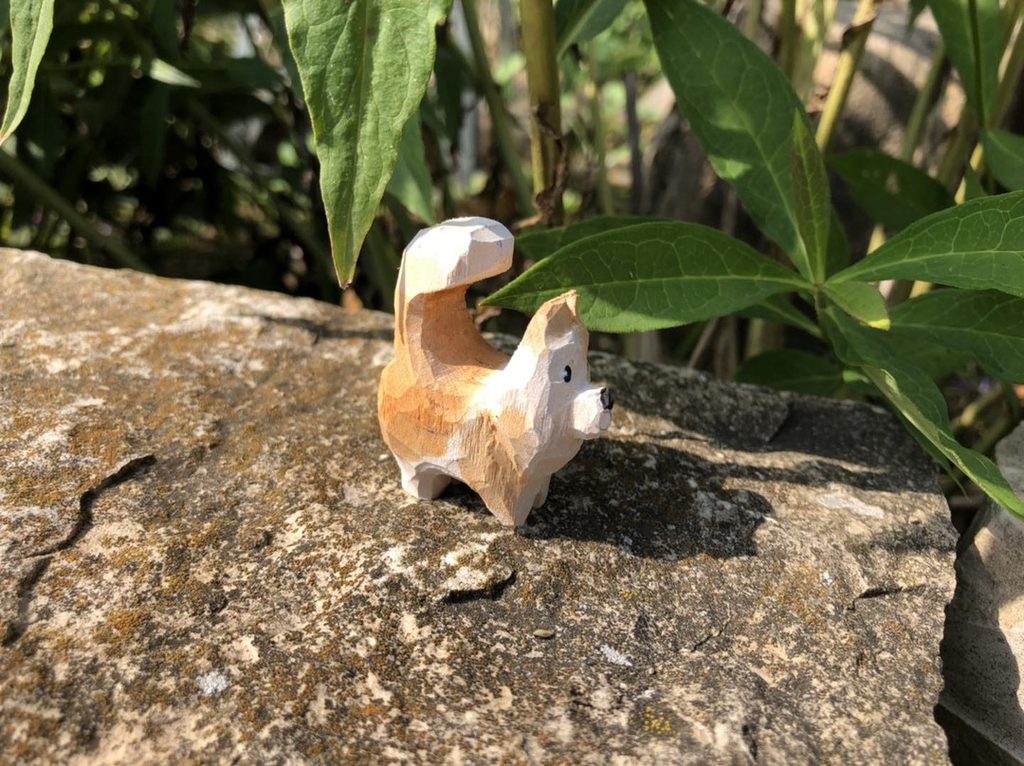
Beginner tip: The curled tail looks like the hardest part, but it’s actually one of the safest, because it curves back and touches or nearly touches the body instead of sticking out into the air. Carve it as a thick crescent attached along the back and you get all the drama with none of the fragility. Keep the legs short and chunky to match the small scale, and let the paint do the detailing. The whole face here is just three dots on a white muzzle, which is far more forgiving than carving eyes into a piece this small.
8. Minimalist Dog Head on a Block
Strip It Back to the Essential Shapes
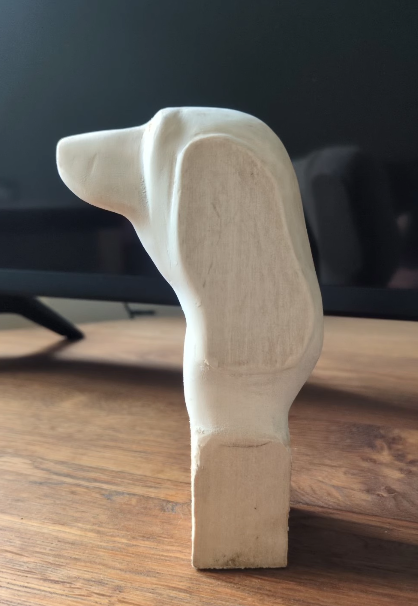
Beginner tip: Simplifying is a skill in itself, and this piece is a great exercise in stopping early. Rough out the head shape, define the ear with one stop cut and one sloping cut behind it, then refine the curves and resist adding features. Leaving the base as an uncarved block is a deliberate choice worth copying, since it gives the piece a gallery look and gives your holding hand something solid to grip while you work. If you’d rather practise your smoothing technique here than leave tool marks, our guide to sanding wood covers working through the grits without flattening your carefully carved curves.
9. Flying Ace Pup in a Toy Plane
Build a Scene Instead of a Single Figure
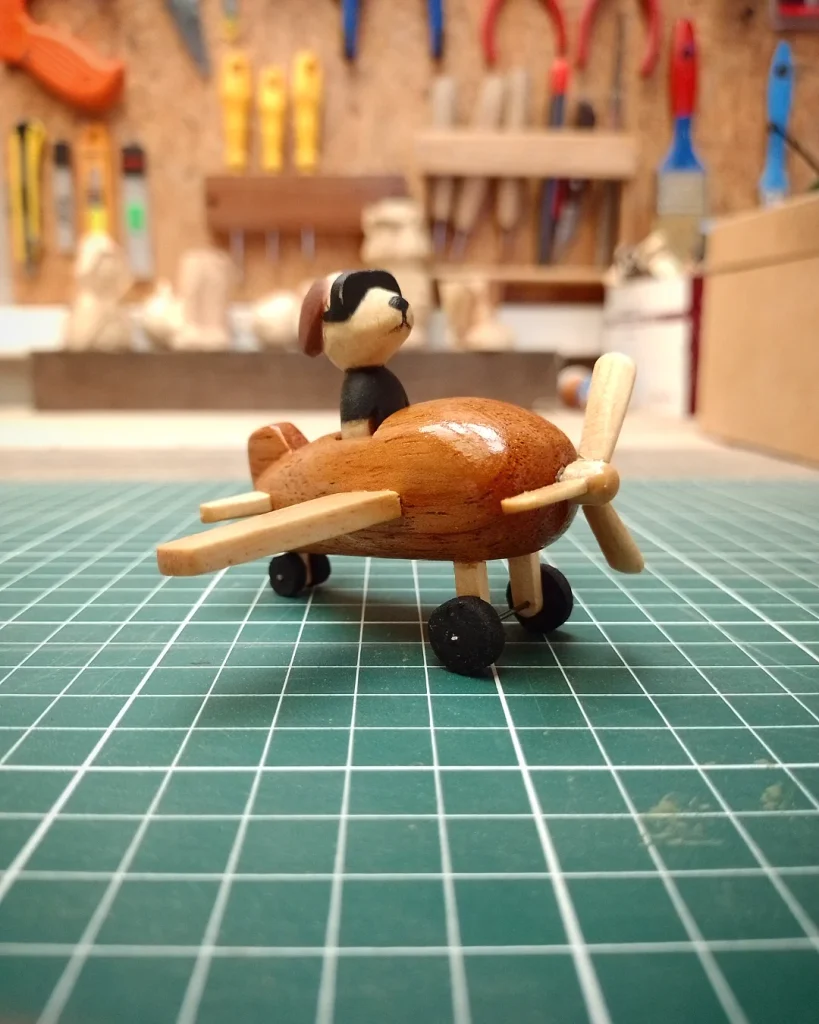
Beginner tip: The clever thing here is that nothing is carved as one complicated piece. The plane is a rounded blob, the wings are flat strips, the propeller is a single crosspiece, and the dog is a small separate figure that drops into a drilled hollow. Making a project from several simple parts and gluing them together is far easier than carving one intricate shape, and it lets you fix or remake any single piece that goes wrong. Contrasting woods do the decorating for you, and a coat of gloss on the body gives it that toy-like finish. If you’d like to try a similar approach on other small projects, these simple wood carvings offer plenty of shapes worth combining.
10. Tall Sitting Spaniel
Stretch the Proportions and Gain a Character
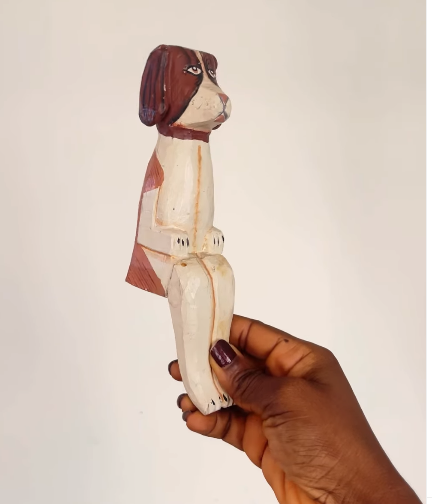
Beginner tip: Working from a long, narrow blank is a good way to build confidence, because the upright sitting pose means everything stays close to the centre line and nothing projects outward. The straight front legs are carved as shallow grooves on the front of the body rather than as separate free-standing parts, which keeps them strong. Note how the details here are painted rather than carved: the eyes, the collar, the toes, and the coat patches are all brushwork on a simple shape. That’s a technique worth borrowing whenever a feature feels too fiddly to cut.
11. Balloon Dog
Bulges, Pinches, and Not a Single Fiddly Detail
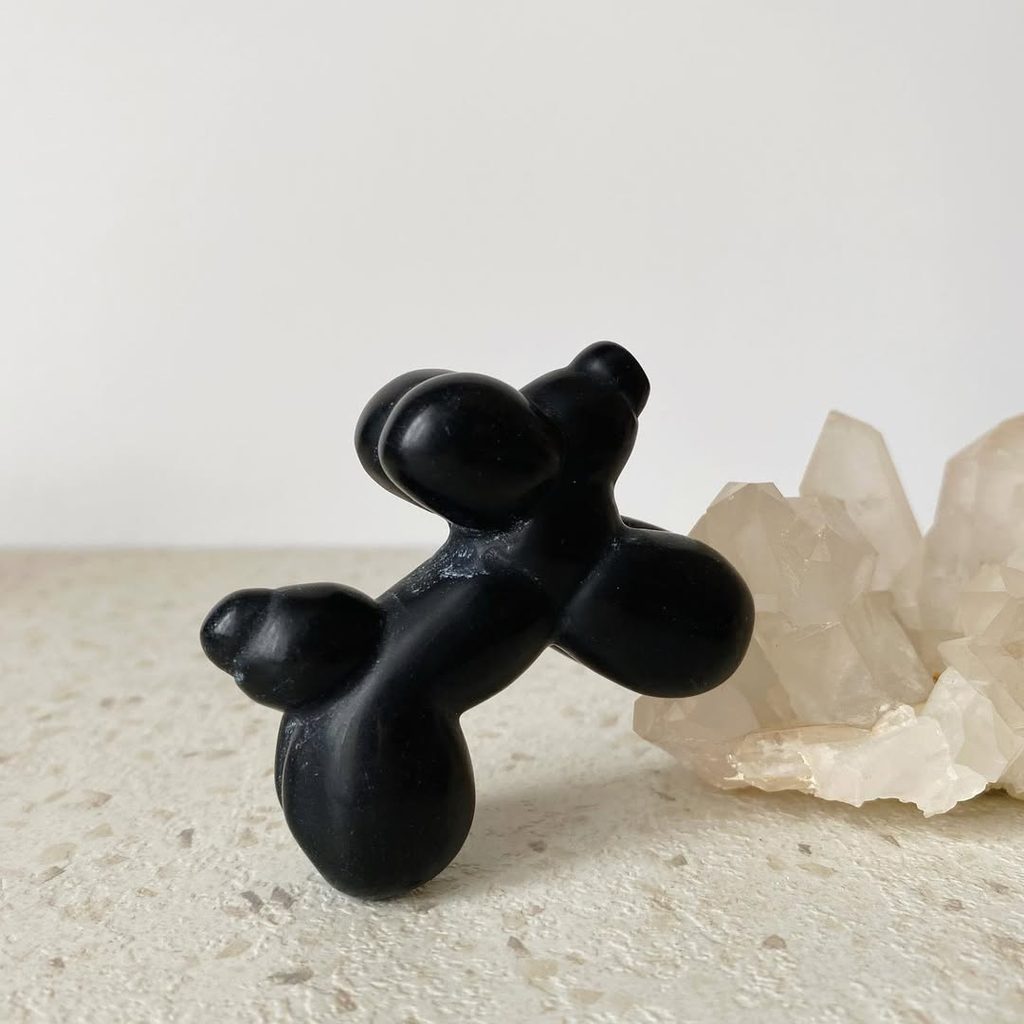
Beginner tip: This design is all about rhythm rather than accuracy, since you’re carving a sequence of rounded lumps separated by deep pinch grooves. There’s no face to get right, no fur to texture, and no anatomy to study, so it’s a brilliant project for practising smooth, even curves. Rough out the blob shapes first, then cut the pinch lines between them with a stop cut from both sides, deepening gradually. Keep the legs short and fat so they read as balloon segments and stay strong. A solid matte paint finish is the key to the look: it conceals grain, disguises minor bumps, and turns a simple carving into something that looks deliberately modern.
12. Big-Eyed Cartoon Puppy
Oversized Eyes, Instant Personality
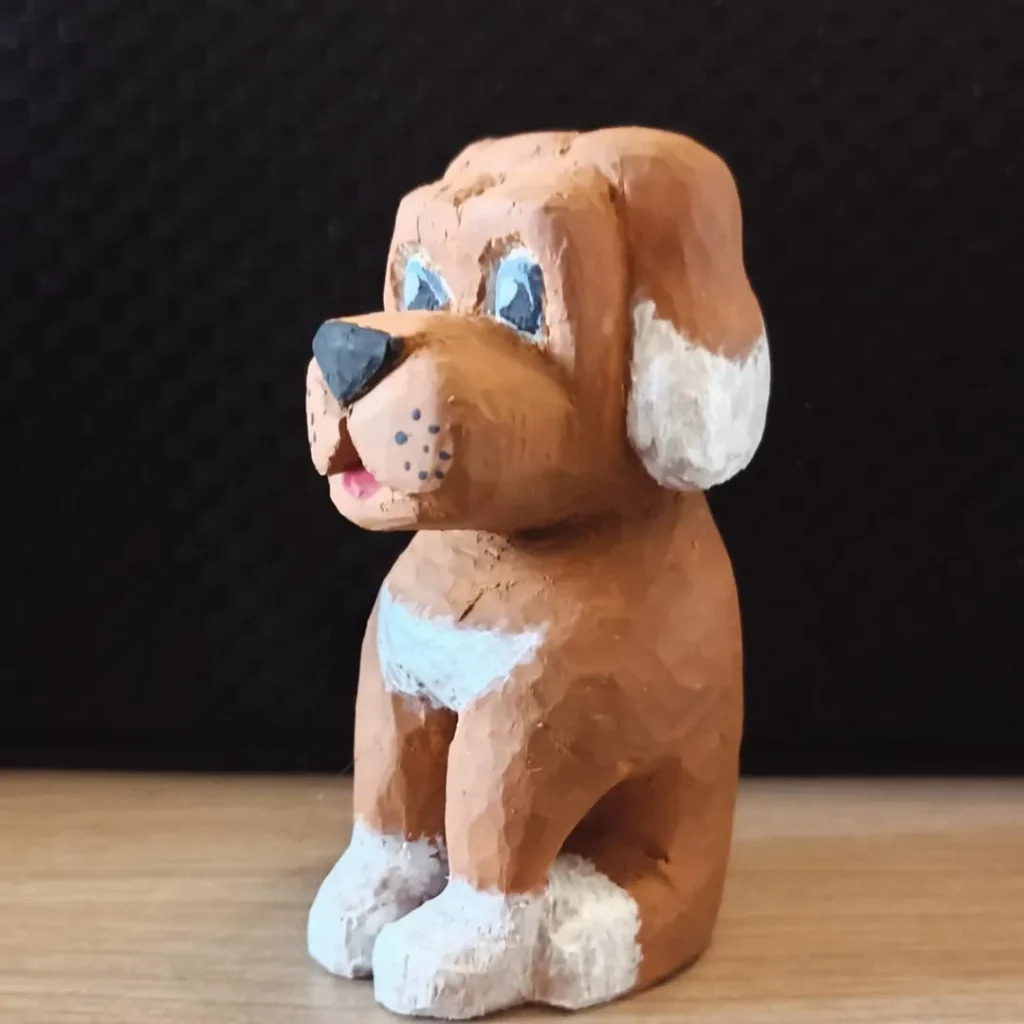
Beginner tip: Exaggerating the head and eyes is the fastest way to give a carving charm, and it’s also more forgiving than realism, because nobody expects a cartoon puppy to be anatomically correct. Carve the head noticeably larger than a real dog’s would be, keep the ears thick and hanging flat against the sides so they can’t snap, and set the eyes wide and low on the face. The eyes themselves are shallow carved sockets filled in with paint, which is far easier than trying to cut a convincing eyeball. Layering white markings over a tan base is also a simple trick that makes the whole figure look considered rather than plain.
13. Realistic Cocker Spaniel
A Portrait Carving to Work Toward
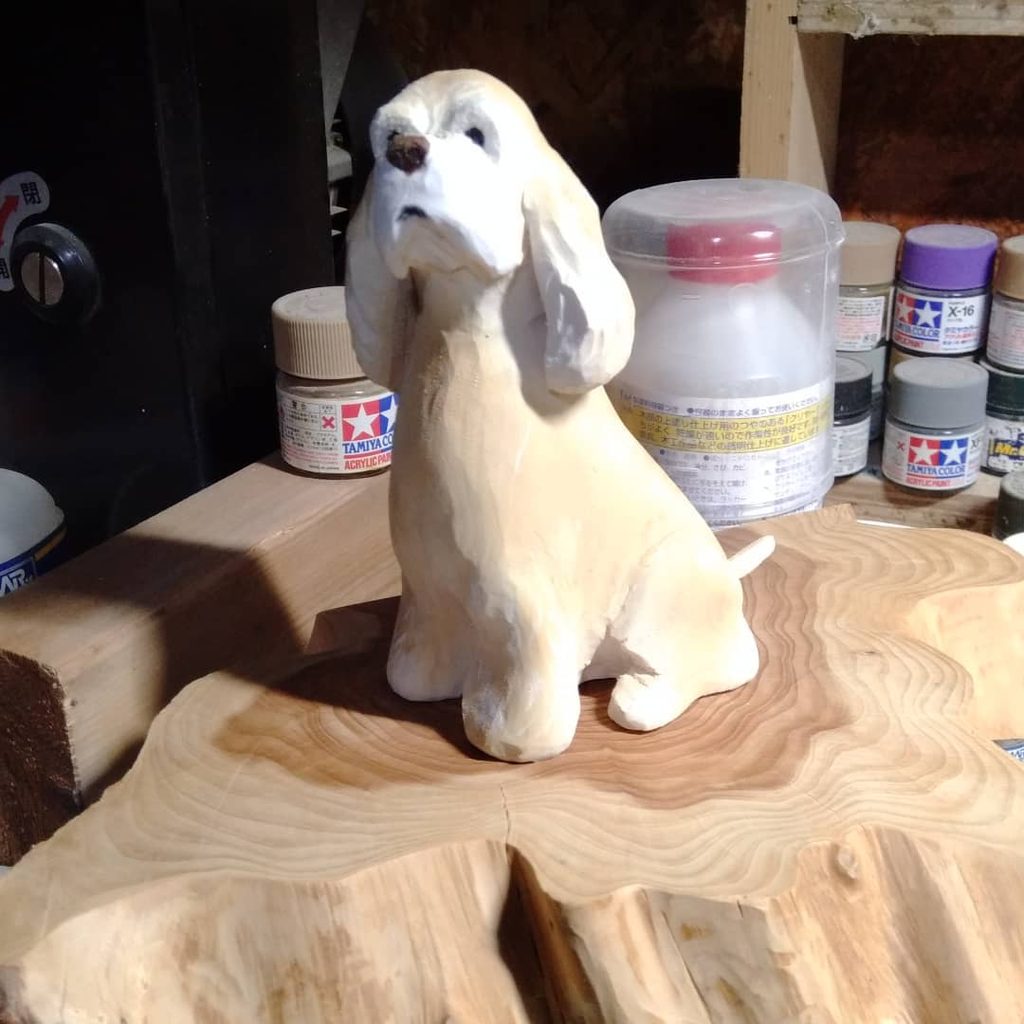
Beginner tip: Treat this one as inspiration rather than a first project. Realistic proportions, a turned head, separated legs, and softly textured fur all take patience and practice. That said, there’s one lesson here you can use straight away: the pose is still a sitting one, resting on a broad, stable base, which is why a piece this detailed doesn’t need any support. When you’re ready to attempt it, start from photographs of a real dog, carve the whole thing chunky first and refine slowly, and leave the feathered ears thick until the very end. Displaying a finished carving on a natural live-edge slab, as here, instantly elevates it.
14. Palm-Sized Pup with a Green Collar
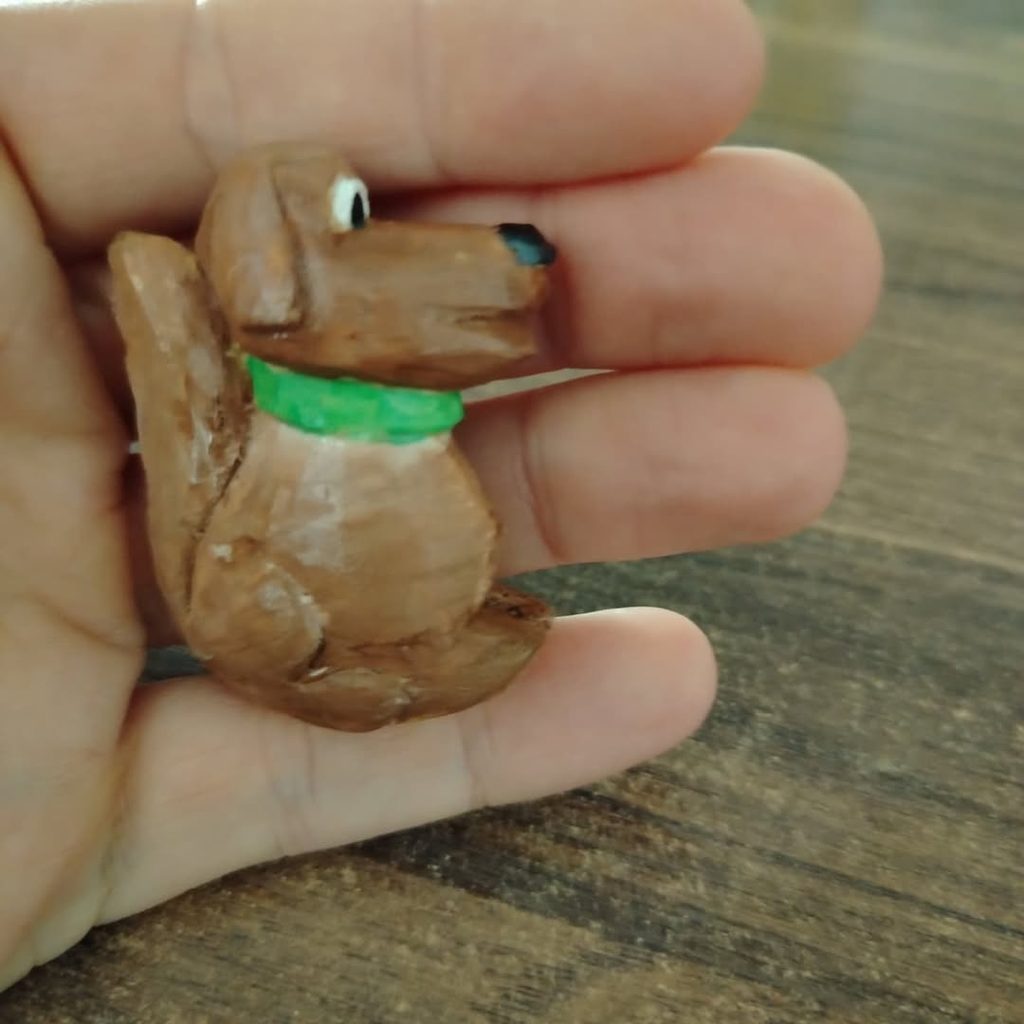
Beginner tip: Not every carving needs to be neat, and this one is proof. The rough facets, the asymmetrical ears, and the wonky eye all add to its charm rather than detracting from it, so it’s an ideal piece to carve when you want to practise without pressure. Small pieces like this are also quick to finish, which matters when you’re learning, since completing ten rough dogs teaches you far more than agonising over one perfect one. Add a single bright accent, like this green collar, to lift a plain brown carving. If your wood feels too hard for fast, confident cuts, try one of these easy ways to soften wood for carving.
15. Relief-Carved Shepherd Portrait
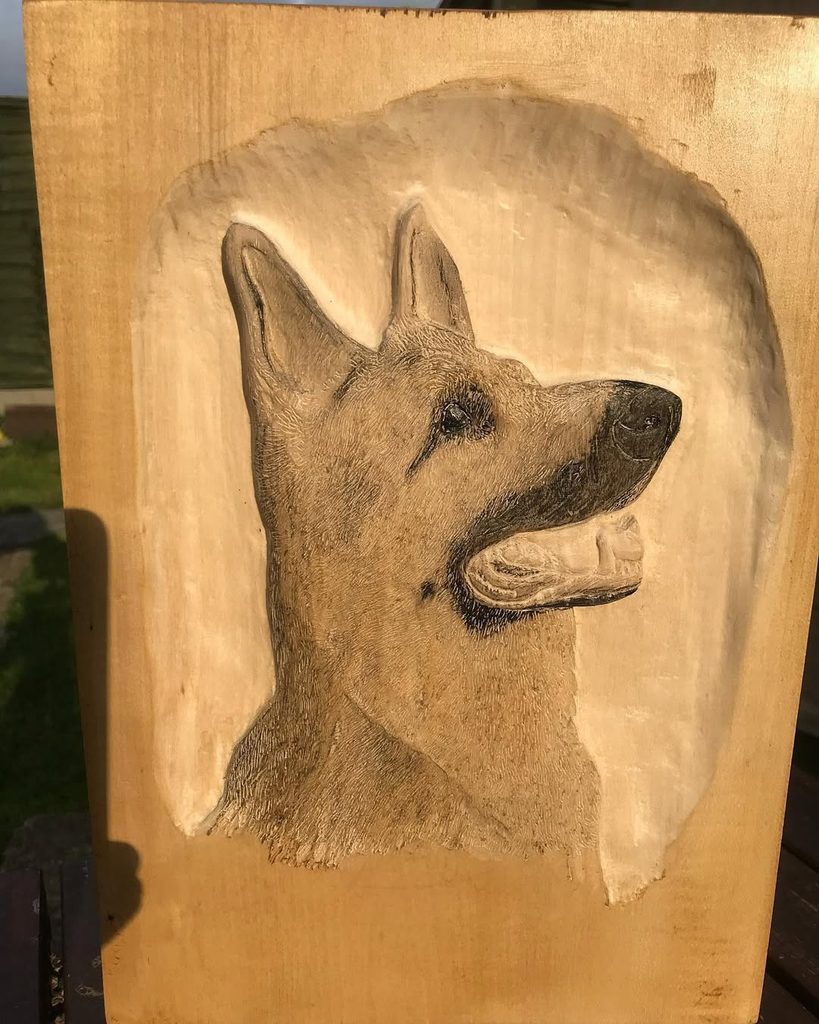
Beginner tip: Relief carving is a useful alternative when free-standing figures feel daunting, because the piece stays flat on the bench, nothing can break off, and you’re essentially drawing with a gouge. Start by tracing the outline onto your panel, make stop cuts around it, then lower the background evenly before shaping anything inside the outline. Keep the carving shallow on your first attempts, as deeper relief takes much more planning. The fur here is created with repeated fine V-cuts following the coat’s direction, which is worth practising on scrap first. If you enjoy the format, these relief carving ideas offer plenty more subjects to try.
16. Sprawled-Out Sleeping Spaniel
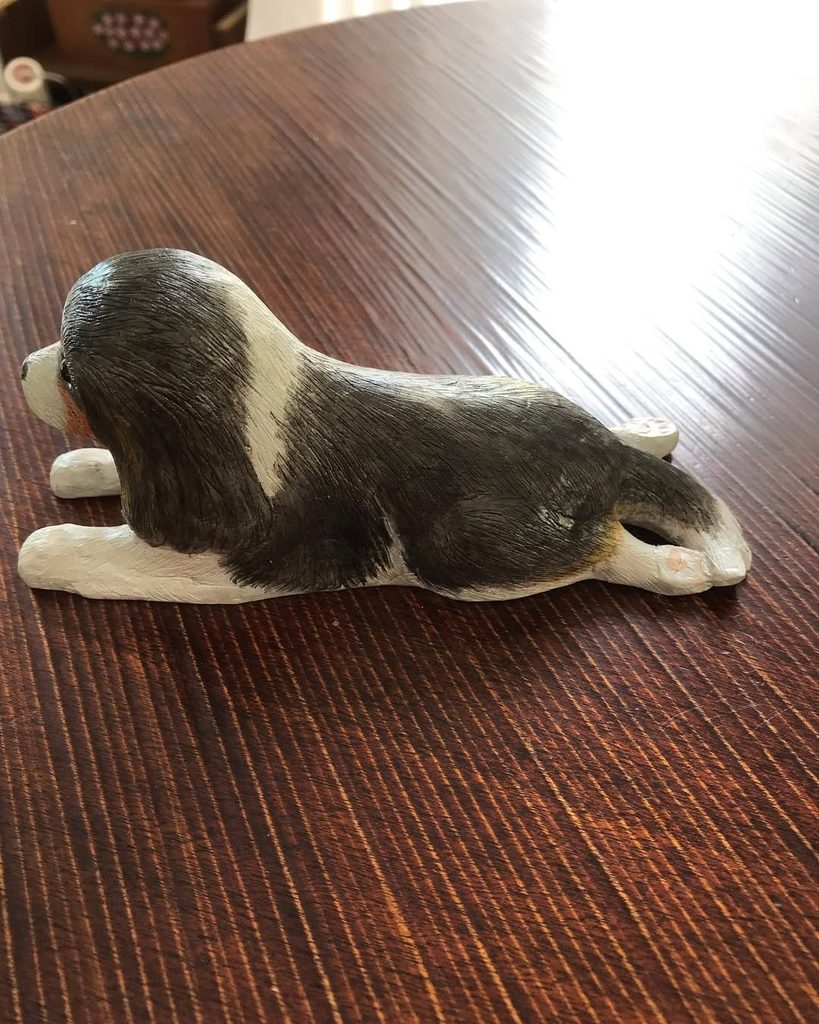
Beginner tip: A lying-down pose is one of the smartest choices a beginner can make, because the entire carving is supported along its length by the surface it rests on. The legs can be carved as low, chunky shapes attached to the ground rather than as free-standing supports, so there’s almost nothing that can snap. Keep the whole figure low and long rather than trying to lift any part of it into the air. The fur here is painted on with fine brush strokes rather than carved, which is a good example of letting the paintbrush do the detailed work while the knife handles the shape.
17. Tiny Wide-Eyed Puppy
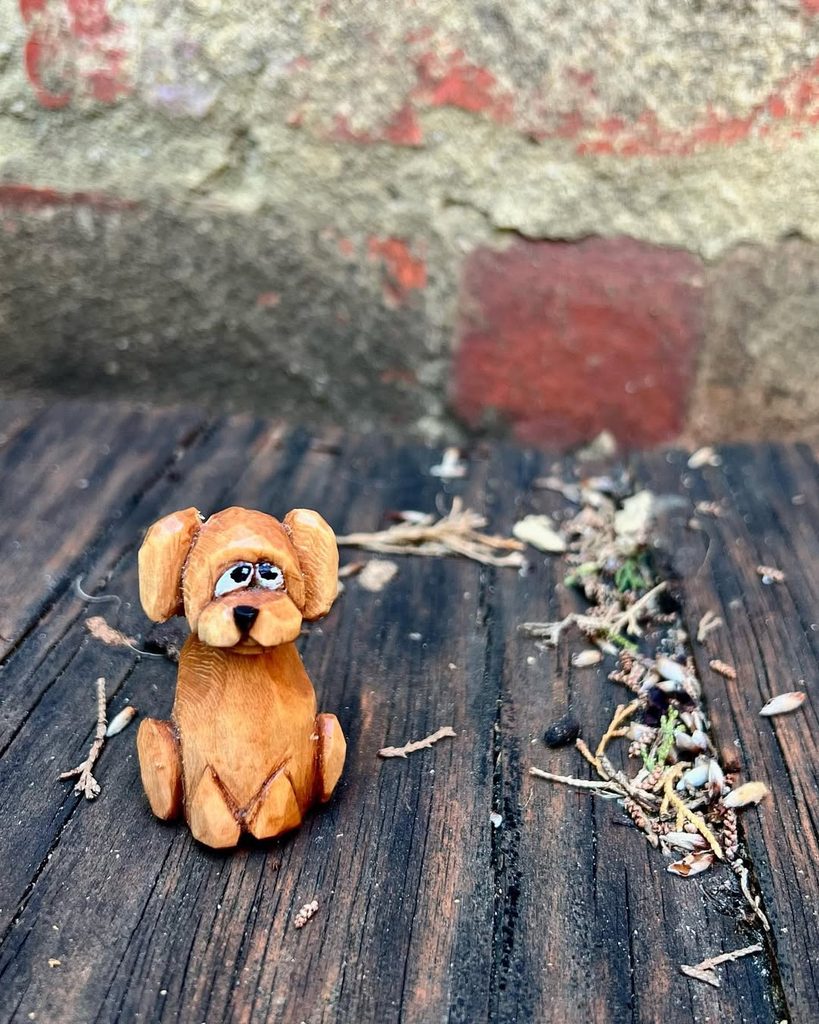
Beginner tip: When a carving is this small, the smart move is to concentrate all the detail in one place. Keep the body as a plain seated block, mark the legs with simple V-cuts rather than carving them free, and spend your time on the face instead. Painting the whites of the eyes is what gives this pup its personality, and it’s far easier than trying to carve a convincing eyeball at this scale. Small pieces like this are also a great way to use up offcuts, and they carve quickly enough that you can try several expressions in an evening.
18. Large Standing Hound Sculpture
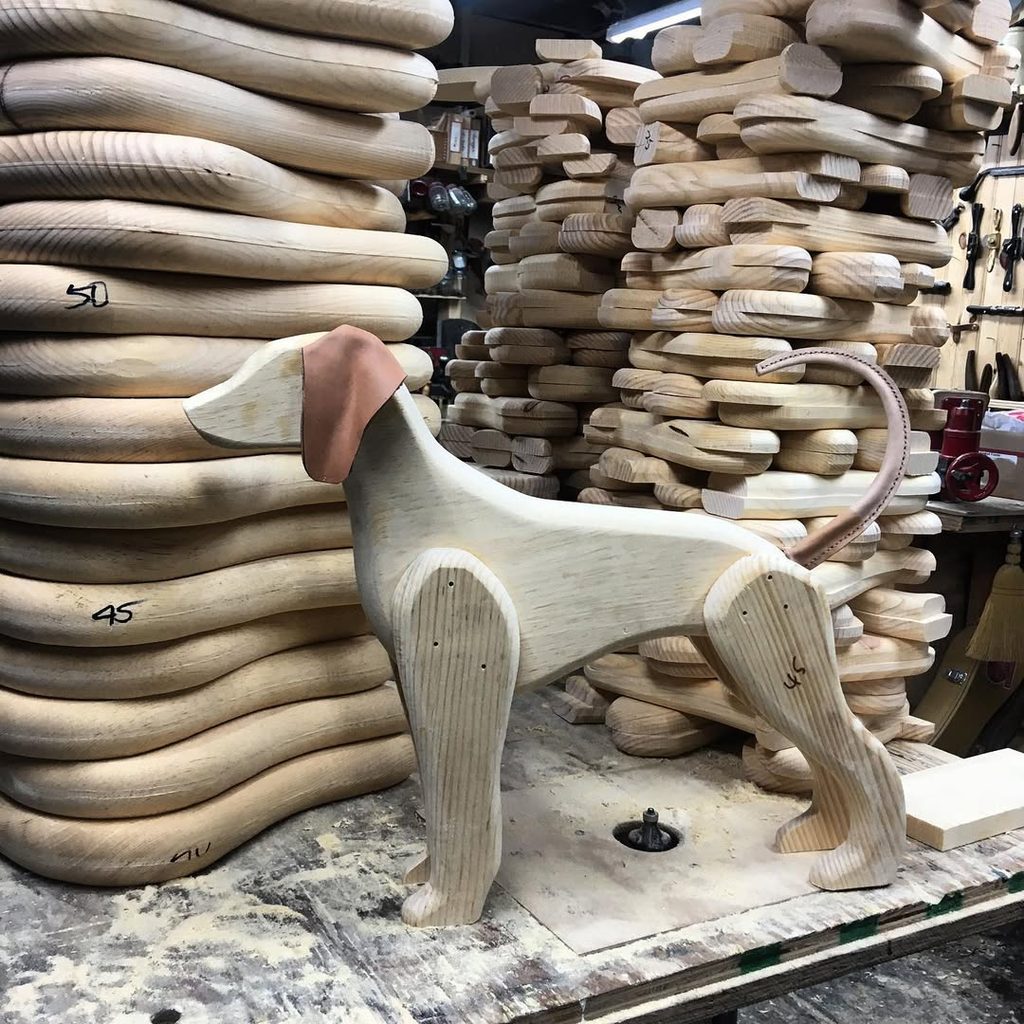
Beginner tip: This is a project for later, and it’s included to show where the craft can lead. At this scale the work shifts from knife carving to sawing, rasping, and sanding, and the legs need careful grain orientation to carry the weight. There’s still a lesson you can borrow immediately: the face has been left completely blank, and the piece is stronger for it. When you’re unsure how to carve a feature, consider whether the design needs it at all. Adding parts in a contrasting wood or material, as with the ears and tail here, is another easy way to make a plain shape look designed.
19. Golden Retriever Head on a Cube
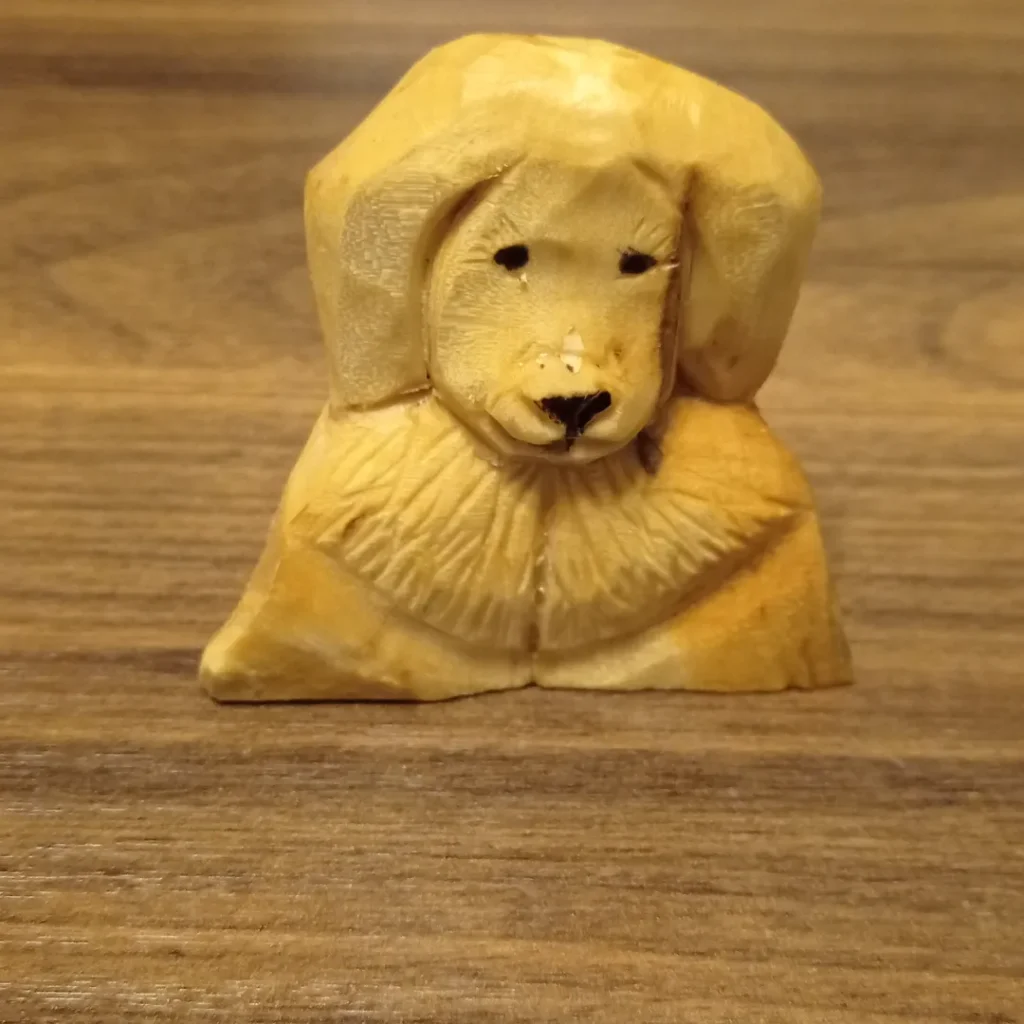
Beginner tip: Carving into the face of a block instead of shaping a whole figure is a brilliant halfway house between relief carving and carving in the round. The uncarved sides give you a firm grip while you work, the piece stands perfectly stable, and you only have to solve one view rather than four. Mark your centre line first and keep the face symmetrical around it. Note that the fur ruff here is nothing more than repeated V-cuts fanning outward, an easy texture that fills space convincingly and hides an uneven surface.
20. Dachshund Draped Over a Stick
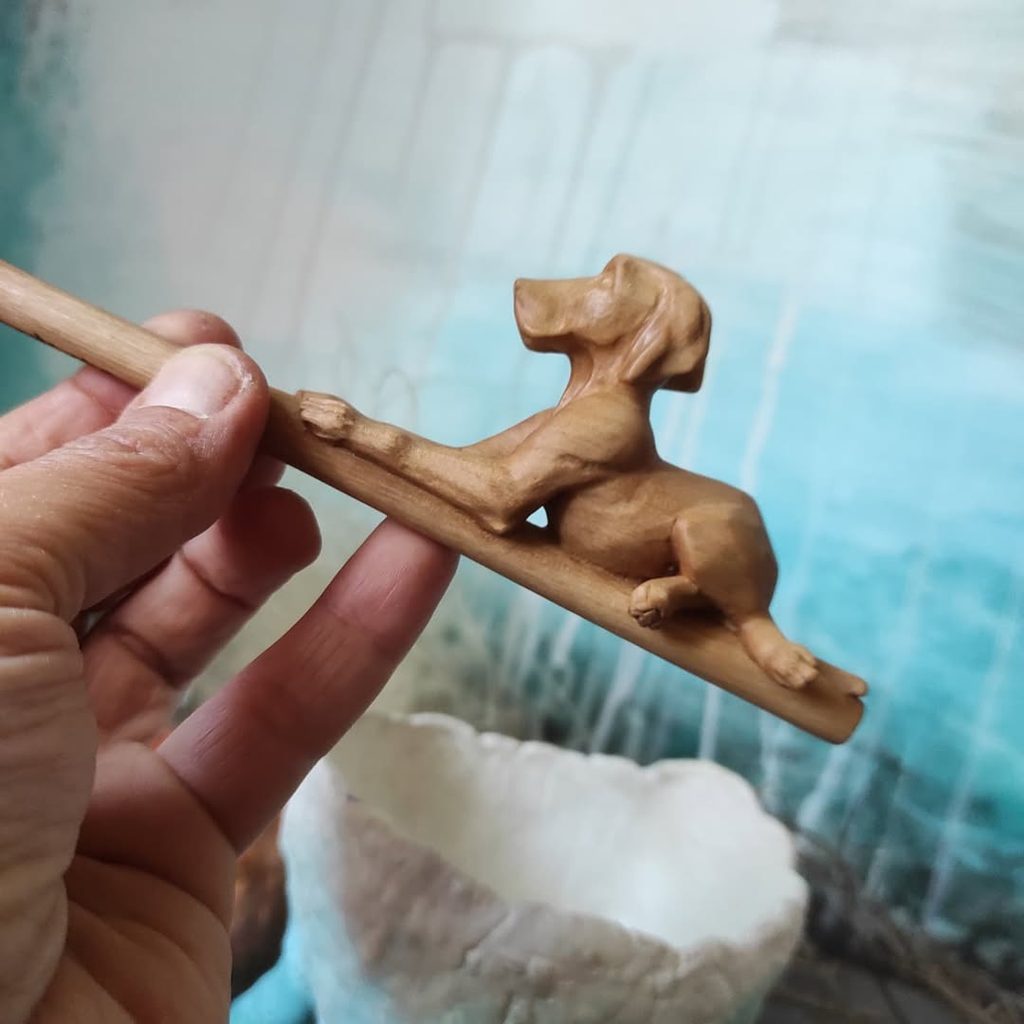
Beginner tip: Carving a figure into a stick is a satisfying next step, because the uncarved portions give you a natural handle and the shaft supports everything you shape. A dachshund is the perfect subject for it, since the breed is already long and low. Sketch the outline along the stick first, then make stop cuts and reduce the wood around it, leaving the head and legs proud. Keep the dangling legs short and thick and the ear flat against the head. If you’d rather not attempt the legs at first, carve the dog lying flat along the top with its legs tucked beneath, and you’ll still get the effect.
Tips for Carving Better Dogs
Always carve with the grain rather than against it. If the wood starts to tear or split instead of slicing cleanly, turn the piece around and cut from the other direction. Take small, controlled cuts rather than ambitious ones, since you can always remove more wood but you can never put it back. If your blank feels stubbornly hard, there are simple ways to soften wood for carving that make the work far more pleasant.
Keep thin parts chunky, especially ears, tails, and legs. Wood is weakest across the grain, so a slim upright ear or an outstretched tail can snap with one careless cut. Leave those parts thicker than you think they need to be and refine them at the very end, when the rest of the carving is done.
Strop your knife every 15 to 20 minutes. A blade that glides through the wood gives you cleaner facets and far more control, and a dull knife is the main cause of both ragged cuts and slipped hands. When painting, thin your acrylics with water so they soak in like a stain and let the tool marks show through, then seal the piece with an oil finish or a wax. For tiny details like whiskers, eyebrows, and spots, a fine-tip pen or a wood-burning tool is usually easier and neater than carving them.
Finally, keep your first dog, however lopsided it turns out. Setting it next to your fifth or sixth carving is one of the most satisfying ways to see how much you’ve learned.
Frequently Asked Questions
What is the best wood for carving dogs?
Basswood is the top choice for beginners because it’s soft, carves smoothly, and holds detail well. Butternut, aspen, and white pine also work nicely. Avoid hard, open-grained woods like oak while you’re learning.
How long does it take to carve a simple dog?
A small, chunky sitting or sleeping dog usually takes a few hours, or two to three evenings if you’re brand new. Standing poses with separate legs take considerably longer, and hollowed pieces like spoons and bowls longer still.
Can I carve a dog that looks like my own pet?
Yes, and the trick is to pick out two or three defining features rather than attempting a portrait. Ear shape, muzzle length, and coat markings do most of the work. Print a side-view photo, trace the outline onto your blank, and keep everything else simple.
Do I need to sand my dog carving?
No. Many carvers deliberately leave the flat, faceted knife cuts visible, a style closely linked to Scandinavian flat-plane carving. Sanding is a personal choice, and paint or oil looks great straight over tool marks.
Conclusion
Dogs make a brilliant subject for new carvers because the poses that are easiest to carve are also the most endearing: curled up asleep, sitting patiently, or flopped on one side. Start with a compact, chunky design, then work your way toward the spoons, pendants, and standing figures as your confidence grows. Before long you’ll have a whole pack of wooden dogs on the shelf, each with its own character. And if you’d like to carve the other side of the household, our easy cat woodcarving ideas for beginners are waiting, while 30 simple wood carvings will keep you busy long after the pack is complete.
